SDKs
Apply an overlay
Speakeasy provides two options for applying overlays:
- Option One: Add the overlay directly to the Speakeasy workflow file, ensuring automatic application with every generation
- Option Two: Output a new OpenAPI document with the overlay applied, creating an updated reference document
Option One: Add an overlay to a Speakeasy workflow
Section titled “Option One: Add an overlay to a Speakeasy workflow”The Speakeasy workflow supports using an overlay file to modify a source OpenAPI document. For more information on sources, refer to the documentation on core Speakeasy concepts.
1. Install the Speakeasy CLI
Section titled “1. Install the Speakeasy CLI”brew install speakeasy-api/tap/speakeasy2. Choose the source
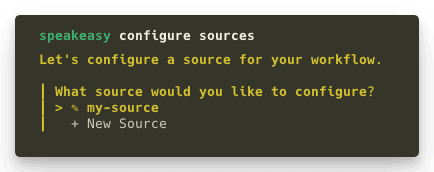
Section titled “2. Choose the source”Run speakeasy configure sources and select or create a source to add an overlay to the Speakeasy workflow file.
3. Add an overlay
Section titled “3. Add an overlay”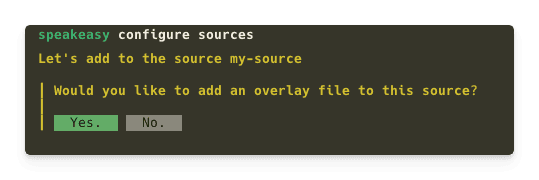
4. Provide the overlay file path
Section titled “4. Provide the overlay file path”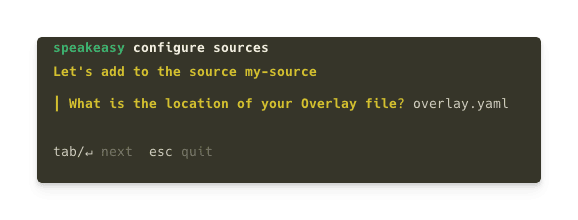
/>
The overlay will now apply to the OpenAPI document as part of the Speakeasy workflow. Execute the workflow by running speakeasy run.
Option Two: Create a new OpenAPI document with an overlay
Section titled “Option Two: Create a new OpenAPI document with an overlay”Creating a new OpenAPI document provides the ideal option for generating a new reference document.
1. Install the Speakeasy CLI
Section titled “1. Install the Speakeasy CLI”brew install speakeasy-api/tap/speakeasy2. Validate the overlay
Section titled “2. Validate the overlay”Validate the overlay before applying it to ensure adherence to the OpenAPI Overlay Specification using this command:
speakeasy overlay validate -o overlays.yaml3. Apply the overlay
Section titled “3. Apply the overlay”Apply the overlay to the OpenAPI document with this command. Replace input-openapi.yaml with the path to the original OpenAPI document, and overlays.yaml with the path to the overlay file:
speakeasy overlay apply -s input-openapi.yaml -o overlays.yaml > combined.yamlThis command merges changes from the overlay file with the original OpenAPI document and outputs the result to a new file named combined.yaml.
4. Review the merged results
Section titled “4. Review the merged results”The combined.yaml file contains the original OpenAPI document updated with modifications from the overlay. Review this file to confirm changes are applied as expected.