How to connect your IDE to MCP
The Model Context Protocol (MCP) connects your AI assistants to real-world tools and data sources. Instead of manually copying and pasting information between tools and your AI assistant, your AI assistant can interact directly with APIs, databases, and services through standardized tool calls.
Gram makes setting up MCP servers simple by hosting servers in the cloud, so you don’t need to handle local configurations, manage infrastructure, or deal with authentication complexity. With Gram, you can turn any OpenAPI document into a fully functional MCP server in minutes.
This guide shows you how to create a Gram-hosted MCP server using Taskmaster, a full-stack CRUD application for task and project management, and use it across some of the most popular IDE-based MCP clients. Taskmaster includes a web UI for managing projects and tasks, a built-in HTTP API, OAuth 2.0 authentication, and a Neon PostgreSQL database for storing data. Try the demo app to see it in action.
Find the full code and OpenAPI document in the Taskmaster repository.
Prerequisites
Section titled “Prerequisites”To follow this guide, you need:
- A Gram account
- An MCP client (This guide covers VS Code with Copilot, Windsurf, and Amp. For Cursor, see the dedicated Cursor guide. For Claude Desktop, see the dedicated Claude Desktop guide.)
Creating an MCP server
Section titled “Creating an MCP server”Before connecting your IDE to a Taskmaster MCP server, you first need to create one. Follow our guide to creating a Taskmaster MCP server.
Once your Taskmaster MCP server is ready, you can connect it to your IDE. The following sections show you how to add the MCP server configuration to the most popular IDE-based MCP clients.
Adding the Gram-hosted MCP server to Cursor
Section titled “Adding the Gram-hosted MCP server to Cursor”For detailed instructions on connecting Cursor to Gram-hosted MCP servers, including using the Gram CLI for quick setup, see the dedicated Cursor guide.
Adding the Gram-hosted MCP server to VS Code with GitHub Copilot
Section titled “Adding the Gram-hosted MCP server to VS Code with GitHub Copilot”VS Code supports MCP through GitHub Copilot with version 1.101 or later.
1. Add the MCP server to the VS Code settings file
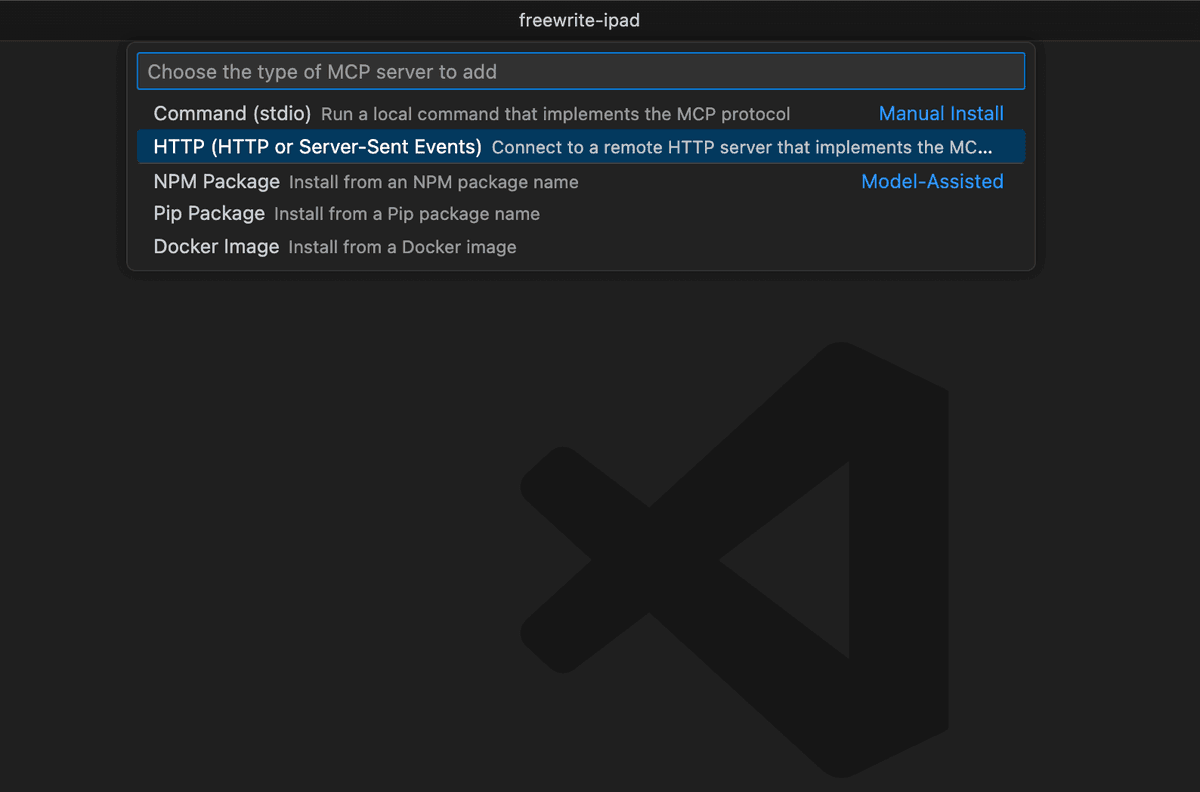
Section titled “1. Add the MCP server to the VS Code settings file”Open the VS Code command palette with Ctrl/Cmd + Shift + P and search for Add MCP Server. Select the HTTP option.
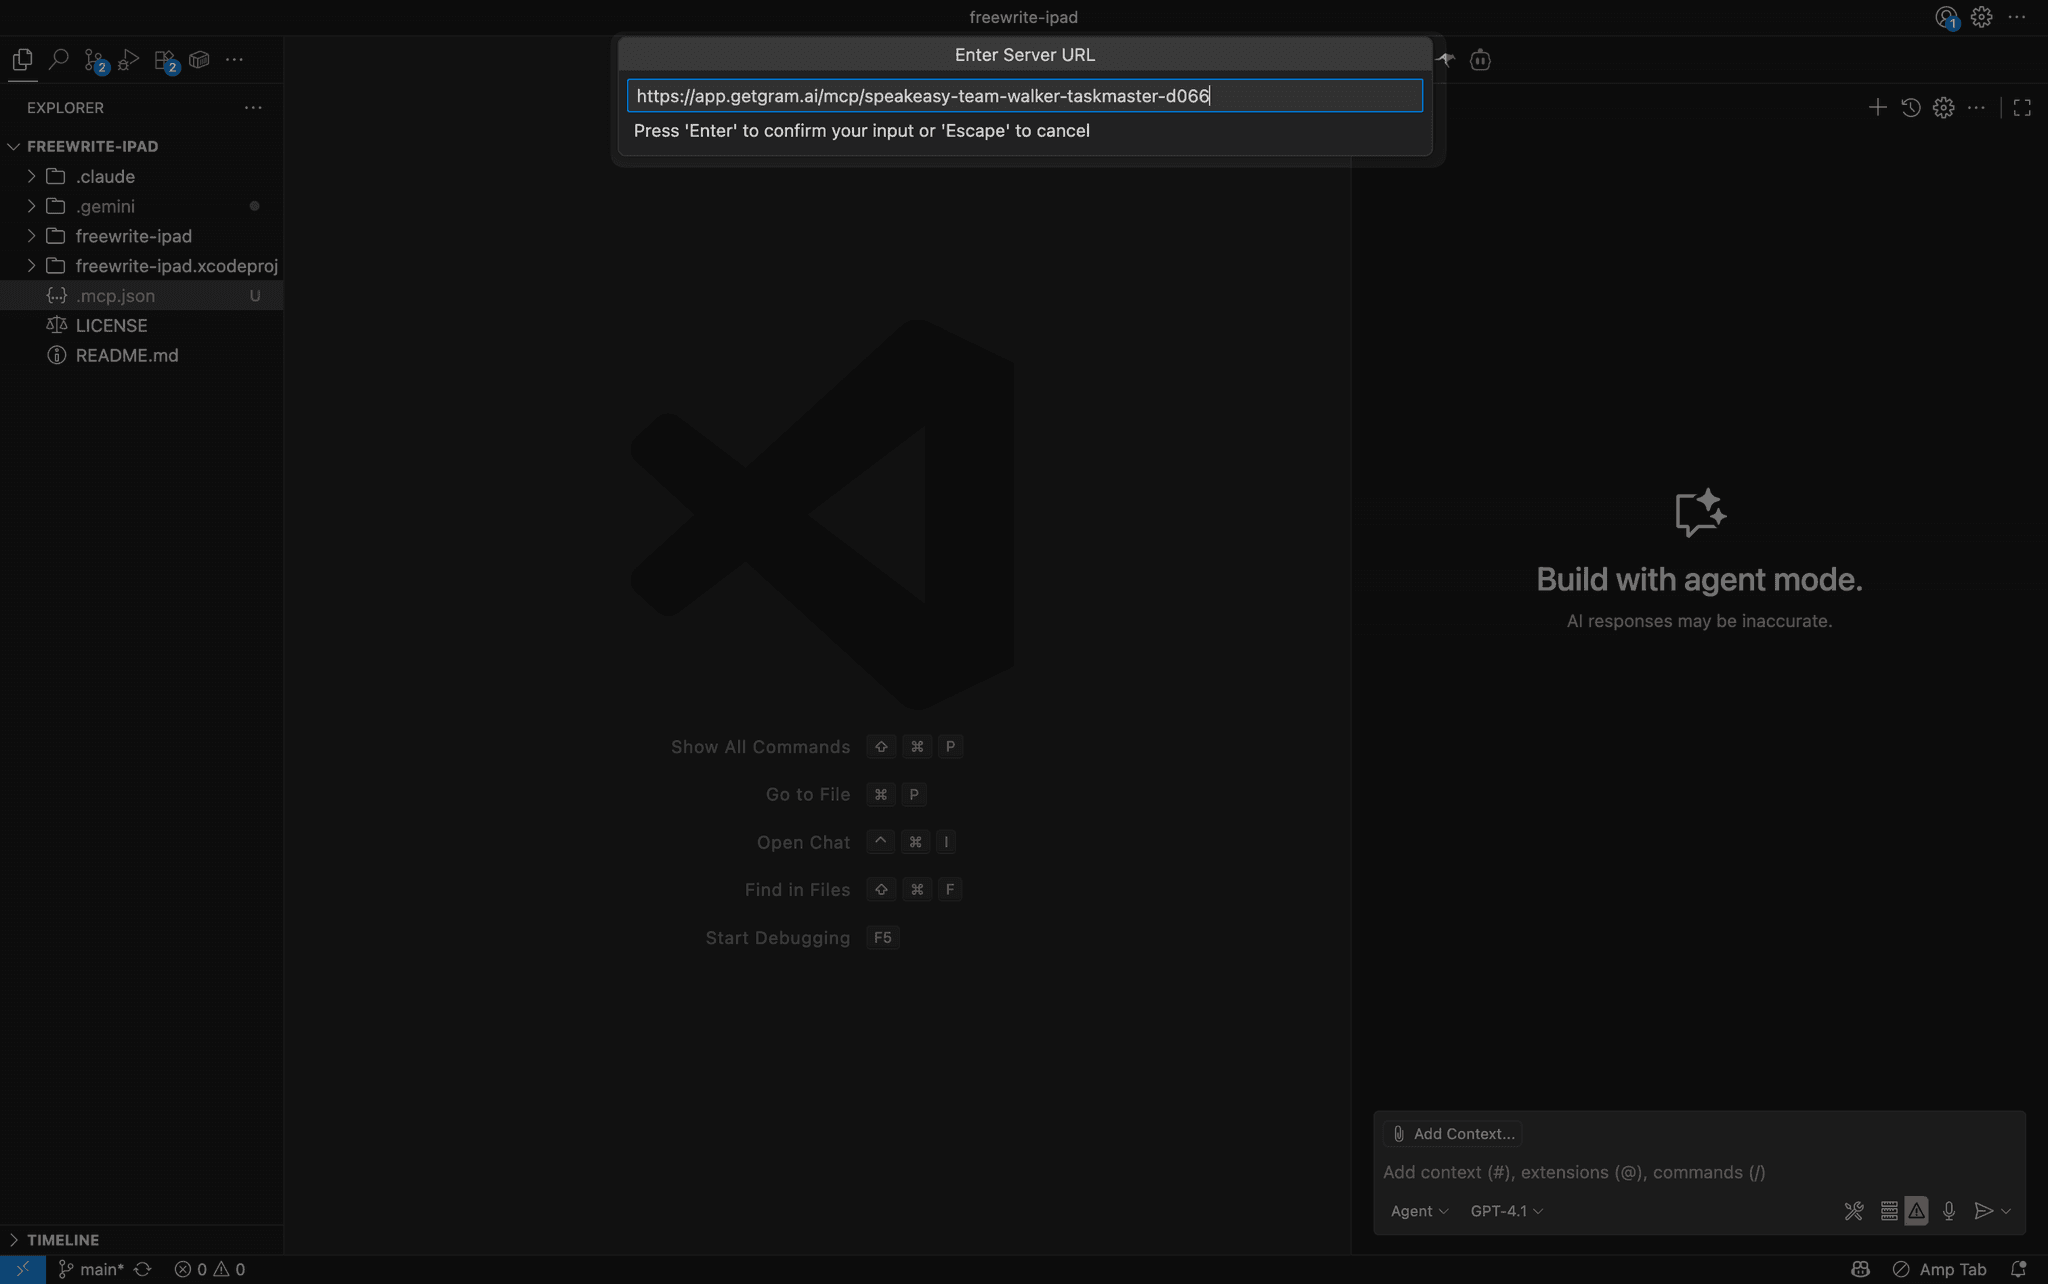
Paste in the URL of your Taskmaster MCP server from the Creating a Taskmaster MCP server guide and enter the server name.
Your MCP server will now show up in the list of MCP servers in the settings.json file.
2. Configure authentication
Section titled “2. Configure authentication”If you’re using an authenticated server or you’re using an environment variable, you can add the authentication details to the settings.json file using the configuration from your Taskmaster creation guide.
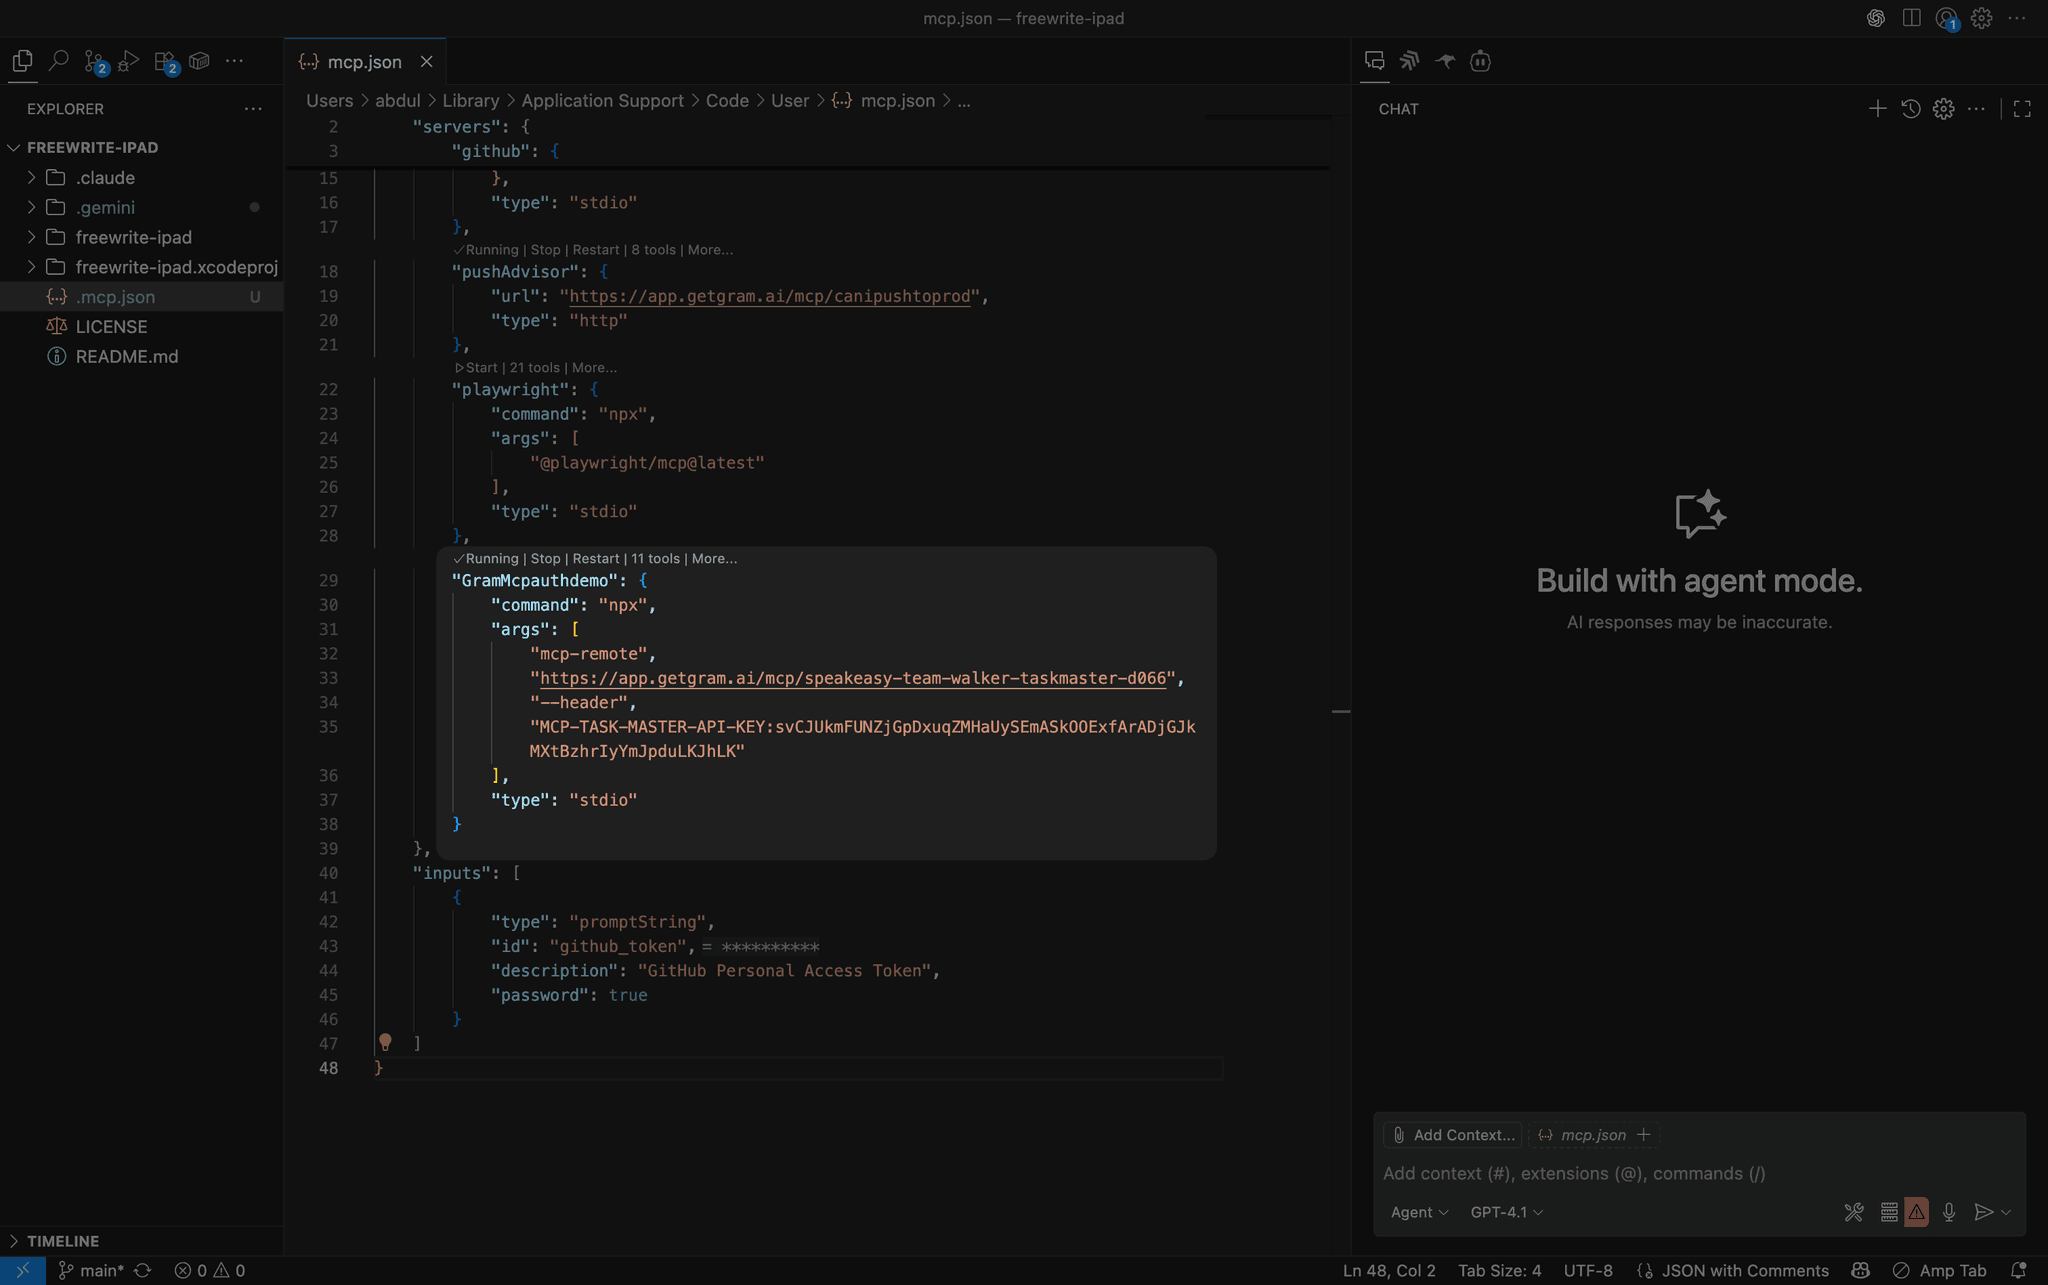
{ "mcpServers": { "GramTaskmaster": { "command": "npx", "args": [ "mcp-remote", "https://app.getgram.ai/mcp/your-taskmaster-slug", "--header", "MCP-TASK-MASTER-API-KEY:<your-key-here>" ] } }}3. Start the server
Section titled “3. Start the server”Open the command palette (Ctrl/Cmd + Shift + P) and type MCP: List Servers to see available servers. Click on the Gram-hosted MCP server to start it.
4. Use the MCP server tools with Copilot
Section titled “4. Use the MCP server tools with Copilot”The Taskmaster tools are now available in the Copilot chat interface. You can enable and disable specific tools as needed.
You can ask questions like:
Create a new task called "Review code changes" with description "Check the latest commits for quality and security"Adding the Gram-hosted MCP server to Windsurf
Section titled “Adding the Gram-hosted MCP server to Windsurf”Windsurf manages MCP servers through its built-in plugin interface.
1. Access Windsurf plugin settings
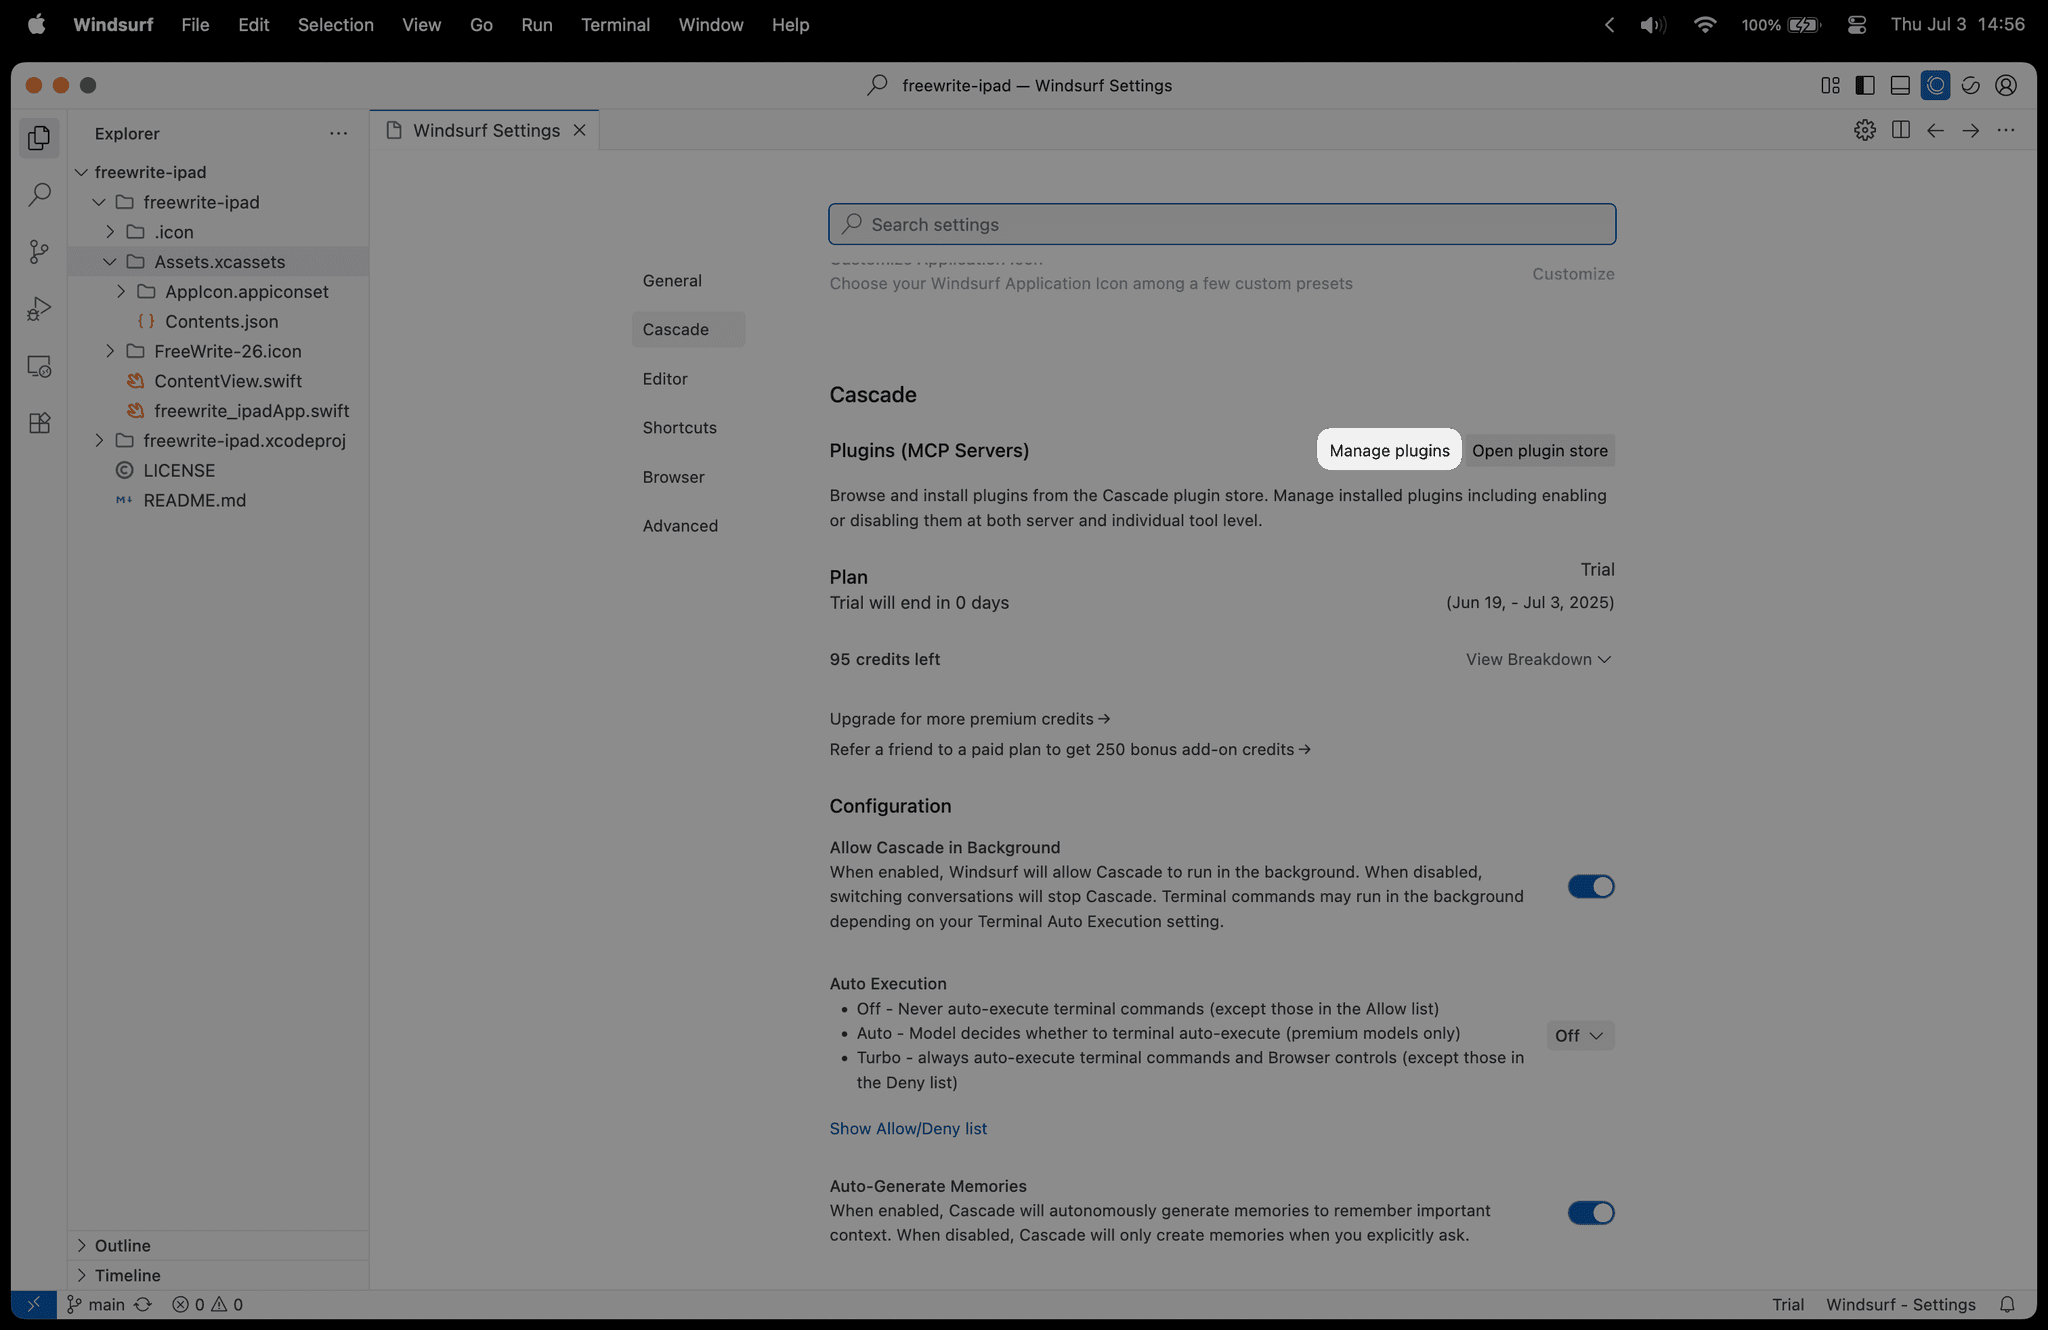
Section titled “1. Access Windsurf plugin settings”Click Windsurf in the top menu bar, then navigate to Settings -> Windsurf Settings to open the main configuration interface.
Under the Plugins (MCP Servers) section, click Manage plugins to access the plugin configuration area. Click View raw config to open the configuration file editor.
2. Add the MCP server configuration
Section titled “2. Add the MCP server configuration”In the mcp_config.json file that opens, replace the contents with your Taskmaster MCP server configuration from the Creating a Taskmaster MCP server guide:
{ "mcpServers": { "GramTaskmaster": { "command": "npx", "args": [ "mcp-remote", "https://app.getgram.ai/mcp/your-taskmaster-slug", "--header", "MCP-TASK-MASTER-API-KEY:<your-key-here>" ] } }}For an authenticated server, use the following configuration instead:
{ "mcpServers": { "GramTaskmaster": { "command": "npx", "args": [ "mcp-remote", "https://app.getgram.ai/mcp/your-taskmaster-slug", "--header", "Authorization: ${GRAM_KEY}" ], "env": { "GRAM_KEY": "Bearer your-gram-api-key" } } }}Replace your-taskmaster-slug with the actual slug from your Taskmaster MCP server configuration.
Save the file.
3. Activate the plugin
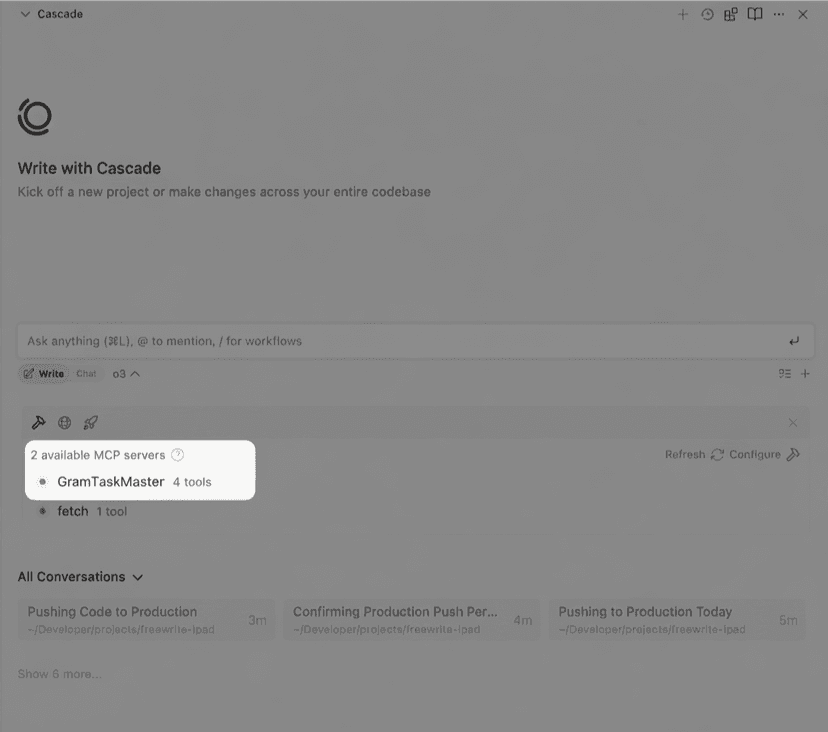
Section titled “3. Activate the plugin”In the Manage plugins tab, click Refresh to reload the plugin configuration. The MCP server plugin will now appear in your available plugins and is ready to use.
Adding the Gram-hosted MCP server to Amp using the VS Code extension
Section titled “Adding the Gram-hosted MCP server to Amp using the VS Code extension”Amp is Sourcegraph’s agentic coding tool, available as a VS Code extension and command-line tool.
The Amp VS Code extension has a GUI for adding and managing MCP servers.
1. Open Amp settings
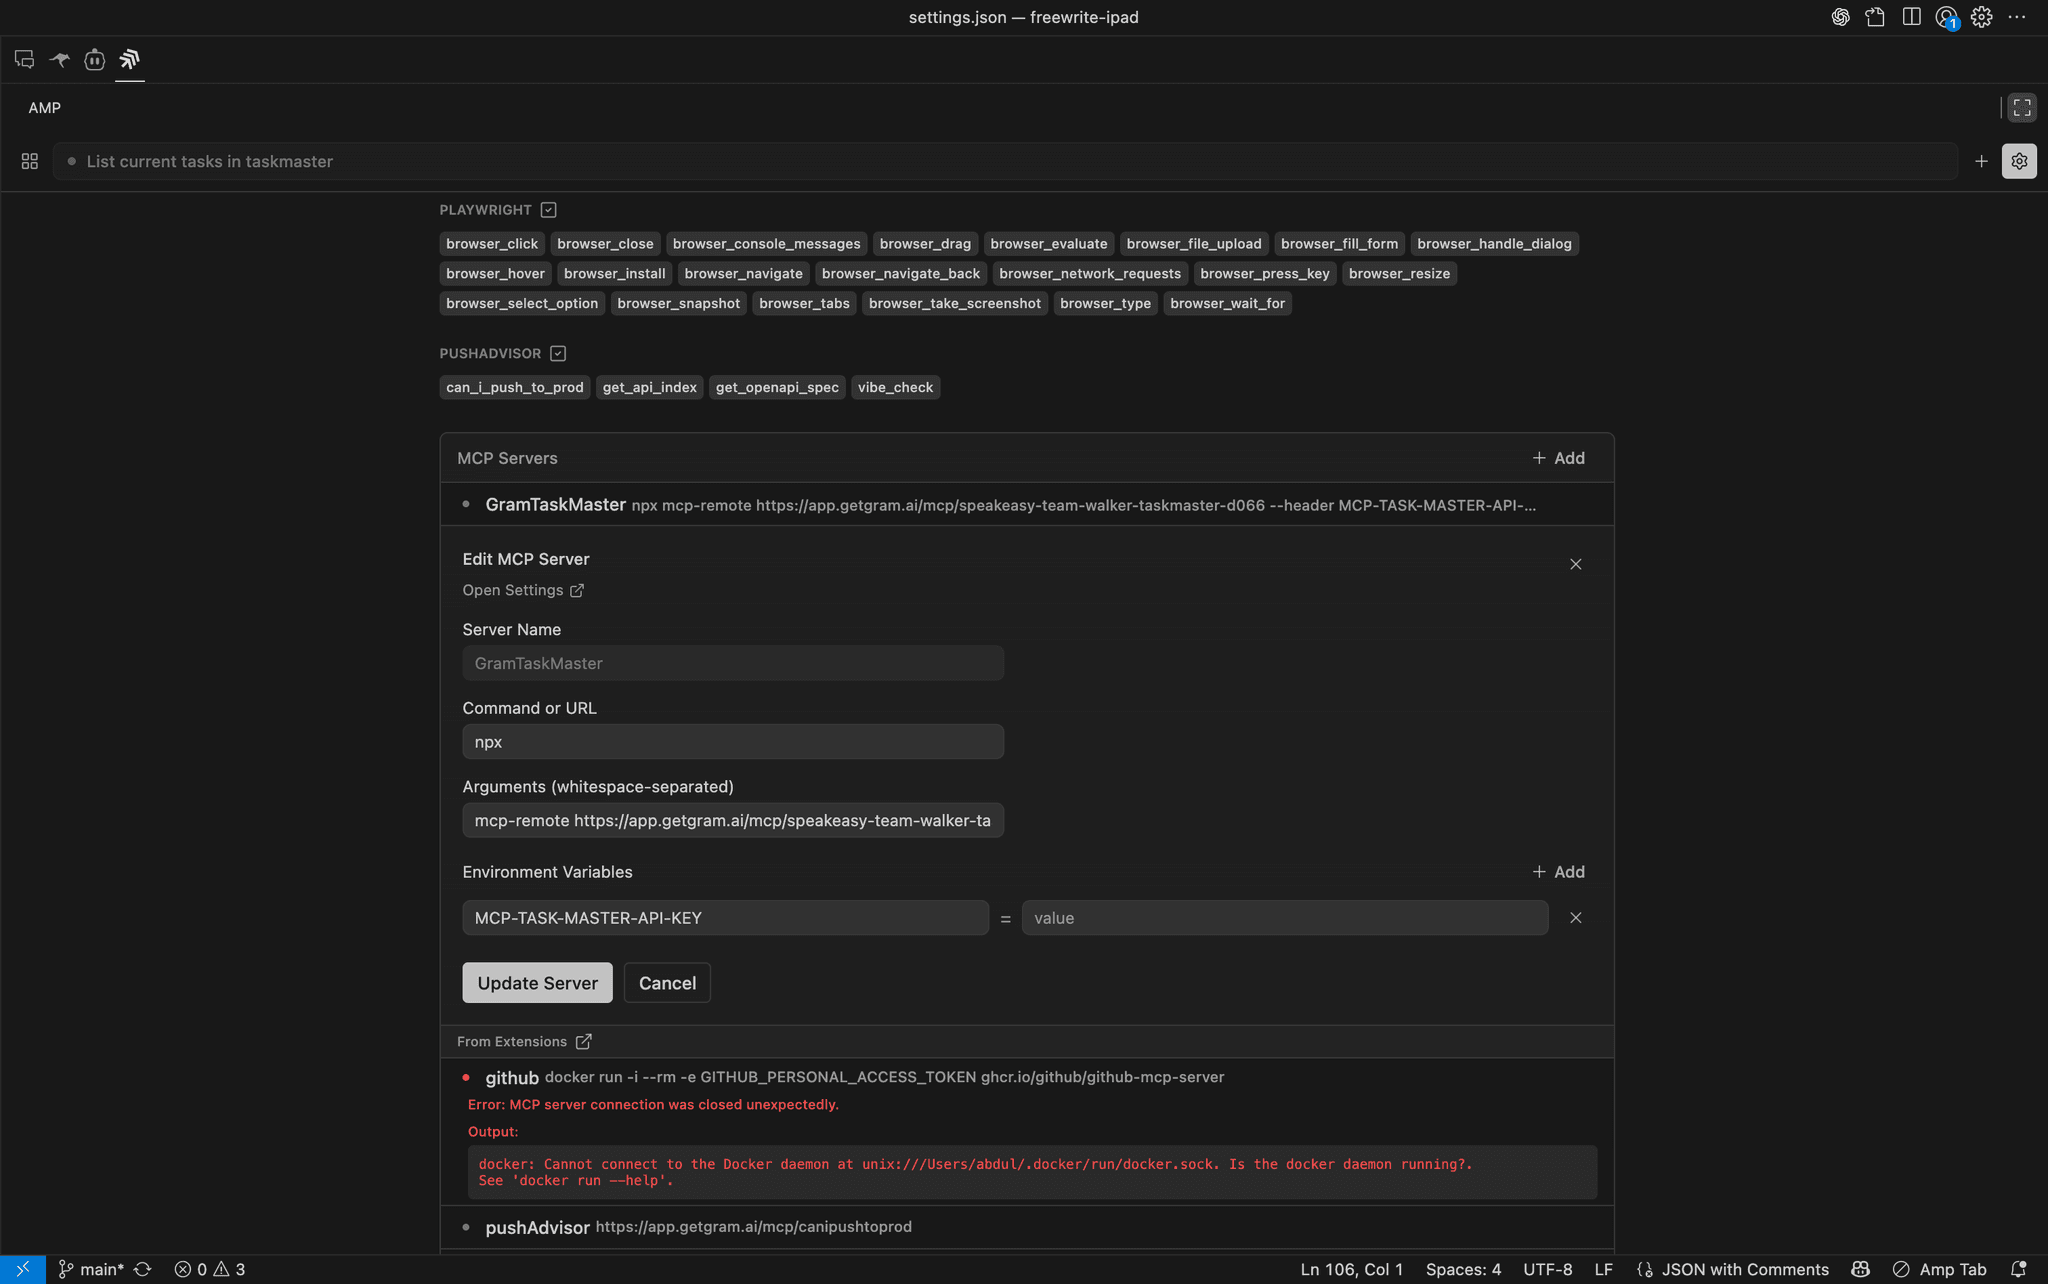
Section titled “1. Open Amp settings”Click the Settings icon in the side window. Scroll down to the MCP Servers section and click Add MCP Server.
2. Add the MCP server configuration
Section titled “2. Add the MCP server configuration”Complete the MCP server details using the configuration from your Taskmaster MCP server:
- Server Name:
taskmaster - Command or URL:
npx - Arguments: Use the arguments from your Taskmaster MCP server configuration
- Environment Variables: Use the environment variables from your Taskmaster MCP server configuration
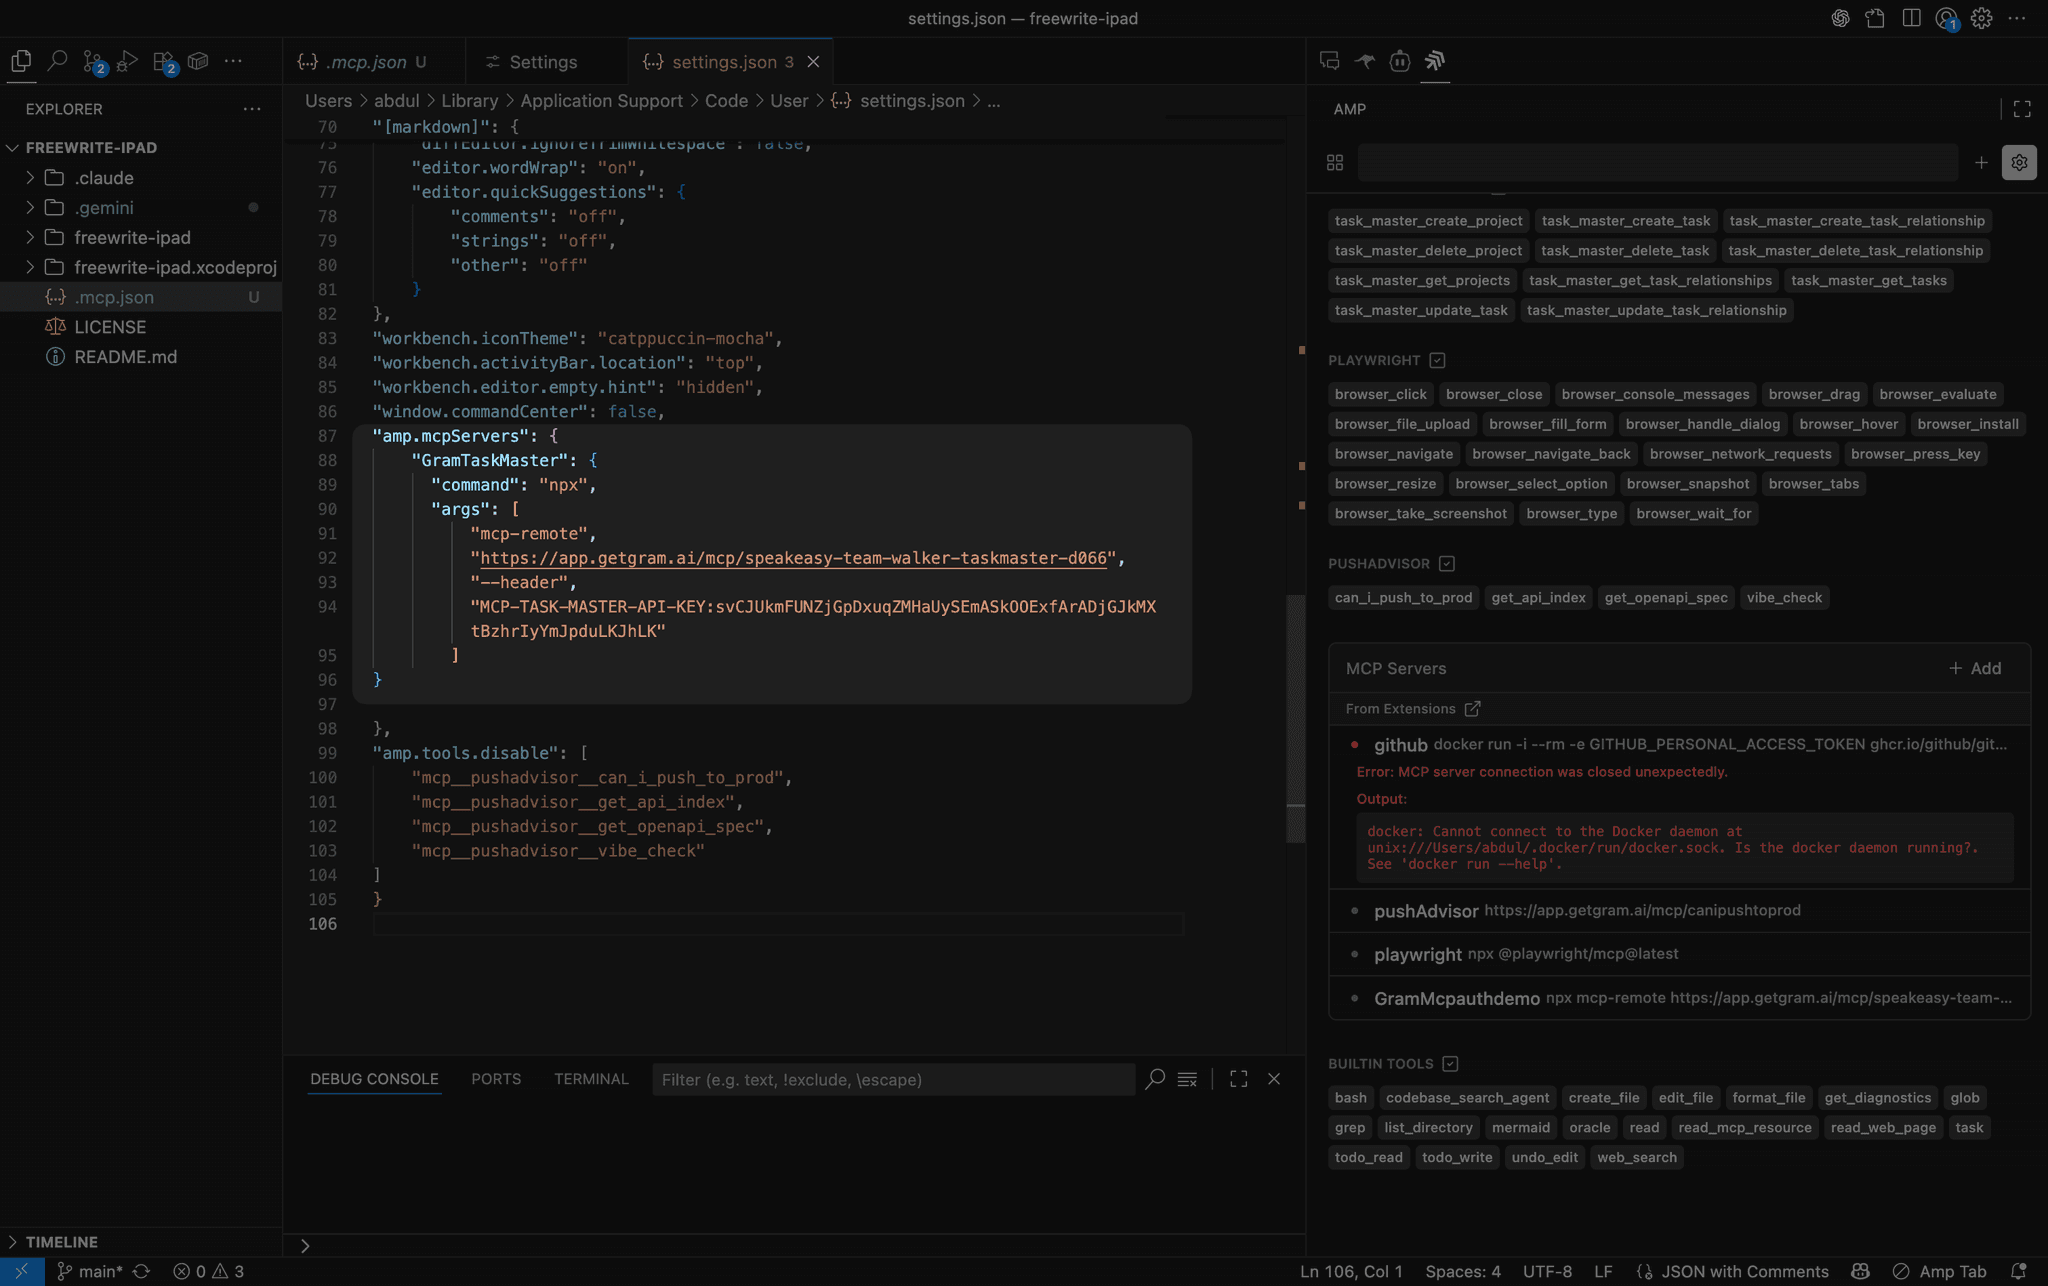
You can also modify the settings.json file directly.
3. Use the MCP server tools
Section titled “3. Use the MCP server tools”Amp automatically loads your Gram-hosted MCP server. You can now interact with the Taskmaster API through natural language prompts like:
Create a new task called "Check deployment status" with description "Verify that all services are running correctly"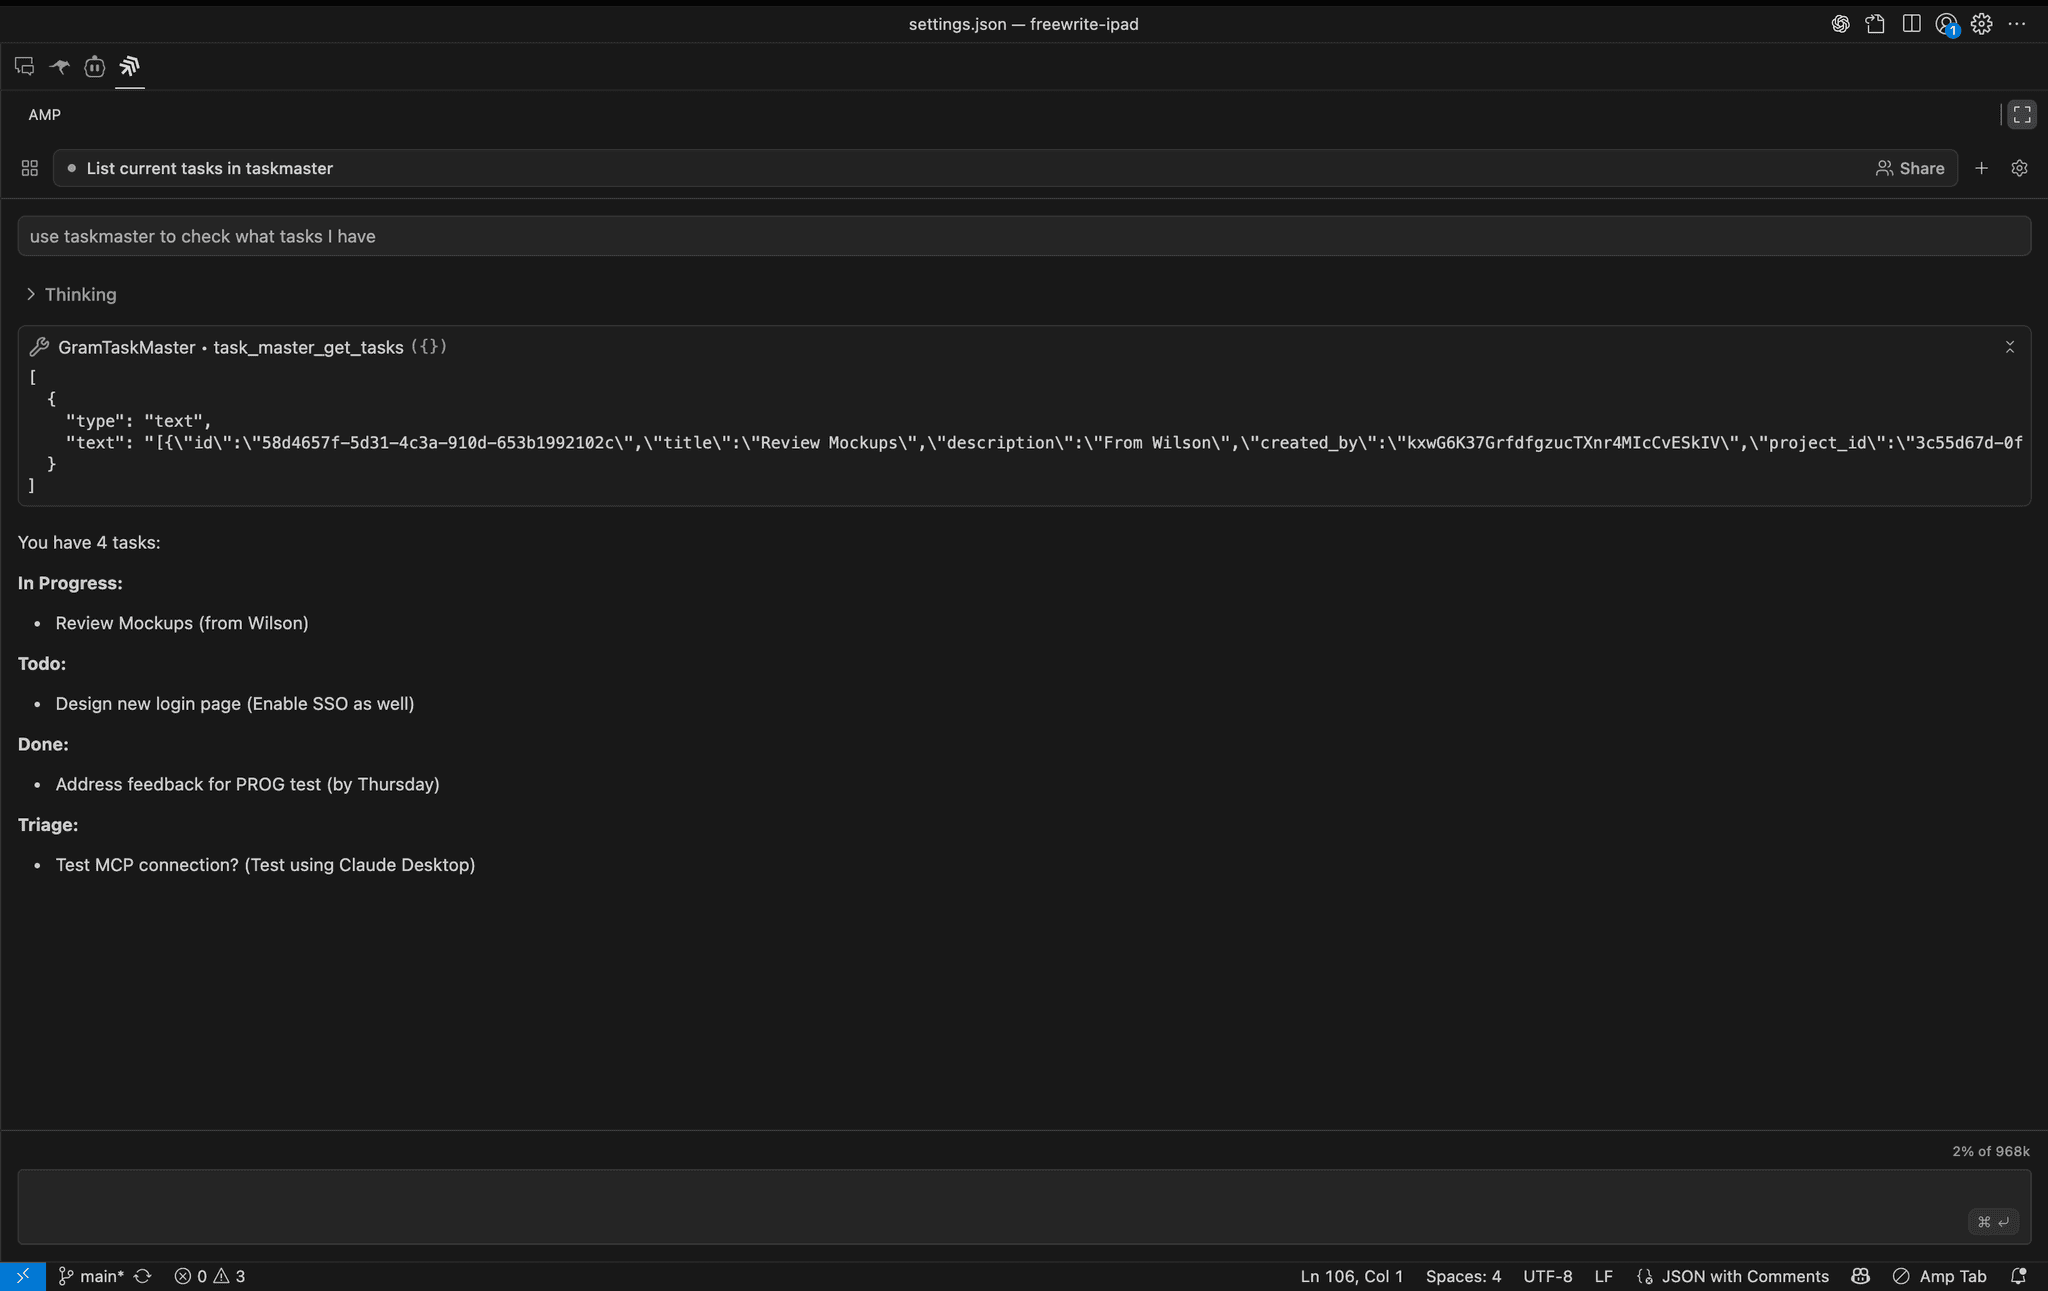
Adding the Gram-hosted MCP server to Amp CLI
Section titled “Adding the Gram-hosted MCP server to Amp CLI”Amp can be configured through the settings.json file.
1. Access the Amp CLI configuration file
Section titled “1. Access the Amp CLI configuration file”The location of the Amp CLI configuration file varies by operating system:
- macOS:
~/.config/amp/settings.json - Windows:
%APPDATA%\amp\settings.json - Linux:
~/.config/amp/settings.json
2. Add the MCP server configuration
Section titled “2. Add the MCP server configuration”Add the amp.mcpServers setting with your Taskmaster MCP server configuration from the Creating a Taskmaster MCP server guide to the configuration file.
For a public server, the configuration will look like this:
{ "amp.mcpServers": { "GramTaskmaster": { "command": "npx", "args": [ "mcp-remote", "https://app.getgram.ai/mcp/your-taskmaster-slug", "--header", "MCP-TASK-MASTER-API-KEY:${MCP_TASK_MASTER_API_KEY}" ], "env": { "MCP_TASK_MASTER_API_KEY": "your-api-key" } } }}
For an authenticated server, the configuration will look like this:
{ "amp.mcpServers": { "GramTaskmaster": { "command": "npx", "args": [ "mcp-remote", "https://app.getgram.ai/mcp/your-taskmaster-slug", "--header", "Authorization: ${GRAM_KEY}" ], "env": { "GRAM_KEY": "Bearer your-gram-api-key" } } }}3. Use the MCP server tools
Section titled “3. Use the MCP server tools”Amp automatically loads your Gram-hosted MCP server. You can now interact with the Taskmaster API using natural language prompts like:
Create a new task called "Check deployment status" with description "Verify that all services are running correctly"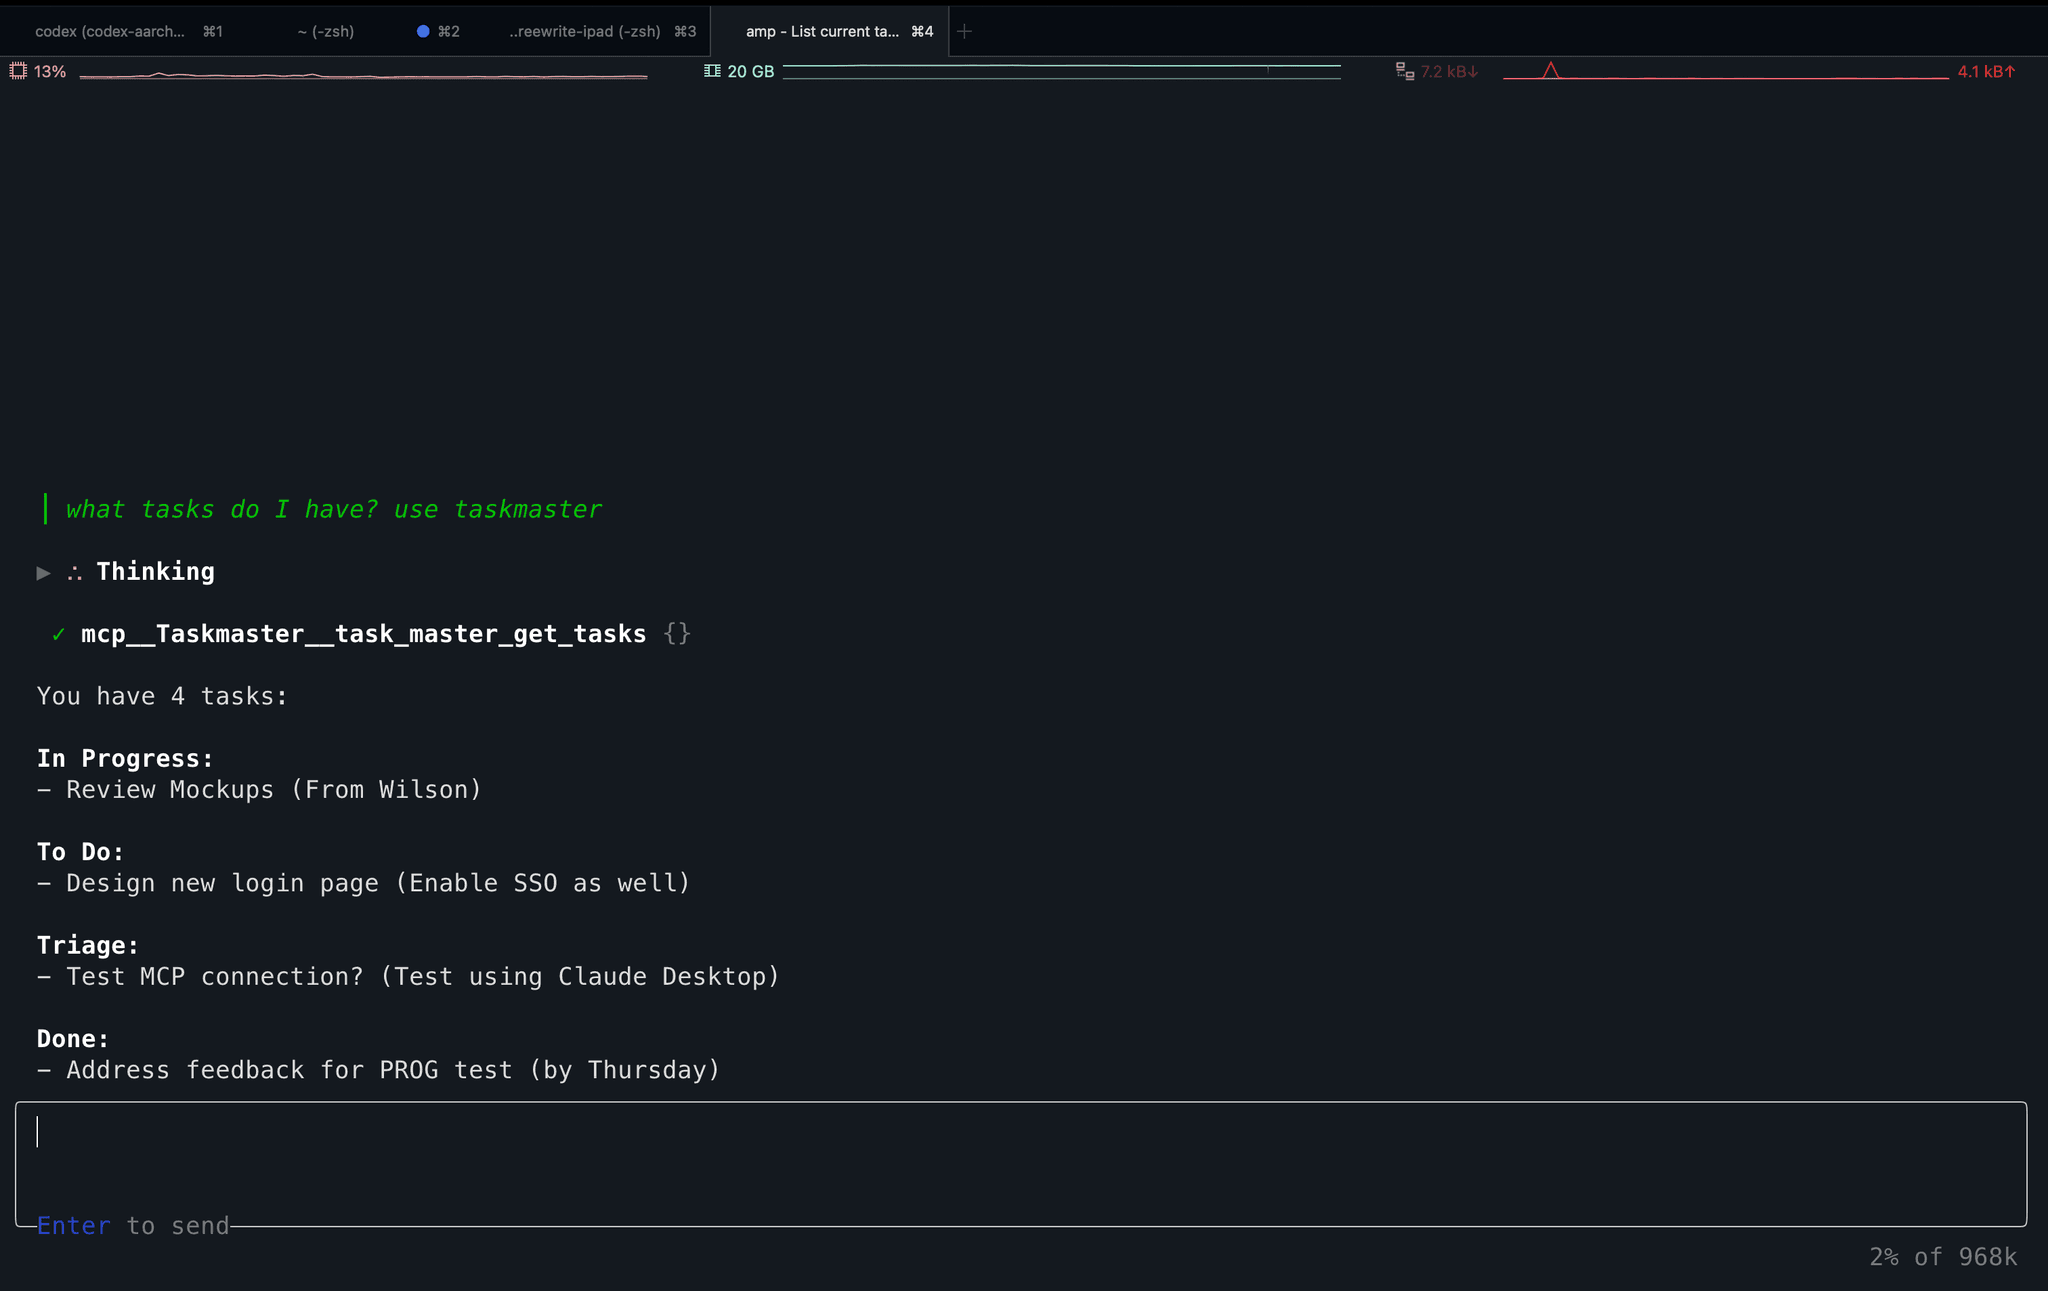
Amp recommends being selective with MCP tools for the best performance. Too many available tools can reduce model performance, so consider disabling unused MCP tools by adding them to the amp.tools.disable setting.
Troubleshooting
Section titled “Troubleshooting”Here are some common issues and solutions:
Server not connecting
Section titled “Server not connecting”If your MCP client can’t connect to the Gram server:
- Verify the MCP server URL is correct in your configuration.
- Check that the API behind the MCP server is reachable from your machine.
- Ensure the
npxcommand is available (reinstall Node.js if needed). - Try restarting your MCP client after making configuration changes.
Authentication errors
Section titled “Authentication errors”If you’re using an authenticated server and getting authentication errors:
- Verify your Gram API key in the dashboard under Settings -> API Keys.
- Ensure the API key is correctly formatted with the
Bearerprefix.
Tools not appearing
Section titled “Tools not appearing”If the tools aren’t showing up in your MCP client:
- Test the MCP server in the Gram Playground first to ensure it’s working.
- Check that the toolset includes the tools you expect to use.
- Verify the environment is correctly configured with the required variables.
- Look for any error messages in your MCP client’s logs.
What’s next
Section titled “What’s next”Ready to build your own MCP server? Try Gram today and see how easy it is to turn any API into agent-ready tools that work across all your development environments.