Building MCP servers
What is MCP authorization?
Governing MCP across your organization?
Speakeasy’s AI control plane connects, secures, and observes every agent and MCP server from one entry point — with SSO, RBAC, runtime guardrails, and a full audit trail.
Imagine giving an AI assistant the keys to your database, customer records, or financial systems. Since the Model Context Protocol (MCP) allows agentic clients to access various parts of your systems as tools and resources, how do you ensure that only the right agents can access the right tools?
This is where authorization comes in.
Authorization determines:
- Who can access your MCP server
- What specific tools and resources they can use
- When their access is valid
- How they need to be authenticated
What is the difference between authorization and authentication?
Before diving deeper, let’s clarify an important distinction:
- Authentication verifies identity, which is to say it confirms who or what is making the request.
- Authorization determines permissions, which is to say it decides what the authenticated entity can access.
Why is authorization important?
Suppose you have a powerful MCP server that can perform various tasks, like accessing sensitive data or executing critical operations. In this case, you need to ensure that only authorized agents can perform these actions.
Without proper authorization, you risk an agent accessing sensitive data it’s not supposed to or, even worse, executing destructive commands.
OAuth 2.1 within MCP
MCP uses a subset of the OAuth 2.1 framework for authorization. Authorization is optional in the specification, but when an HTTP-based MCP server supports it, the June 2025 revision defines a clear model: your MCP server acts as an OAuth 2.1 resource server, and a separate authorization server handles the user and issues tokens.
The specification sets out the following requirements:
- Mandatory PKCE: All MCP clients must use Proof Key for Code Exchange (PKCE) to prevent authorization code interception attacks.
- Protected resource metadata: MCP servers must implement RFC 9728 and serve an OAuth Protected Resource Metadata document at
/.well-known/oauth-protected-resource. A401 Unauthorizedresponse must include aWWW-Authenticateheader pointing to that metadata, and clients read it to discover which authorization server to use. - Authorization server metadata: The authorization server must publish RFC 8414 metadata (at
/.well-known/oauth-authorization-server), which clients use to find its endpoints. - Resource indicators: MCP clients must send the RFC 8707
resourceparameter on every authorization and token request, identifying the MCP server the token is for. The server must then validate that a token was issued specifically for it (audience validation), which is what stops a stolen or misdirected token from being replayed against a different service. - Client registration: MCP clients and authorization servers should support Client ID Metadata Documents. Clients use pre-registered credentials when available. Dynamic Client Registration is deprecated and remains a fallback for compatibility.
- Standardized error handling: MCP servers must respond with specific HTTP status codes (
401,403,400) for different authorization scenarios.
Implementing OAuth in MCP
The specification keeps the resource server (your MCP server) separate from the authorization server that issues tokens. That gives you three practical options:
- Delegate to a third-party provider: Point your Protected Resource Metadata at an established authorization server such as Auth0, Okta, WorkOS, or your own identity platform. This is the least work and the recommended default.
- Run your own authorization server: Host an authorization server alongside your MCP server. It remains a distinct role from the resource server even when the two share a domain.
- Reuse your existing OAuth infrastructure: If your API already has an OAuth setup, expose it as the authorization server for your MCP server.
Earlier drafts of the specification allowed the MCP server to act as its own combined authorization and resource server. The current model keeps the two roles distinct, which is what makes audience-bound tokens and the confused-deputy protections work.
How does MCP authorization work in real-world applications?
Let’s walk through an example to understand how you’d implement authorization in a real-world MCP server.
Scenario: A document management system
Suppose you’ve built a document management MCP server that exposes these tools:
createDocumentreadDocumentupdateDocumentdeleteDocumentshareDocument
You need to make sure different users have appropriate access levels:
| Role | Access level | Allowed tools |
|---|---|---|
| Viewer | Can only read documents | readDocument |
| Editor | Can read, create, and update documents | readDocument, createDocument, updateDocument |
| Admin | Has full access to all document operations | readDocument, createDocument, updateDocument, deleteDocument, shareDocument |
When an agent tries to access this system through an MCP client, the following flow occurs:
-
Initial request: An MCP client tries to call the
deleteDocumenttool without an access token. -
Challenge response: The MCP server responds with a
401 Unauthorizedstatus. -
Authentication initiation: The client redirects the agent to an authorization URL.
-
User consent: The client is authenticated and granted the requested permissions, for example, for an
editorrole. -
Token exchange: After consent, the authorization server issues an access token.
-
Authorized request: The client includes this token in subsequent requests and can access only the tools allowed by the role.
- For example, a client with the
editorrole can callreadDocument,createDocument, andupdateDocument, but notdeleteDocument.
- For example, a client with the
-
Permission verification: The MCP server validates not just the token’s authenticity but also the specific permissions it grants.
Here’s how you can implement authorization checks in a real MCP server:
from mcp.server import Serverfrom mcp.auth import TokenValidator
app = Server("document-manager")token_validator = TokenValidator()
@app.tool("deleteDocument", description="Delete a document by ID", args={"id": str})async def delete_document(id: str, context):    # Check if user has admin role via token claims    token = context.auth.token    if not token:        raise PermissionError("Authentication required")
    user_roles = token_validator.get_roles(token)    if "admin" not in user_roles:        raise PermissionError("Admin role required to delete documents")
    # Proceed with deletion if authorized    result = await database.delete_document(id)    return {"status": "deleted", "documentId": id}
In this example, the deleteDocument tool checks whether the user has the admin role before allowing the deletion of a document. If not, it raises a PermissionError.
Authorization patterns
There are a few authorization patterns you can implement to enhance the security of your MCP server.
1. Role-based access control (RBAC)
Define roles (like viewer, editor, and admin) and assign permissions to these roles. Depending on the context, clients can then be assigned roles rather than individual permissions.
{ "roles": { "viewer": { "permissions": ["readDocument"] }, "editor": { "permissions": ["readDocument", "createDocument", "updateDocument"] }, "admin": { "permissions": [ "readDocument", "createDocument", "updateDocument", "deleteDocument", "shareDocument" ] } }}2. Attribute-based access control (ABAC)
Base authorization decisions on attributes (or claims) about the user, resource, action, and environment.
@app.tool("updateDocument", args={"id": str, "content": str})async def update_document(id: str, content: str, context):    document = await database.get_document(id)
    # Check if user is the document owner or has editor/admin role    token = context.auth.token    user_id = token_validator.get_user_id(token)    user_roles = token_validator.get_roles(token)
    if (document.owner_id == user_id or        any(role in ["editor", "admin"] for role in user_roles)):        # Authorized to update        return await database.update_document(id, content)    else:        raise PermissionError("Not authorized to update this document")
3. Third-party authorization
Instead of building your own authorization system from scratch, integrate your MCP server with existing identity providers like Auth0, Okta, GitHub, or even the authentication layer of your own API. This lets you use the established identity infrastructure and avoid duplicating user management.
sequenceDiagram
    participant Client as MCP Client
    participant Server as MCP Server
    participant Auth as Identity Provider

    Client->>Server: Connect to the MCP endpoint
    Server-->>Client: 401 Unauthorized + auth URL
    Client->>Server: Redirect to /oauth/authorize
    Server->>Auth: Forward to provider's OAuth endpoint
    Auth-->>Client: Show login & consent screen
    Client->>Auth: User approves access
    Auth-->>Server: Callback with auth code
    Server->>Auth: Exchange code for token
    Auth-->>Server: Return access token
    Server-->>Client: Issue MCP session token
    Client->>Server: Call tool with session token
    Server->>Auth: Use provider token for API calls
    Auth-->>Server: Return API response
    Server-->>Client: Return tool response
In this flow:
- The MCP server acts as a bridge between your MCP client and the identity provider.
- The identity provider handles user authentication and consent.
- The MCP server exchanges tokens with the provider and maintains the mapping.
- Your tools can use the provider’s APIs without exposing tokens to clients.
Let’s see how this works with the Sentry MCP server, which uses Sentry’s OAuth service as its identity provider:
flowchart LR
    Client[MCP Client]
    MCP[MCP Server]
    SentryOAuth[Sentry OAuth]
    SentryAPI[Sentry API]

    Client <-->|"Auth & Tools"| MCP
    MCP <-->|"OAuth Flow"| SentryOAuth
    Client <-->|"Consent"| SentryOAuth
    MCP <-->|"API Calls"| SentryAPI
-
Initial connection: Your MCP client connects to a Sentry MCP server.
-
OAuth initiation: The server responds with a
401 Unauthorized, triggering the OAuth flow. -
First OAuth step: The client redirects to the MCP server’s OAuth endpoint.
-
Server-side OAuth: The MCP server shows its own consent screen first.
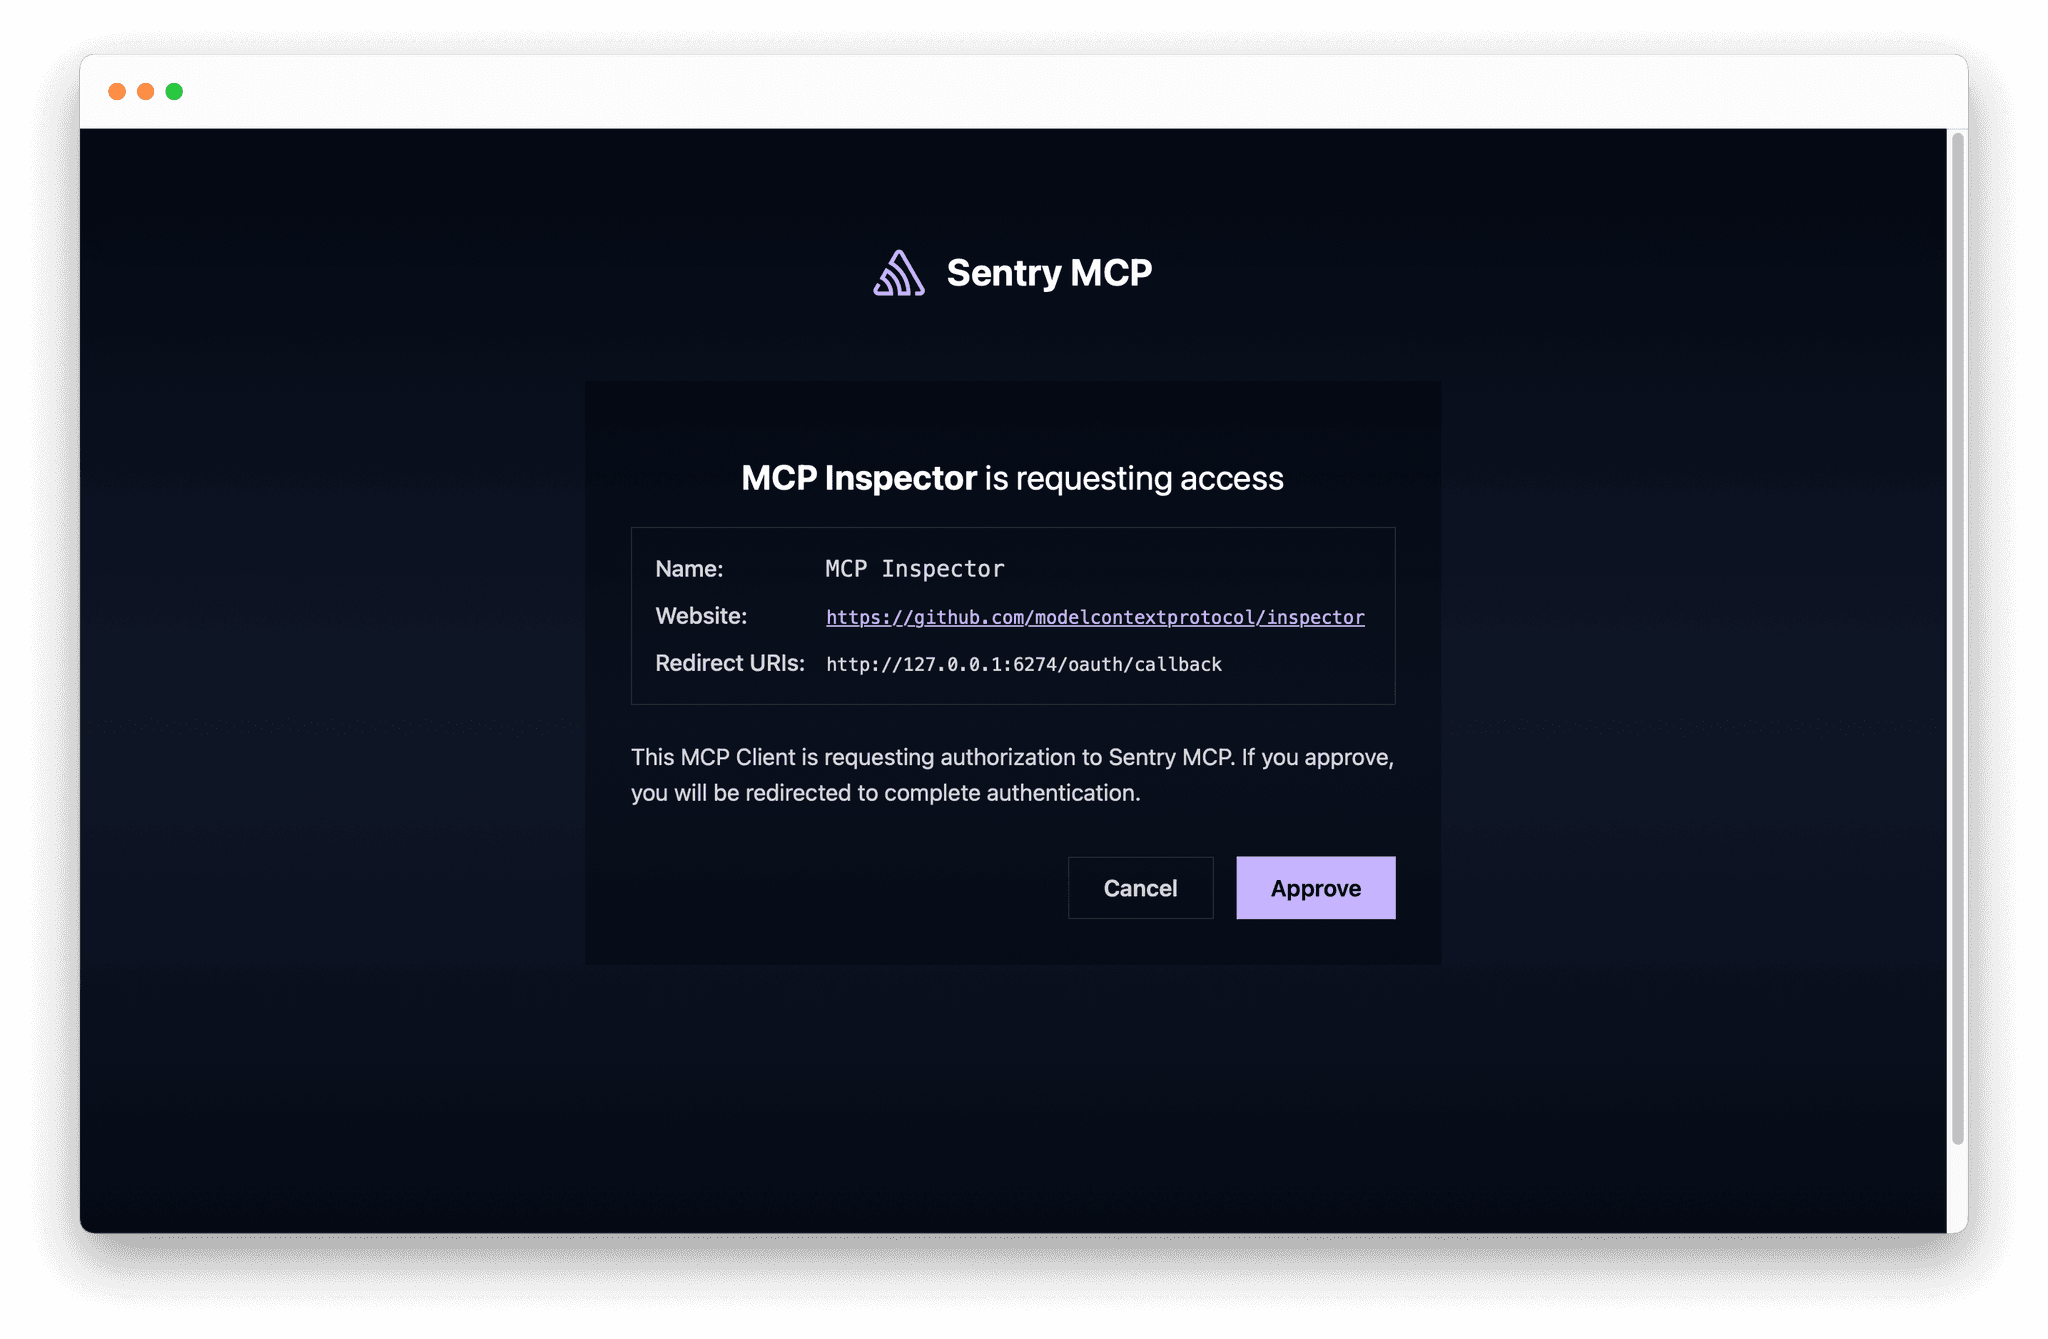
-
Provider authentication: After approving this first step, the server redirects to Sentry’s OAuth service.
-
Provider consent: You’ll see Sentry’s consent screen showing which permissions the MCP server is requesting.
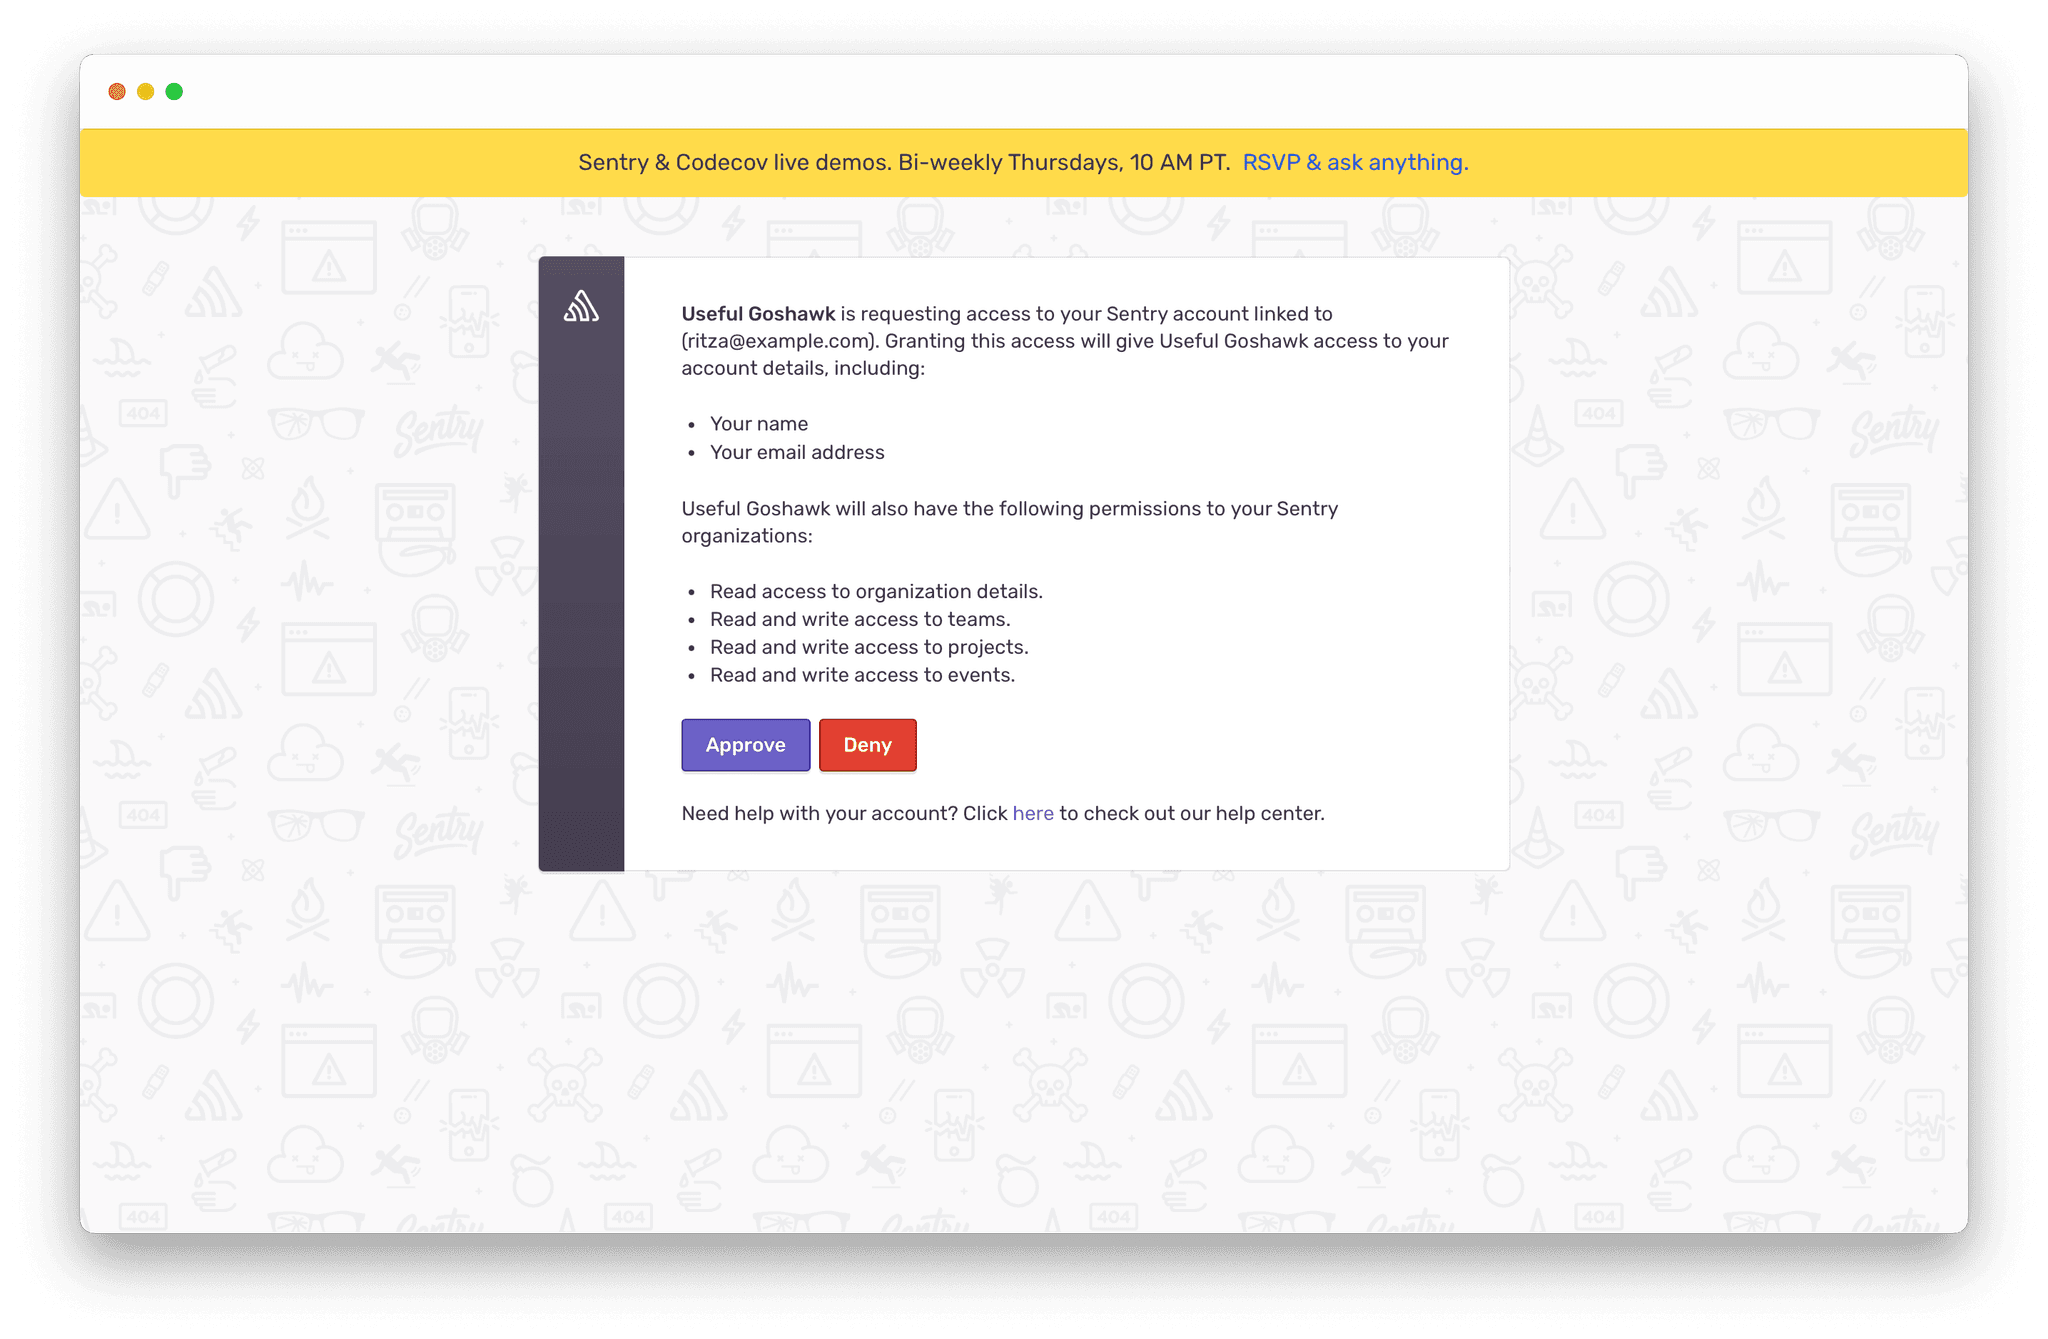
-
Double token exchange:
- Sentry issues an OAuth token to the MCP server (not to your client).
- The MCP server creates its own session token for your client.
- The Sentry token stays secure on the server side.
-
Using tools: When you call a tool like
list_organizations, the following flow begins.- The server validates your MCP session token.
- It uses its Sentry token to call the Sentry API.
- You get the results without ever handling Sentry credentials.
This setup creates a secure proxy pattern - the MCP server mediates interactions between clients and the identity provider. There are actually two OAuth flows happening:
- One occurs between your client and the MCP server.
- The other occurs between the MCP server and Sentry.
This double-layer approach provides extra security by keeping the provider’s tokens isolated from clients.
Proxying safely
When your MCP server proxies to a third-party authorization server with a static client ID, it becomes a potential confused deputy. The specification requires proxy servers to obtain the user’s consent for each dynamically registered client before forwarding to the upstream authorization server, and forbids passing the client’s token through to the upstream API - the server must exchange it for a separate token issued to the server itself.
For more details on how this works, see the remote-servers page.
Authorization Code Flow with PKCE
For browser-based applications and most MCP clients, the specification recommends the Authorization Code Flow with PKCE (Proof Key for Code Exchange). This is for public clients that cannot keep secrets.
The PKCE extension prevents authorization code interception attacks by requiring the client to generate a secret “code verifier” and its transformed value (the “code challenge”). This ensures that only the original requester can exchange the authorization code for tokens.
Note
Authorization in MCP is tightly integrated with the transport layer. An HTTP MCP server communicates its authorization requirements through HTTP responses and Protected Resource Metadata. The 2026-07-28 protocol has no initialization handshake.
Authorization and root boundaries
MCP roots are deprecated and do not enforce access control. New implementations should pass file locations explicitly and validate access using server-side authorization. The example below illustrates application-level checks, not security enforced by the Roots feature.
For example, you might implement both in a tool like readDocument to make sure that a client can read only the documents within their authorized roots and only if they have the right permissions:
@app.tool("readDocument", args={"id": str, "rootPrefix": str})async def read_document(id: str, rootPrefix: str, context):    # First check authorization    if not has_permission(context.auth.token, "documents:read"):        raise PermissionError("No permission to read documents")
    # Then validate against roots    if not context.roots.can_access(f"{rootPrefix}/{id}"):        raise PermissionError("Document outside accessible roots")
    # Return the document only if both checks pass    return get_document(id)
Best practices for secure MCP authorization
Here are a few best practices to keep in mind when implementing authorization in your MCP server:
- Apply the principle of least privilege: Grant only the permissions necessary for the intended function.
- Implement short-lived tokens: Set reasonable expiration times for access tokens.
- Validate tokens properly: Check signature, expiration, issuer, and audience claims.
- Provide clear permission errors: Help users understand why access was denied.
- Use TLS for all communications: Encrypt all authorization-related traffic.
- Implement rate limiting: Protect against brute-force and denial-of-service attacks.
To roll authorization out across an organization, see MCP authorization for every team and the MCP gateway, which centralizes SSO, RBAC, and audit for every MCP server. For governing a whole fleet of agents alongside your servers, see the agent control plane.