Identity / Authorizing agents
Authorizing agents
Create an agent identity, choose the servers and tools it can reach, give it a credential, connect its runtime, and verify the first call. Covers rotation, revocation, MCP session consent, and effective permissions.
An agent identity lets an automated agent, such as a release bot or a CI job, connect to MCP servers under its own name instead of a person’s credentials. A person chooses which servers and tools the agent can reach and gives it a credential. Every call the agent makes is then attributed to the agent, and its access can be cut off without touching anyone else’s.
For the agent lifecycle after creation, see Agent identity.
Access requirements
Section titled “Access requirements”Any organization member can create an agent and becomes its owner. Authorizing an agent owned by someone else requires the agent:authorize scope from Roles and Permissions.
Create an agent
Section titled “Create an agent”Open Identity > Identities in the project sidebar. Filter to Agents to see existing agents, then select New agent identity.
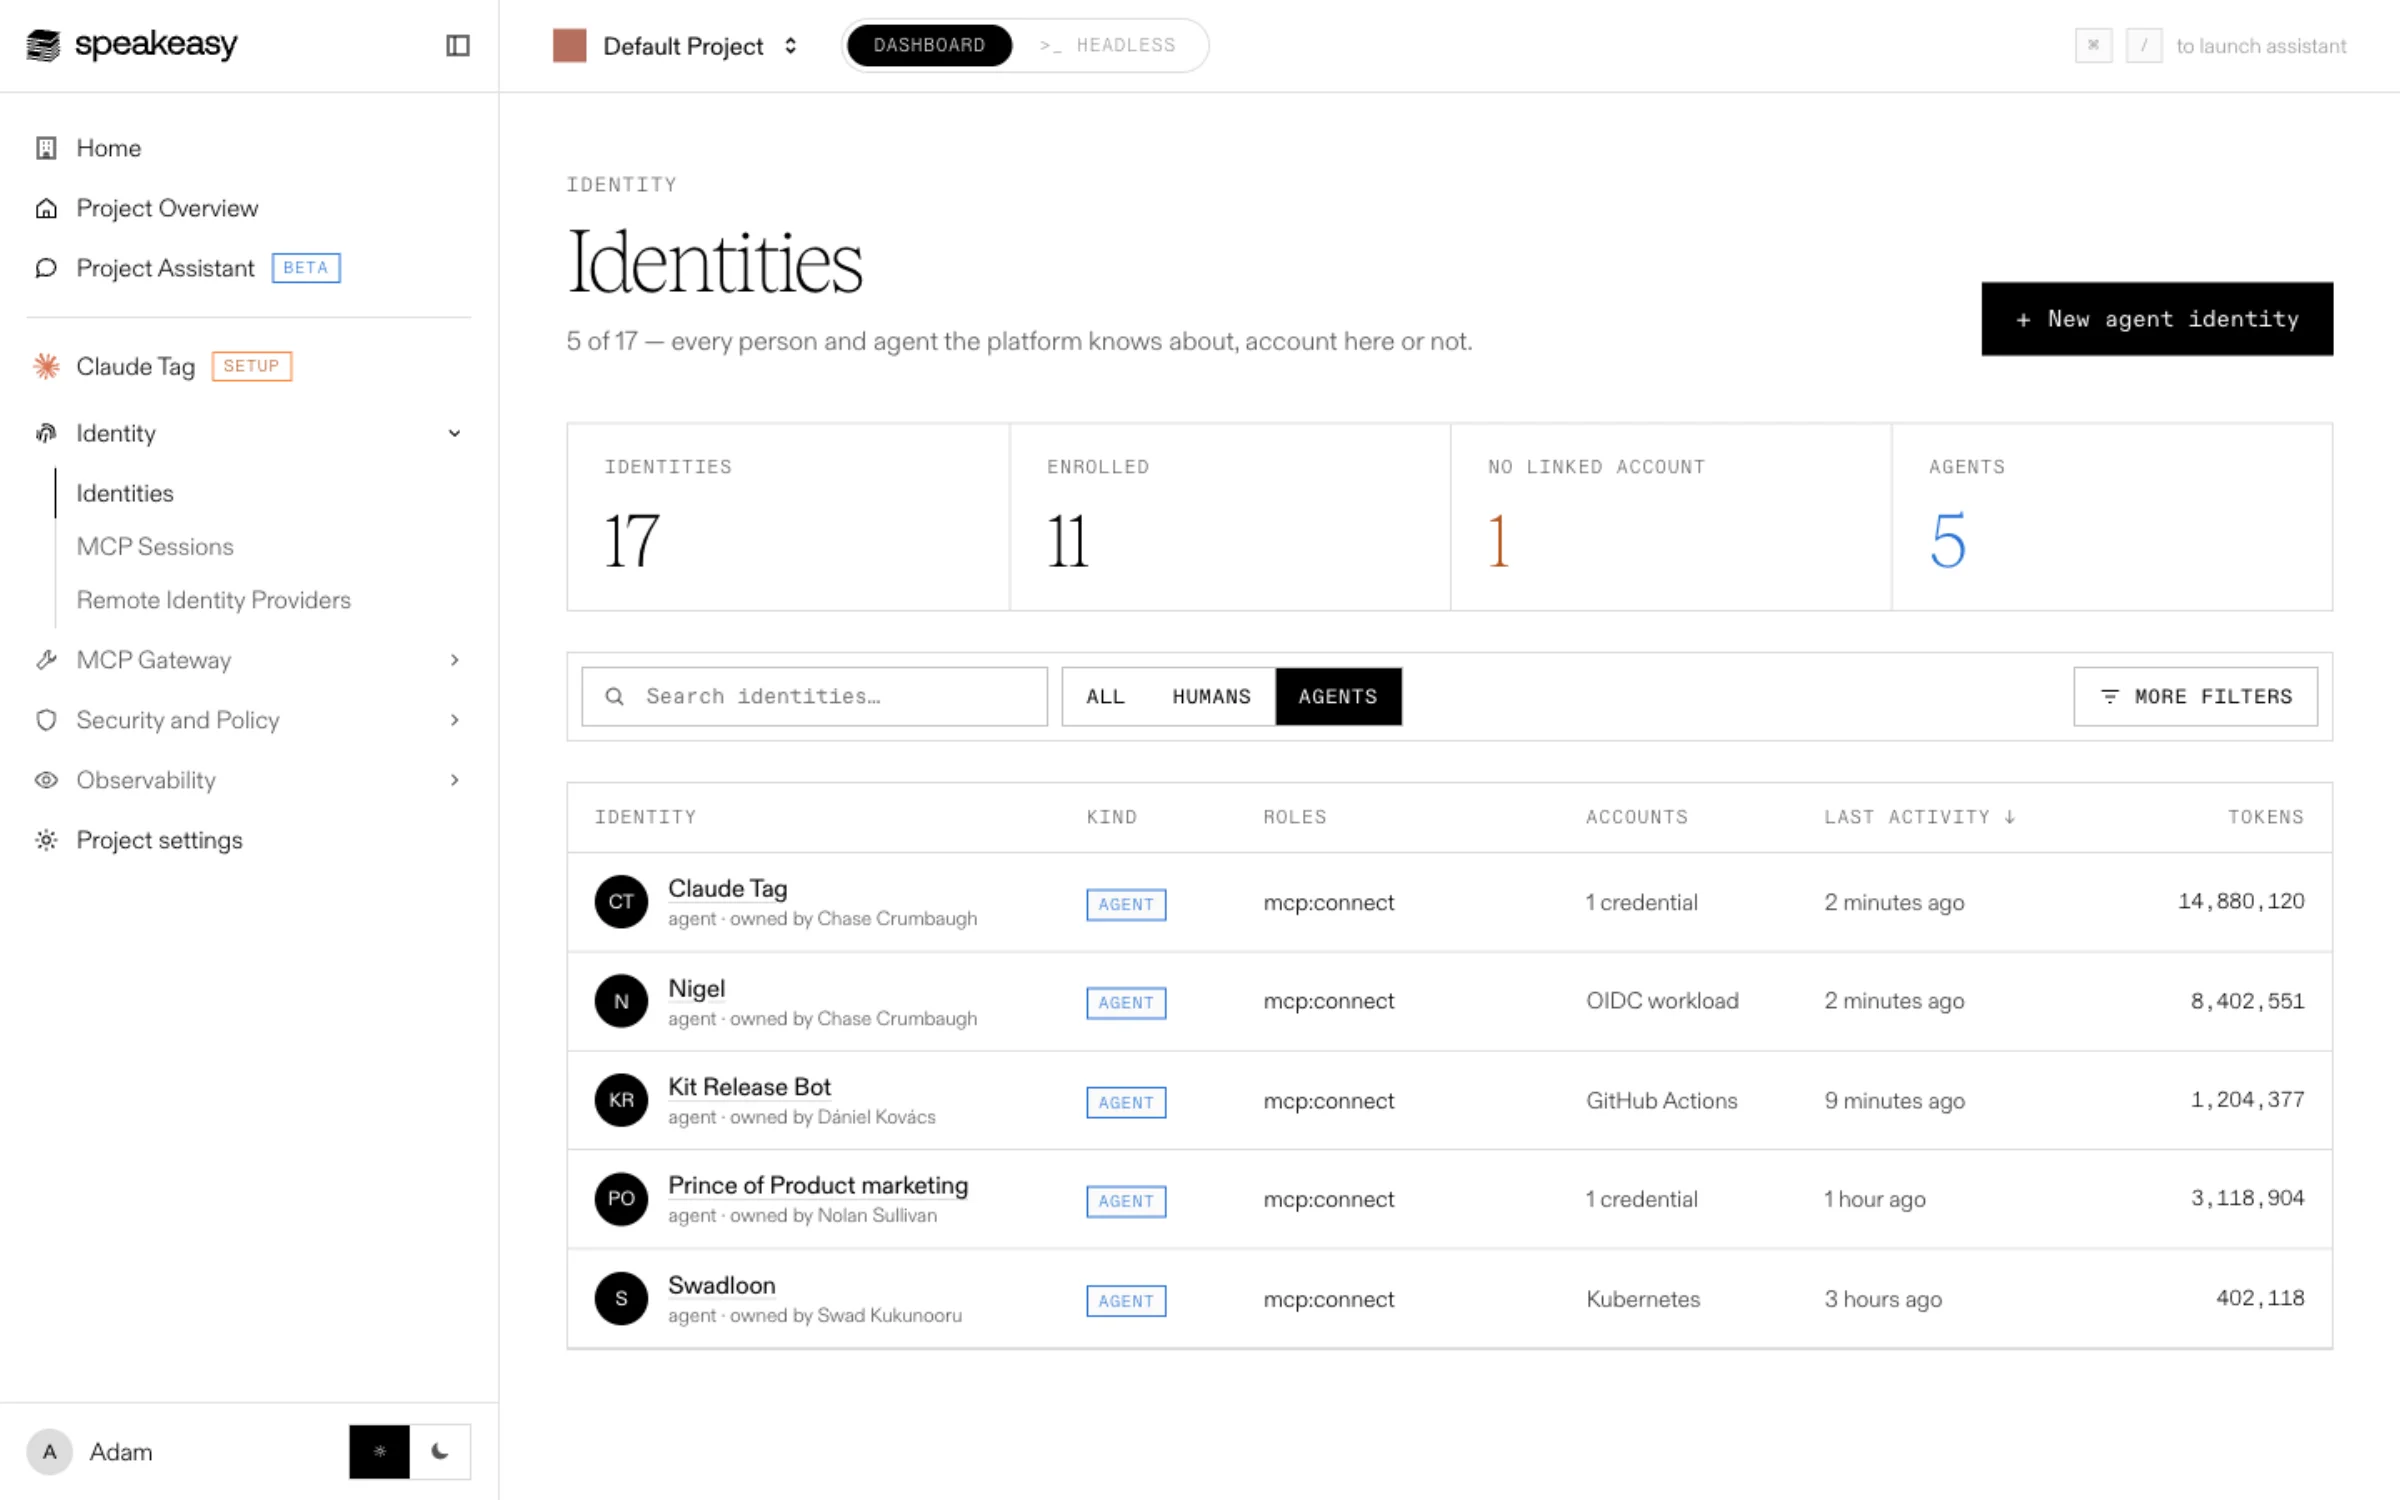
The wizard has five steps. A summary panel beside it tracks the choices made so far.
Name and scope
Section titled “Name and scope”Give the agent a name that will make sense in audit logs and session lists. Then choose its scope:
- Project limits the agent to servers in the current project.
- Organization lets the agent reach servers in every project.
Name and scope can be changed later.
Select servers
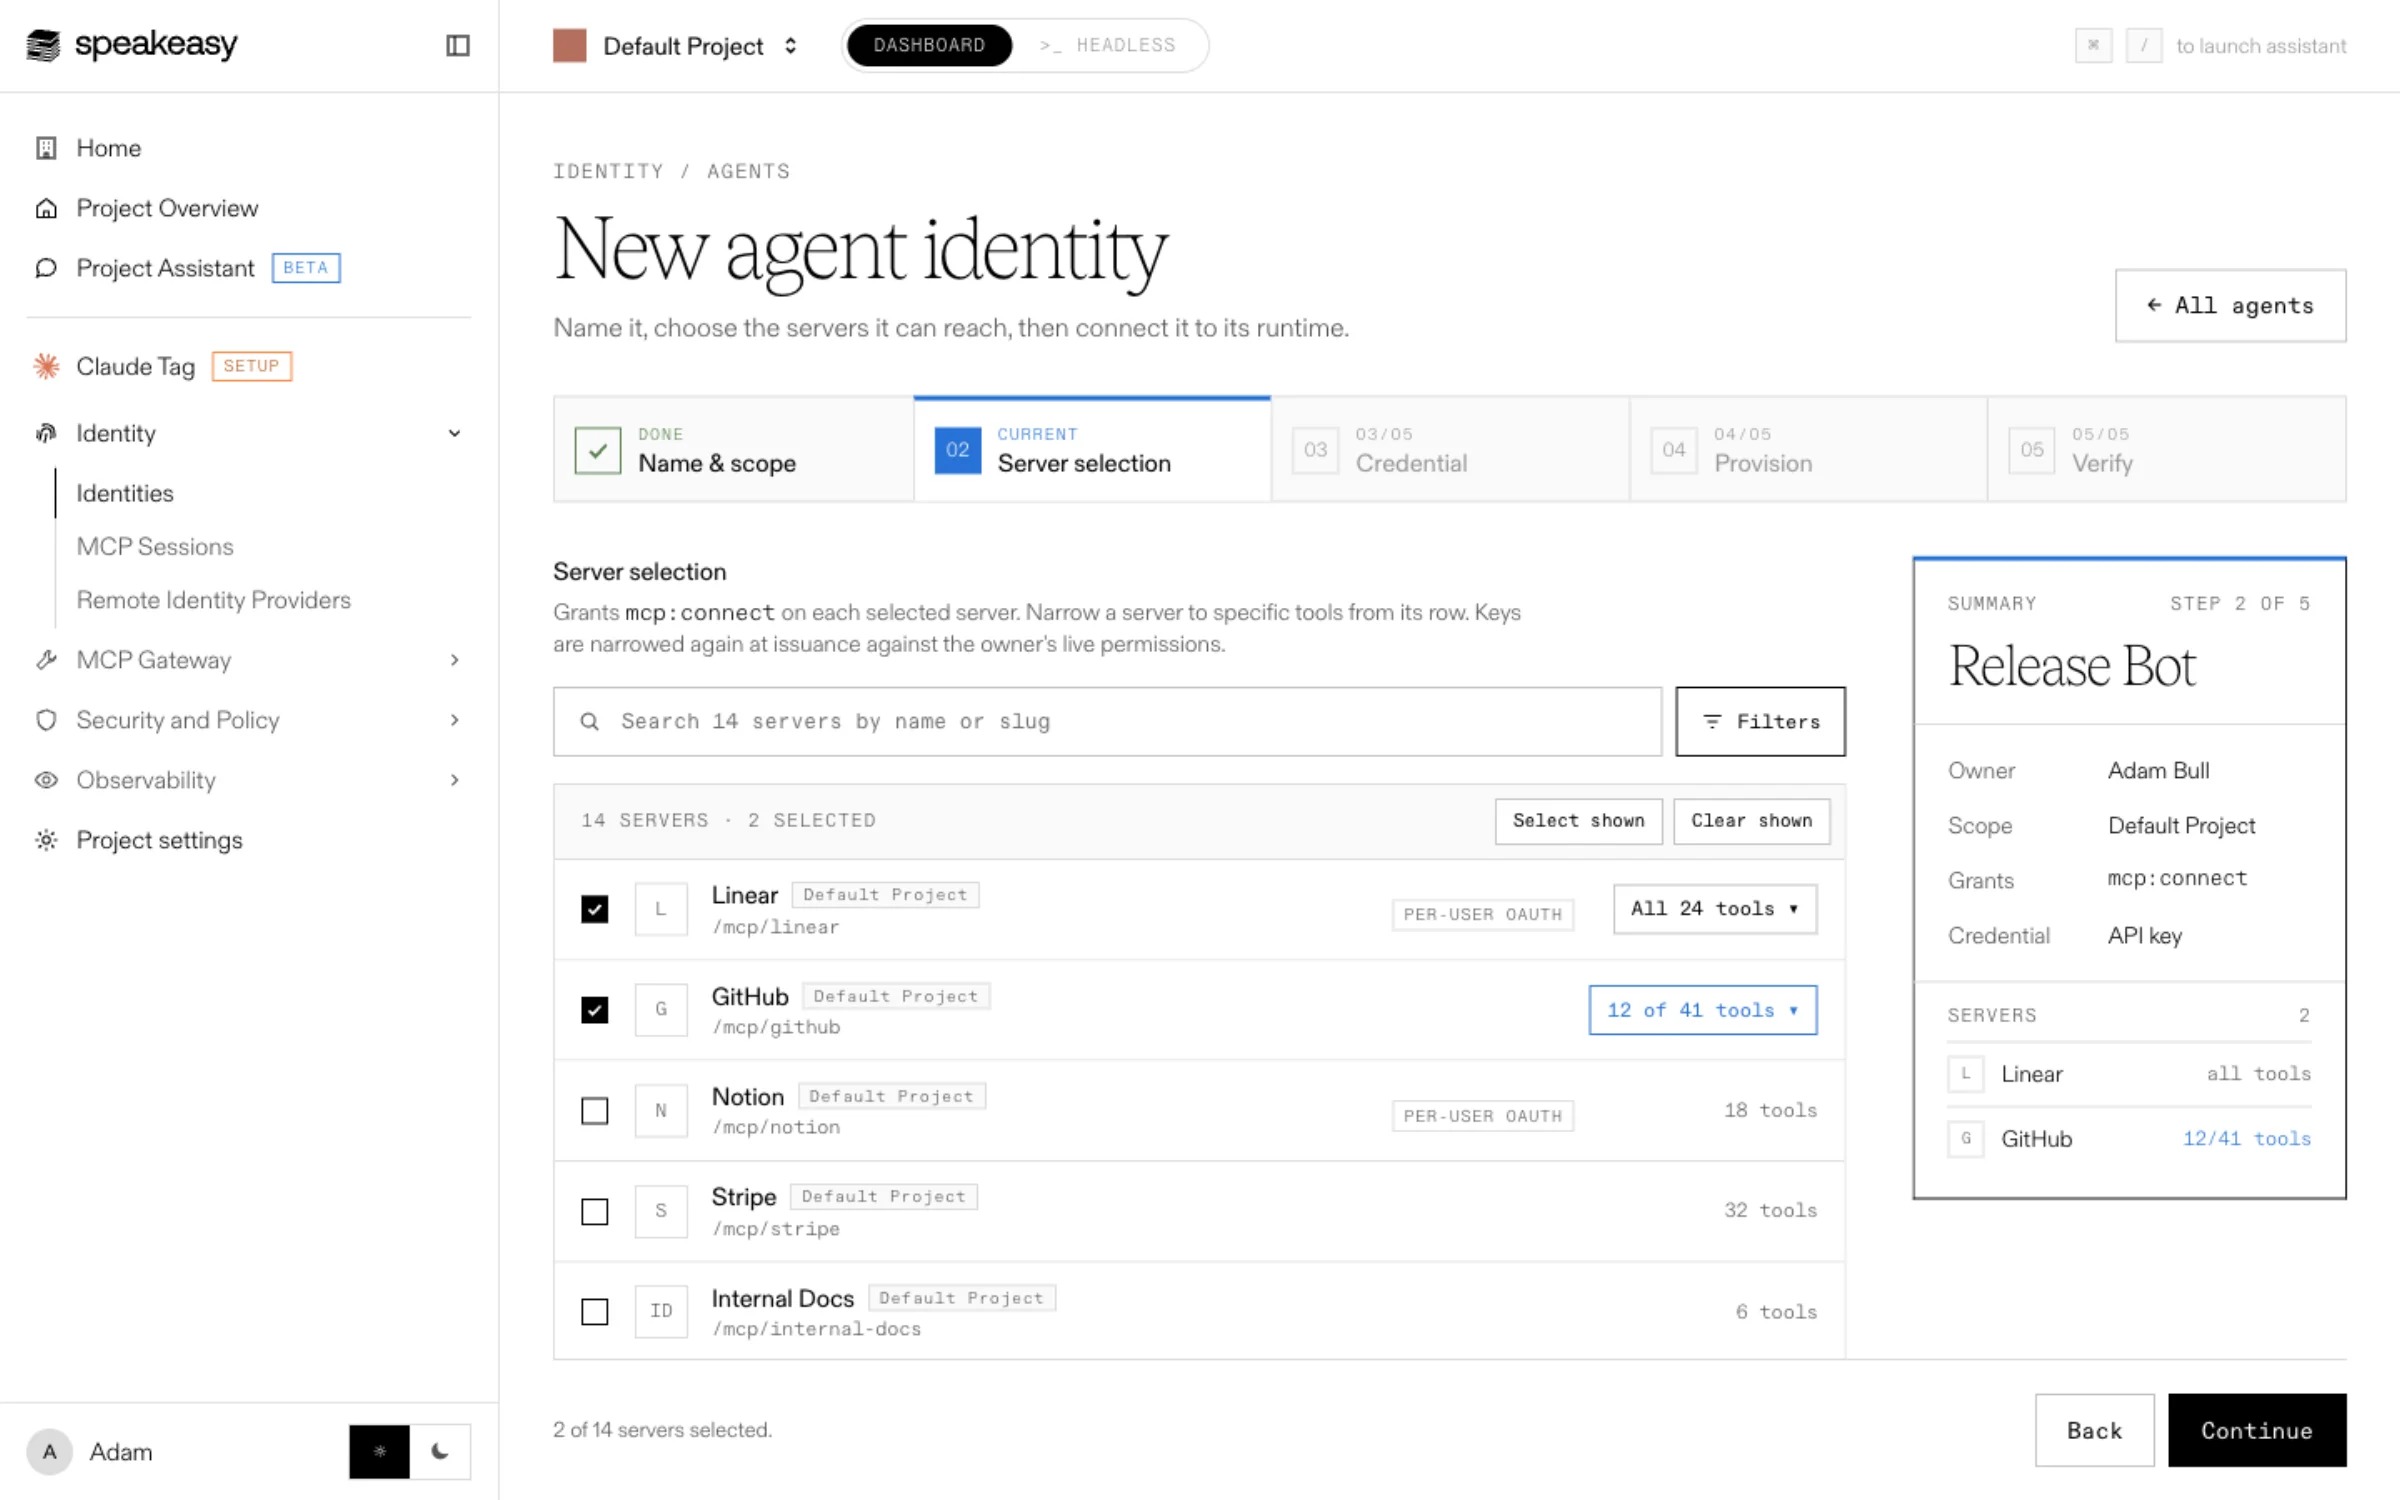
Section titled “Select servers”Select the MCP servers the agent can connect to. Each selected server grants mcp:connect. To limit a server to specific tools, open the tool selector on its row. Grant only what the agent needs, because the agent can call every tool it is given.
Choose a credential
Section titled “Choose a credential”Choose how the agent proves who it is:
- API key works in any runtime. The key is long-lived and can be rotated or revoked. API keys expire after 90 days by default and after one year at most.
- Workload identity suits CI jobs and Kubernetes pods. The workload exchanges the token its own platform already issues for a short-lived session, so no secret is stored. See Workload identity.
Select Create agent. The agent is created and the action is recorded in the organization audit log.
Provision the runtime
Section titled “Provision the runtime”The Provision step connects the agent’s runtime to its gateway URL, which puts every selected server behind one endpoint. For an API key, choose one of three options. For a workload, see Exchange a platform token.
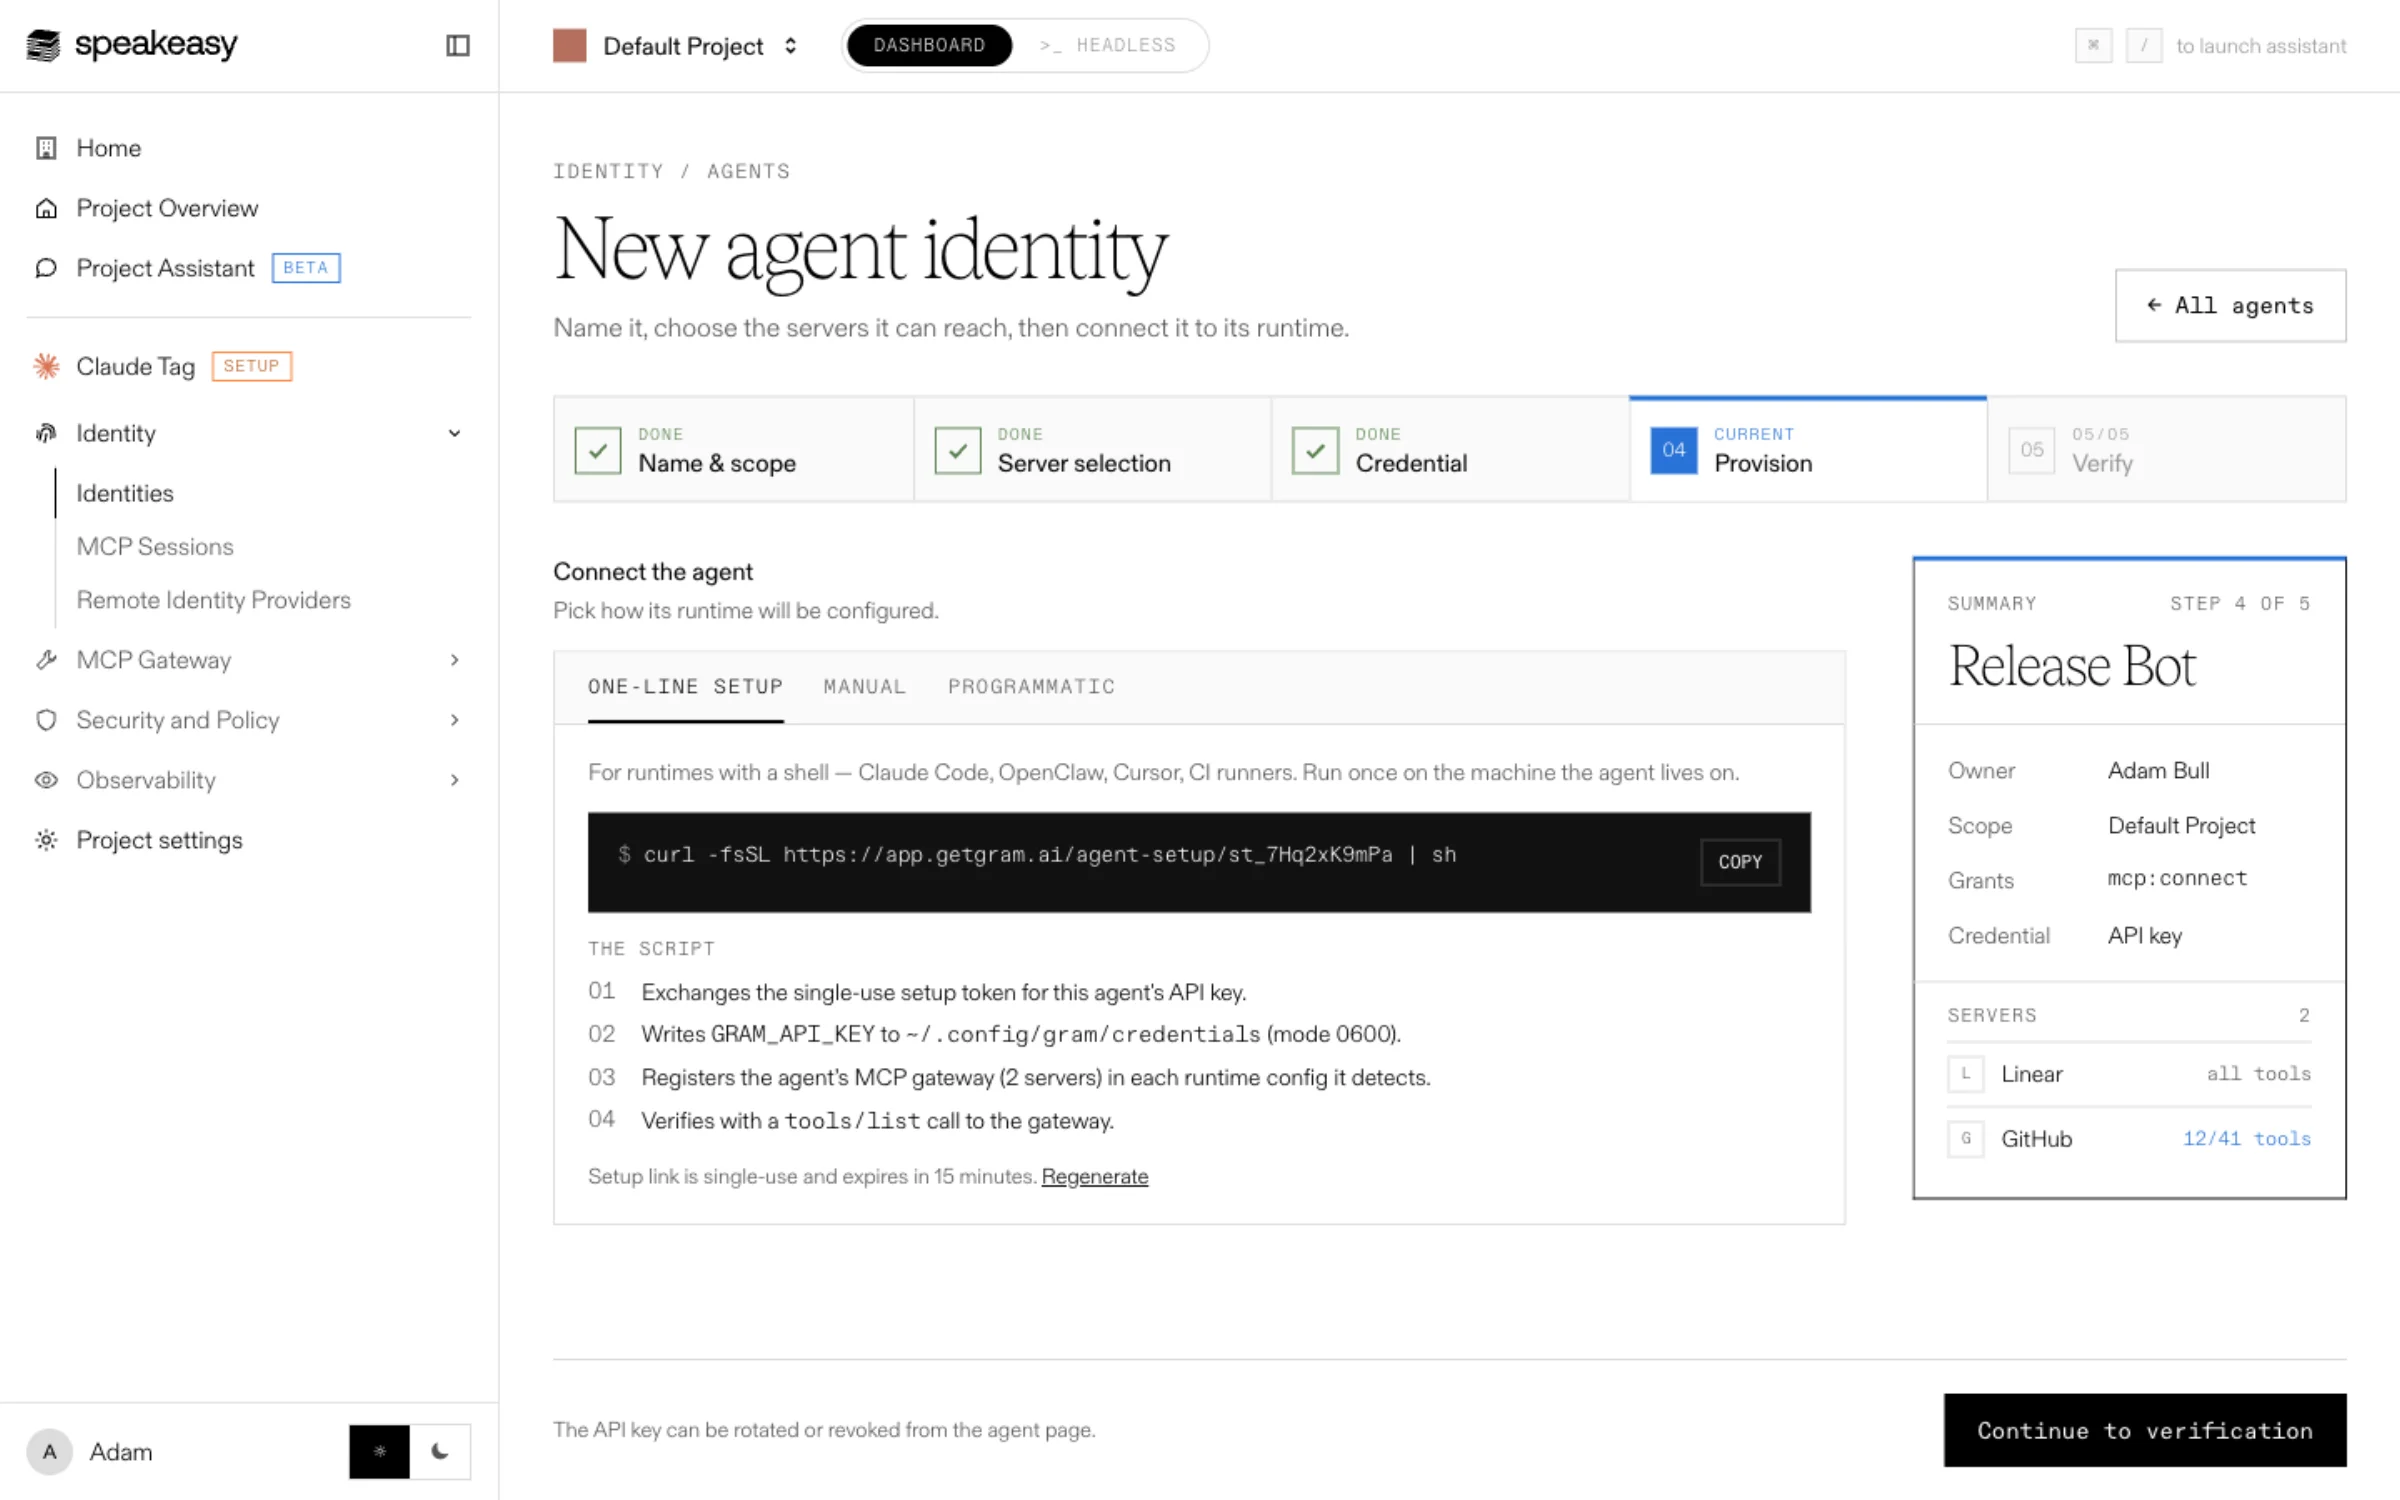
One-line setup suits runtimes with a shell, such as Claude Code, Cursor, and CI runners. Run the command once on the machine the agent lives on:
curl -fsSL https://app.getgram.ai/agent-setup/<setup-token> | shThe script exchanges the setup token for the agent’s API key, stores the key in ~/.config/gram/credentials, registers the gateway in each runtime configuration it finds, and makes a test call. The setup link works once and expires after 15 minutes. Select Regenerate for a new one.
Manual shows the API key and gateway URL to copy into any MCP client. The key is shown only once. Send it as Authorization: Bearer $SPEAKEASY_AI_API_KEY.
Programmatic suits agents built on an SDK. Read the key from a secret store and never commit it:
import { Client } from "@modelcontextprotocol/sdk/client/index.js";import { StreamableHTTPClientTransport } from "@modelcontextprotocol/sdk/client/streamableHttp.js";
const transport = new StreamableHTTPClientTransport(  new URL("https://app.getgram.ai/mcp/agents/release-bot"),  { requestInit: { headers: { Authorization: `Bearer ${process.env.SPEAKEASY_AI_API_KEY}` } } },);const client = new Client({ name: "release-bot", version: "1.0.0" });await client.connect(transport);
Verify the first call
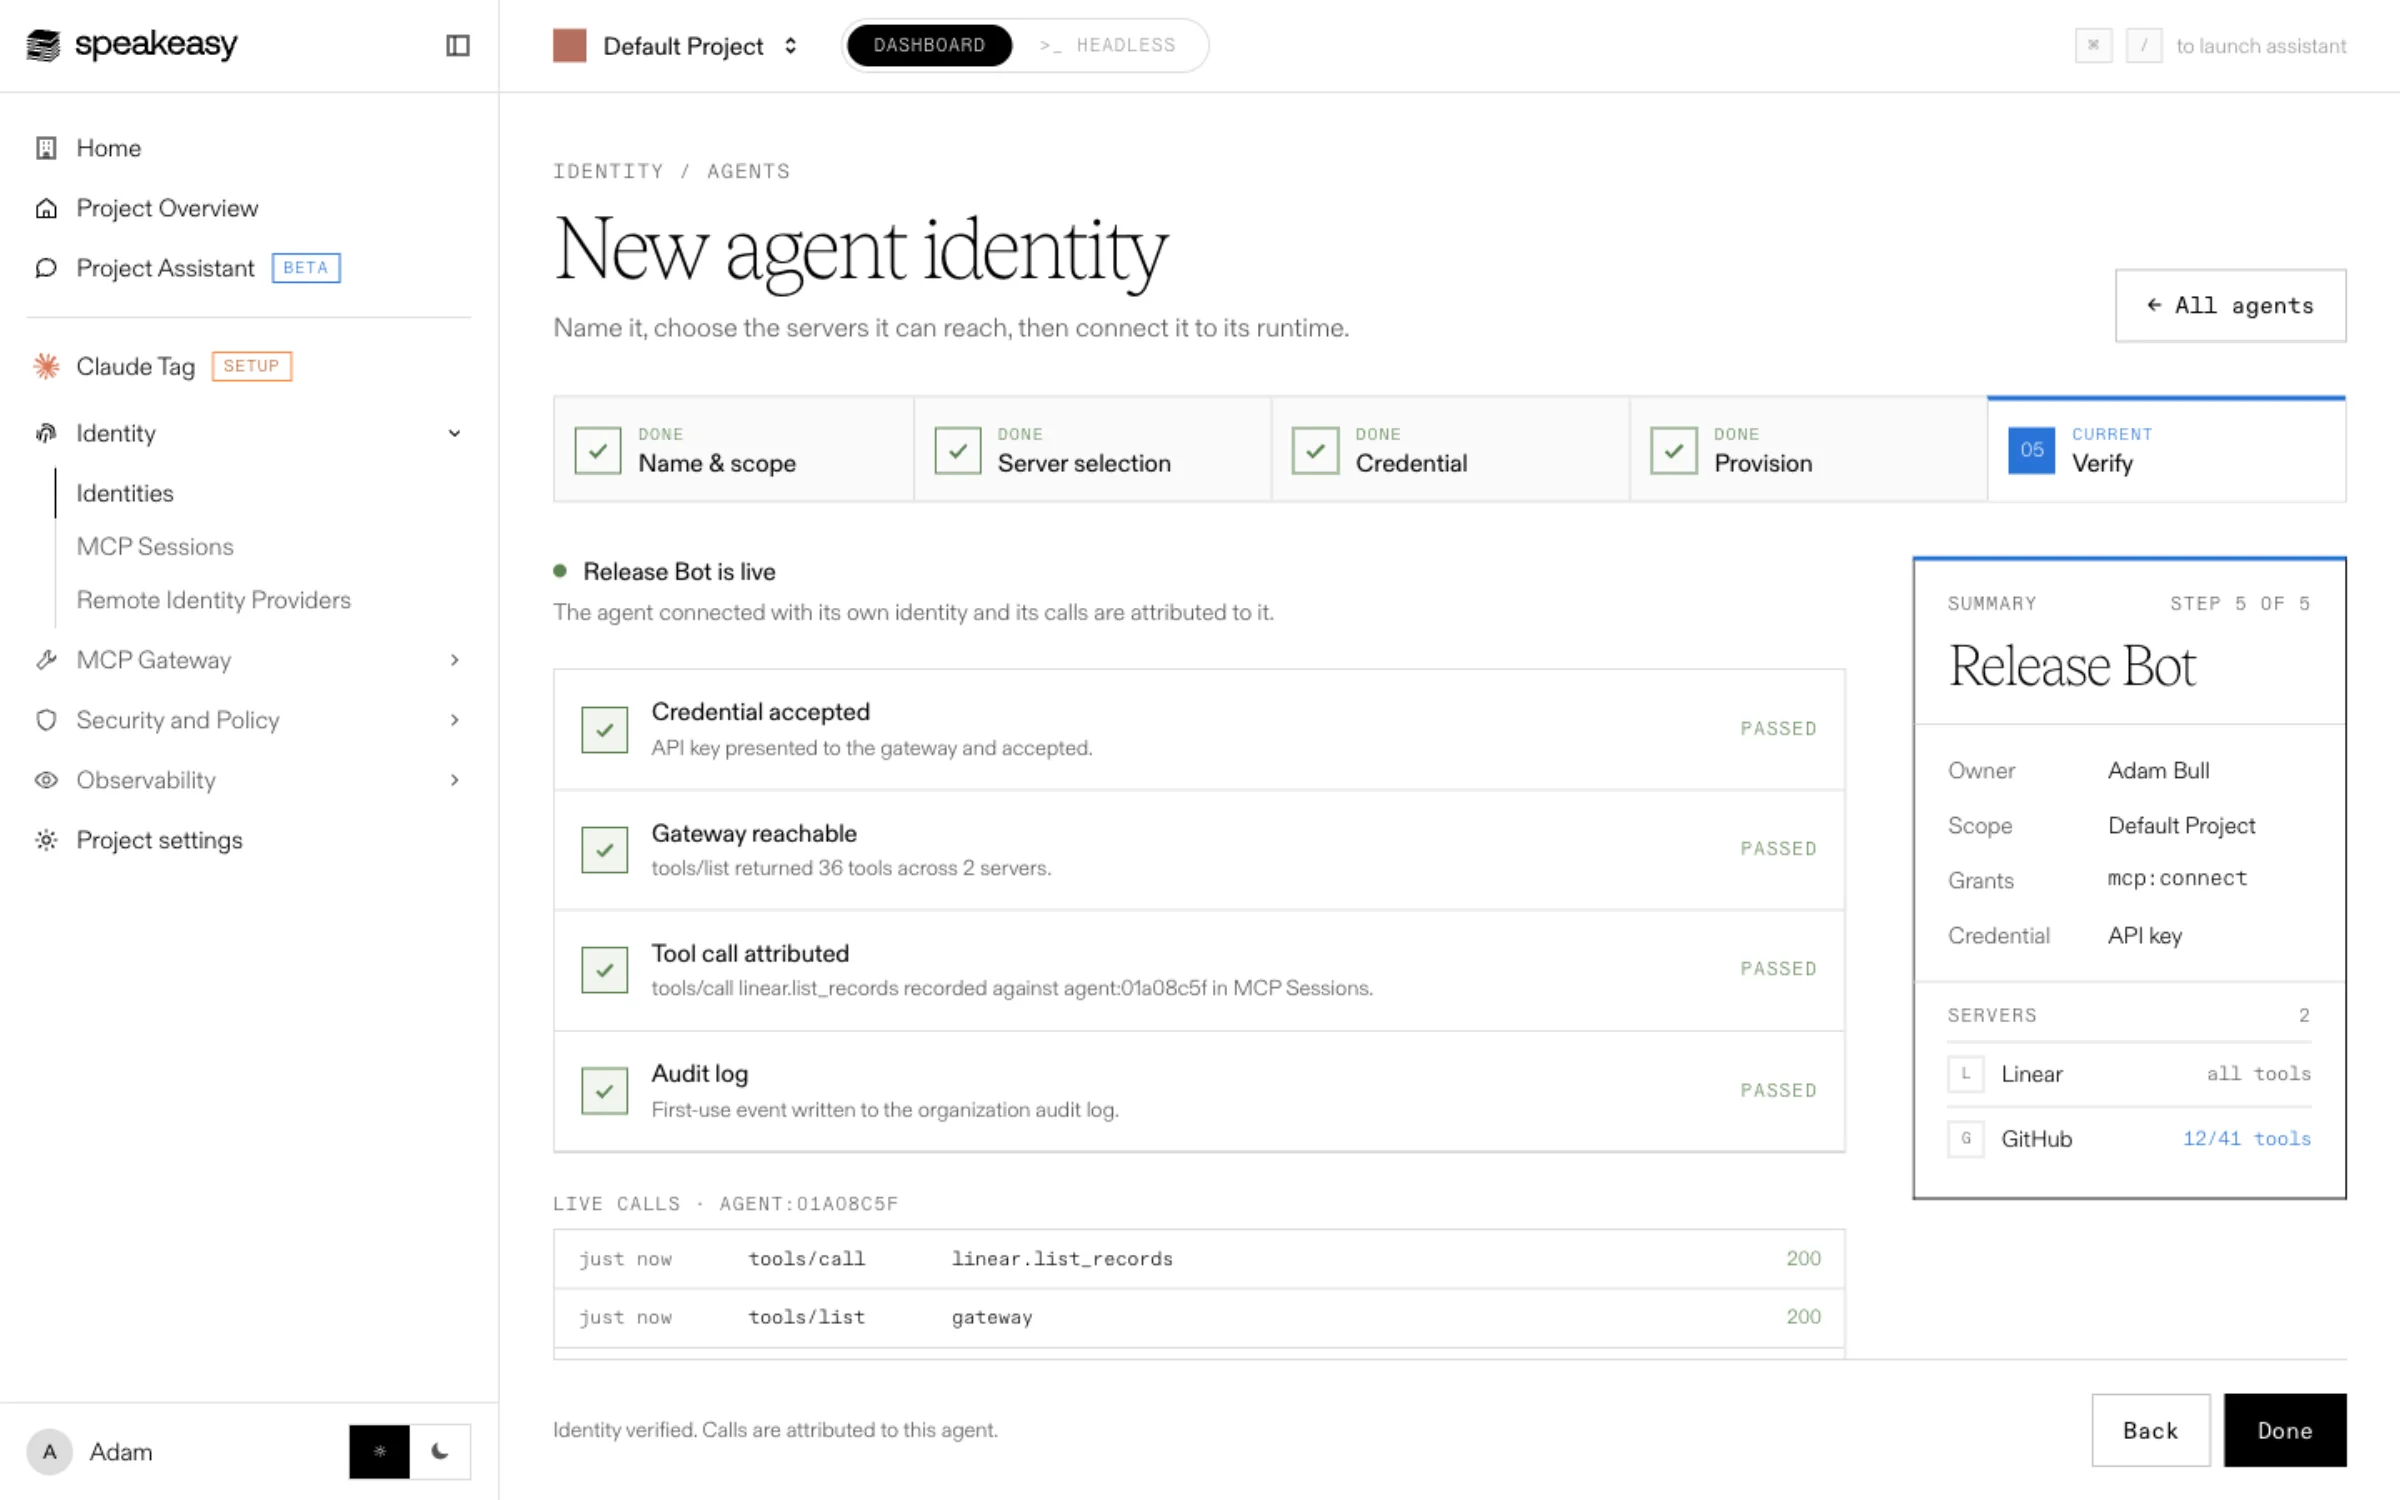
Section titled “Verify the first call”The Verify step waits for the agent’s first calls. Keep it open while the agent runs. The checks confirm that the credential was accepted, the gateway listed the agent’s tools, a tool call was attributed to the agent in MCP Sessions, and the first use was written to the audit log.
When every check passes, a live feed shows the agent’s calls as they arrive.
If nothing arrives:
- A 401 means the credential was rejected. Run the setup again, or for a workload, check the issuer and claim matchers.
- A 403 means the tool isn’t granted. Check the server and tool selection.
- No requests at all means the runtime isn’t pointed at the gateway URL.
Rotate or revoke a credential
Section titled “Rotate or revoke a credential”The agent’s page lists its API keys and Sessions. Rotating a key issues a replacement and revokes the old one. Revoke API key and Revoke session take effect immediately and can’t be undone. To cut off every credential at once, suspend or revoke the agent. Agent sessions also appear on MCP Sessions with every other connection.
Connect as an agent from an MCP client
Section titled “Connect as an agent from an MCP client”A person can also connect an MCP client as an agent. On the consent screen, choose Agent under Authorize as, pick the agent, and select Authorize agent. The session grants only mcp:connect on that one server. The person who approved is recorded as the authorizer, and the agent as the actor.
An agent appears in the list only when it is active and both it and its owner are allowed mcp:connect on that server. When the server needs a connected account, the person can share one of their own with Use this account and later detach it with Remove agent access.
Effective permissions
Section titled “Effective permissions”An agent request succeeds only when three things allow it: the credential, which is fixed when issued and never widened; the agent’s own permissions and roles; and the owner’s current permissions. An agent can never do more than its owner. The agent and owner permissions are checked on every request, so removing a permission from either takes effect immediately. See How authorization is evaluated.
Creating agents, changing permissions, and issuing or revoking credentials are all recorded in Audit Logs.