Identity / Connect Speakeasy to your services
Connect Speakeasy to your services
Use Okta Cross App Access so the platform reaches Linear, Notion, and other services as each person, with no separate connect step per service.
Enterprise Managed Auth is in preview. Contact your Speakeasy account team to enable the Enterprise Managed Auth feature flags for your organization.
The platform asks Okta for access to each downstream service on a person’s behalf, so nobody connects Linear, Notion, or another service one at a time. Okta decides who may reach which service, and removing access in Okta stops it everywhere. This is the outbound half of Enterprise Managed Auth.
Access requirements
Section titled “Access requirements”Setup requires the org:admin scope, which only the default Admin
role holds, and an
Okta administrator who can create apps, register AI agents, and grant API
scopes. Turning Enterprise Managed Auth on for a server requires
project:write.
How it works
Section titled “How it works”The person signs in to Okta once through the platform. When a tool call needs a service token the platform doesn’t hold yet, it makes two exchanges on the person’s behalf: one at Okta for an ID-JAG, and one at the service’s authorization server for an access token.
sequenceDiagram
    participant Client as MCP client
    participant CP as AI Control Plane
    participant Okta
    participant AS as Service authorization server
    participant MCP as Service MCP server
    Client->>CP: Connect to an MCP server
    CP->>Okta: Redirect the person to sign in
    Okta-->>CP: ID token and refresh token
    Client->>CP: Tool call
    CP->>Okta: Token exchange: ID token for an ID-JAG
    Okta-->>CP: ID-JAG for the service
    CP->>AS: JWT bearer grant with the ID-JAG
    AS-->>CP: Access token
    CP->>MCP: Tool call with the access token
- Sign in. The person signs in through Okta, with its MFA and conditional access policies. The platform keeps the ID token and refresh token, encrypted, as the person’s delegation.
- Exchange. On a tool call, the platform asks Okta for an Identity Assertion JWT Authorization Grant (ID-JAG) addressed to the service. Okta checks that the person is assigned and that the Speakeasy AI agent has a resource connection for that service.
- Redeem. The platform presents the ID-JAG to the service’s authorization server, receives an access token, and runs the tool call as that person.
Setup at a glance
Section titled “Setup at a glance”Setup happens in three places: the Okta Admin Console, the dashboard, and each service’s own admin console. Phases 1 and 2 happen once. Phases 3 and 4 repeat for each service.
| Phase | Once or per service | Okta | Dashboard | Service admin console |
|---|---|---|---|---|
| 1. Connect Okta | Once | API service app with read-only scopes | Org URL and client ID | |
| 2. Set up Okta sign-in | Once | AI agent, its public key, the linked app | Agent ID, Set up Okta sign-in | |
| 3. Connect a service | Per service | Resource connection on the AI agent | Confirm setup | Turn on Enterprise Managed Auth, trust the Okta issuer |
| 4. Turn it on for the server | Per server | Turn on in the server’s settings |
Before you start
Section titled “Before you start”| Requirement | Why |
|---|---|
Okta org URL on .okta.com, .oktapreview.com, .okta-emea.com, .okta-gov.com, or .okta.mil | Custom Okta domains need Speakeasy to allow them; contact support |
| People provisioned through directory sync | Sign-in does not create accounts. A person Okta signs in who is not a member is refused |
| Customer-managed encryption keys, with a Google Cloud KMS key | The platform signs its requests to Okta with this key. AWS KMS keys cannot back it. Contact Speakeasy to enable them |
| Each service supports Enterprise Managed Authorization for MCP | The service must trust your Okta org. Many services require an Enterprise or SSO plan |
| Each MCP server is a remote server with its own authorization server | The authorization server must advertise the identity assertion grant and have a confidential client registered for the platform |
1. Connect Okta
Section titled “1. Connect Okta”The platform reads apps and their user and group assignments from Okta through an API service app. It never writes to your Okta org, and this connection does not issue tokens or sign anyone in.
Open IDP and SSO > Identity providers, select Connect Okta, enter the Okta organization URL, such as https://example.okta.com, and select Continue. Then choose how to create the app. You can switch until you enter the client ID. Connect Okta walks through the Okta Integration Network install step by step.
| Okta Integration Network (client secret) | Custom API Services app (private key) | |
|---|---|---|
| Best for | Most organizations | Okta orgs that don’t allow client-secret authentication, or teams that want no secret to copy |
| Create the app | Applications and Resources > API Service Integrations > Add Integration, choose Speakeasy, select Install & Authorize | Applications and Resources > Applications > Create App Integration > API Services, name it Speakeasy, Use Okta-generated client ID. Not CIMD |
| Authentication | Copy the Client secret. Okta shows it only once | On General > Public keys, choose Use a URL to fetch keys dynamically and paste the key URL from the checklist. Then set Client authentication to Public key / Private key and leave DPoP required |
| Scopes | Granted by the integration | On Okta API Scopes, grant okta.apps.read |
| Admin roles | Application Administrator (org-wide) and Read-only Administrator | Same |
| Back in the dashboard | Enter Client ID and Client secret, select Submit and verify | Enter Client ID (0oa…), select Submit and verify |
The client ID can be saved only once. To change it, revoke the connection and connect again. When verification passes, the Okta card shows Verified.
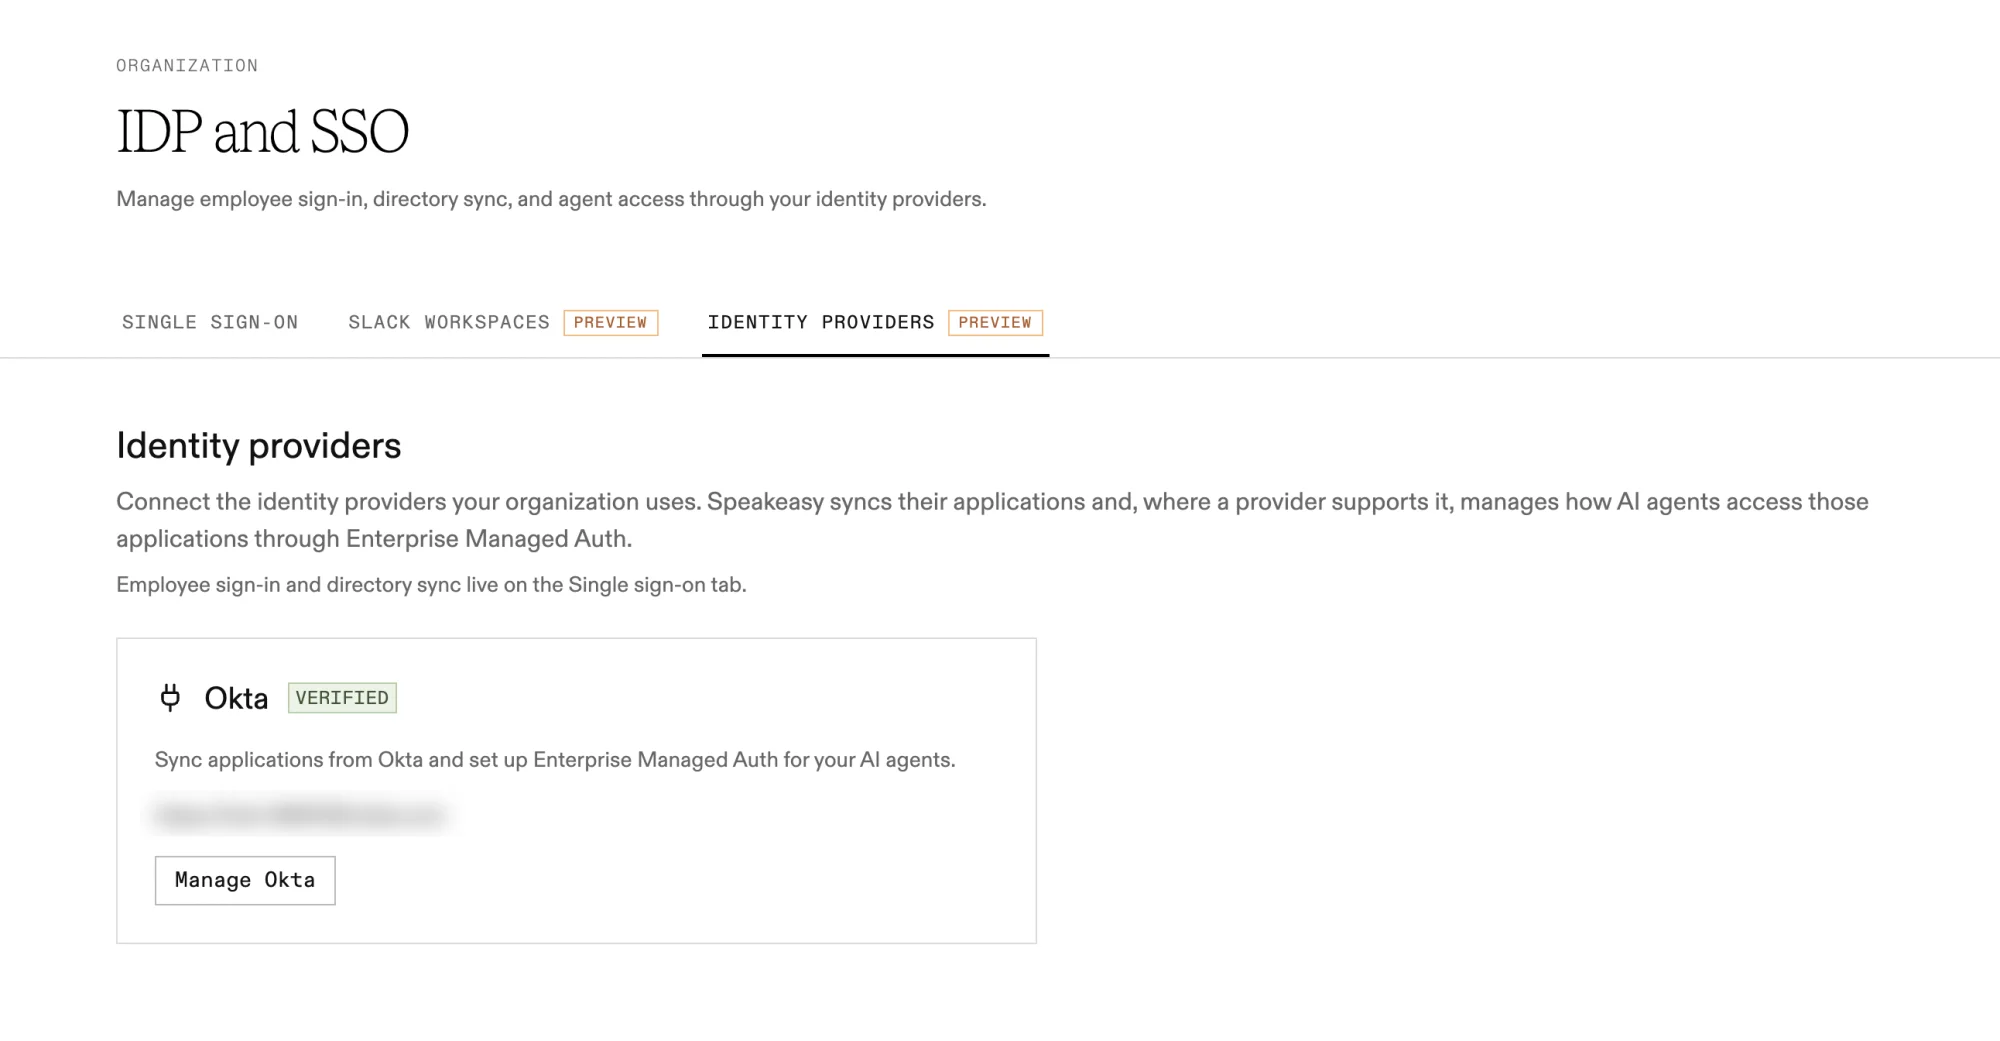
If verification fails, the Setup tab lists what to fix. Select Re-verify after changing the app in Okta. Once verified, the Applications tab syncs apps from Okta and suggests catalog MCP servers that match them.
2. Set up Okta sign-in
Section titled “2. Set up Okta sign-in”Okta issues assertions only to a registered AI agent. The agent’s linked OIDC app becomes the app people sign in to the platform with. Follow the Cross App Access setup checklist on the Cross App Access tab.
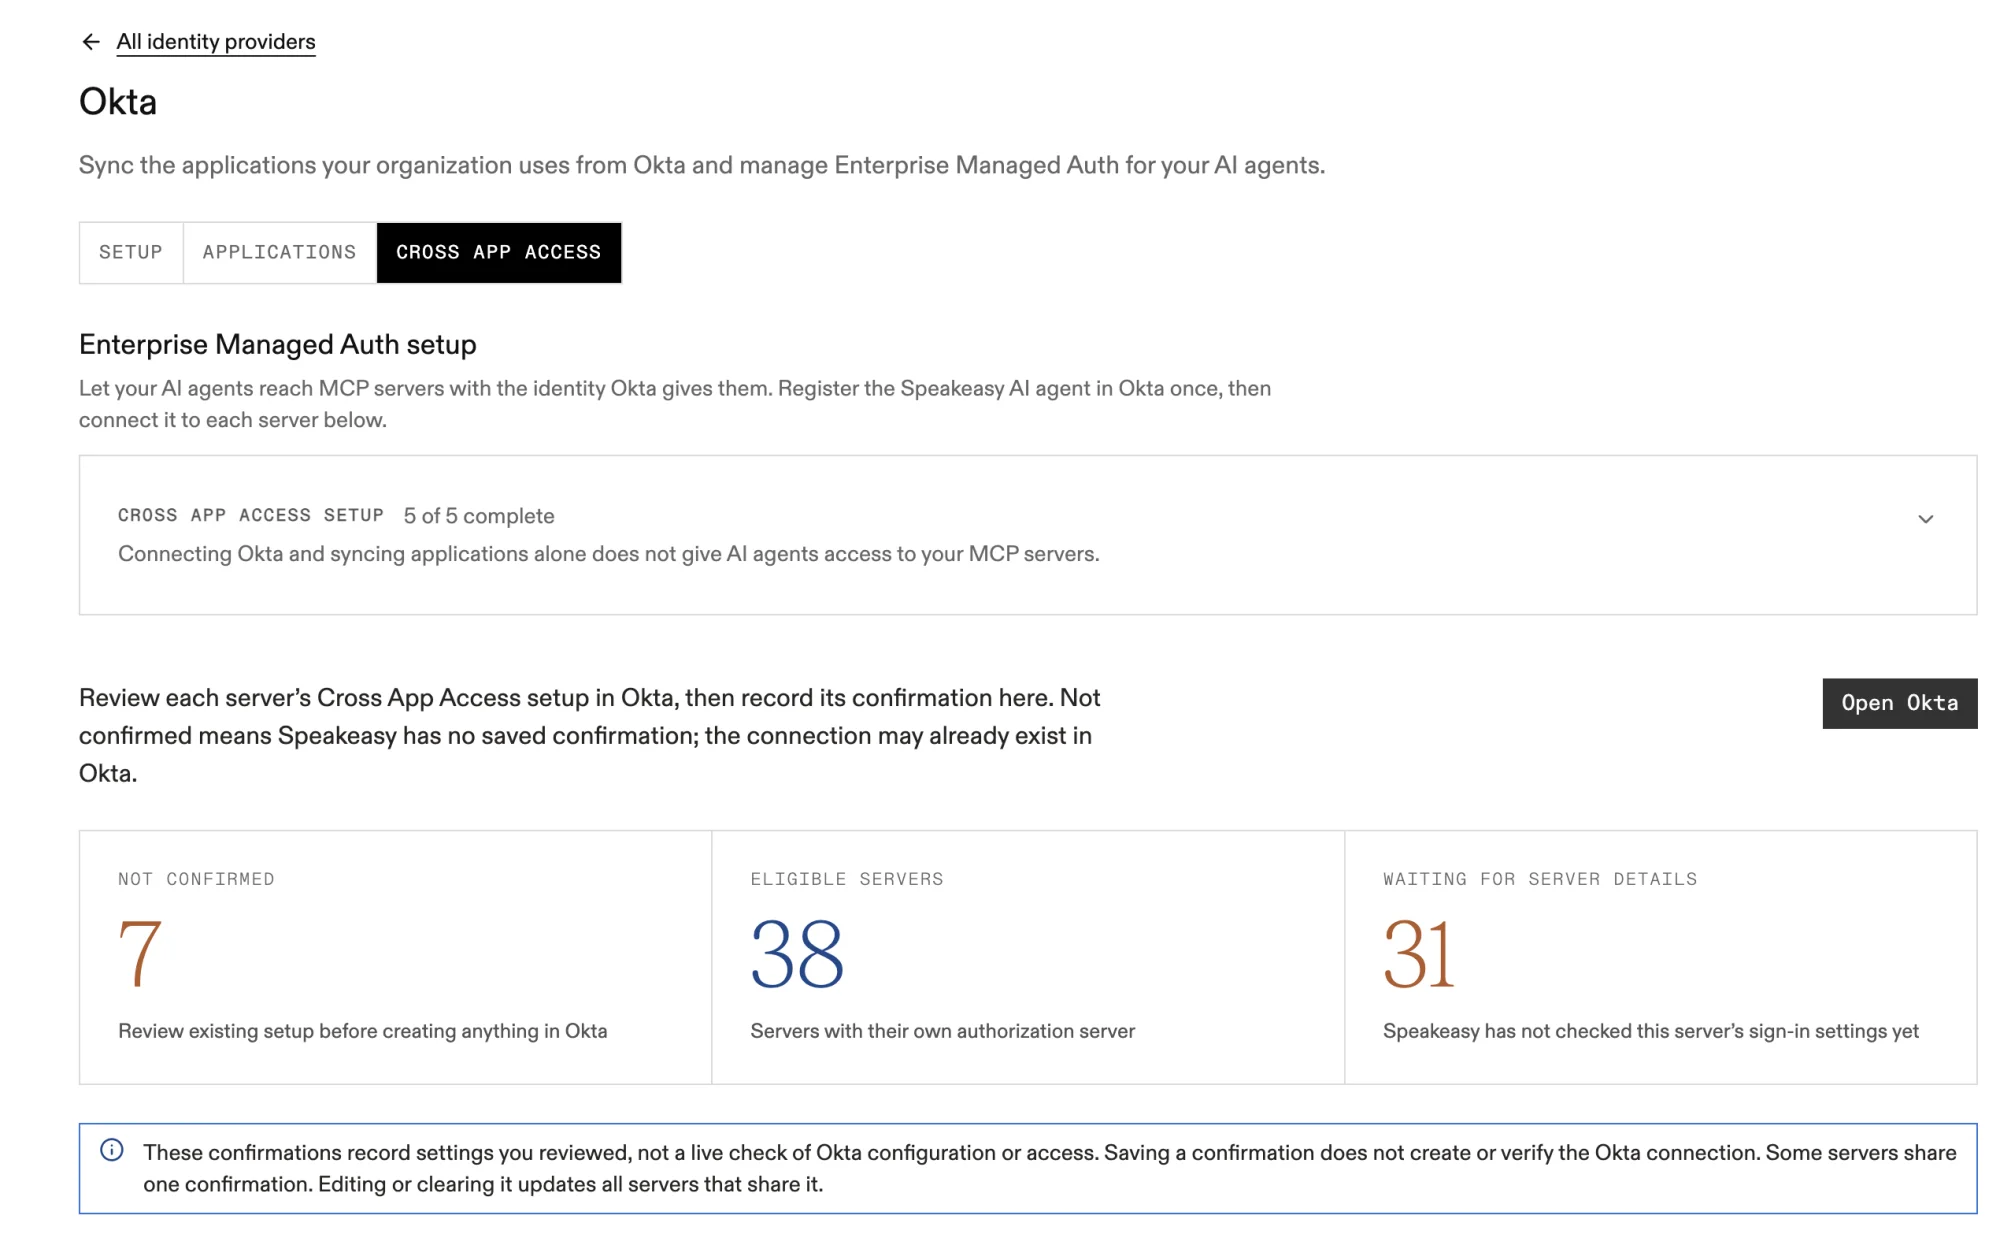
In Okta, register the agent
- Open Directory > AI Agents > Register AI agent > Register manually and name it Speakeasy Agent.
- Keep Allow users to access this agent checked and Create a new OIDC app linked to this AI agent selected. Don’t choose an existing app; the link is permanent.
- Copy the agent ID, the
wlp…value in the agent page’s URL.
In the dashboard, record the agent and create the sign-in
- Enter the Agent ID and, optionally, the Bound application ID (the
0oa…in the linked app’s page URL), then select Save agent. - On the Setup tab, under Okta sign-in, choose a Signing key set and select Set up Okta sign-in. This creates the
okta-sign-insign-in issuer and links it to Okta. - Copy the Agent public key (JWK) and the Sign-in redirect URI.
In Okta, activate the agent and its app
- In the agent’s Credentials, paste the public key and select Activate.
- On the linked app’s General tab, enable the Authorization Code and Refresh Token grant types and add the sign-in redirect URI.
- Set the linked app to Active and assign the users or groups who use MCP servers through the platform.
The platform can’t see these Okta settings, so the checklist marks them Not checked. Okta stores the pasted key itself: after rotating the signing key set, paste the new public key into Okta again.
One sign-in issuer serves one service. For each additional service, add a sign-in issuer under Sign-in issuers, or select Trust Okta sign-in on an existing one.
3. Connect a service
Section titled “3. Connect a service”Each service needs a resource connection on the Speakeasy AI agent in Okta, and must trust your Okta org on its side. The Server connections list on the Cross App Access tab shows each eligible server with the Resource, Issuer, Client ID, and Scopes to use.
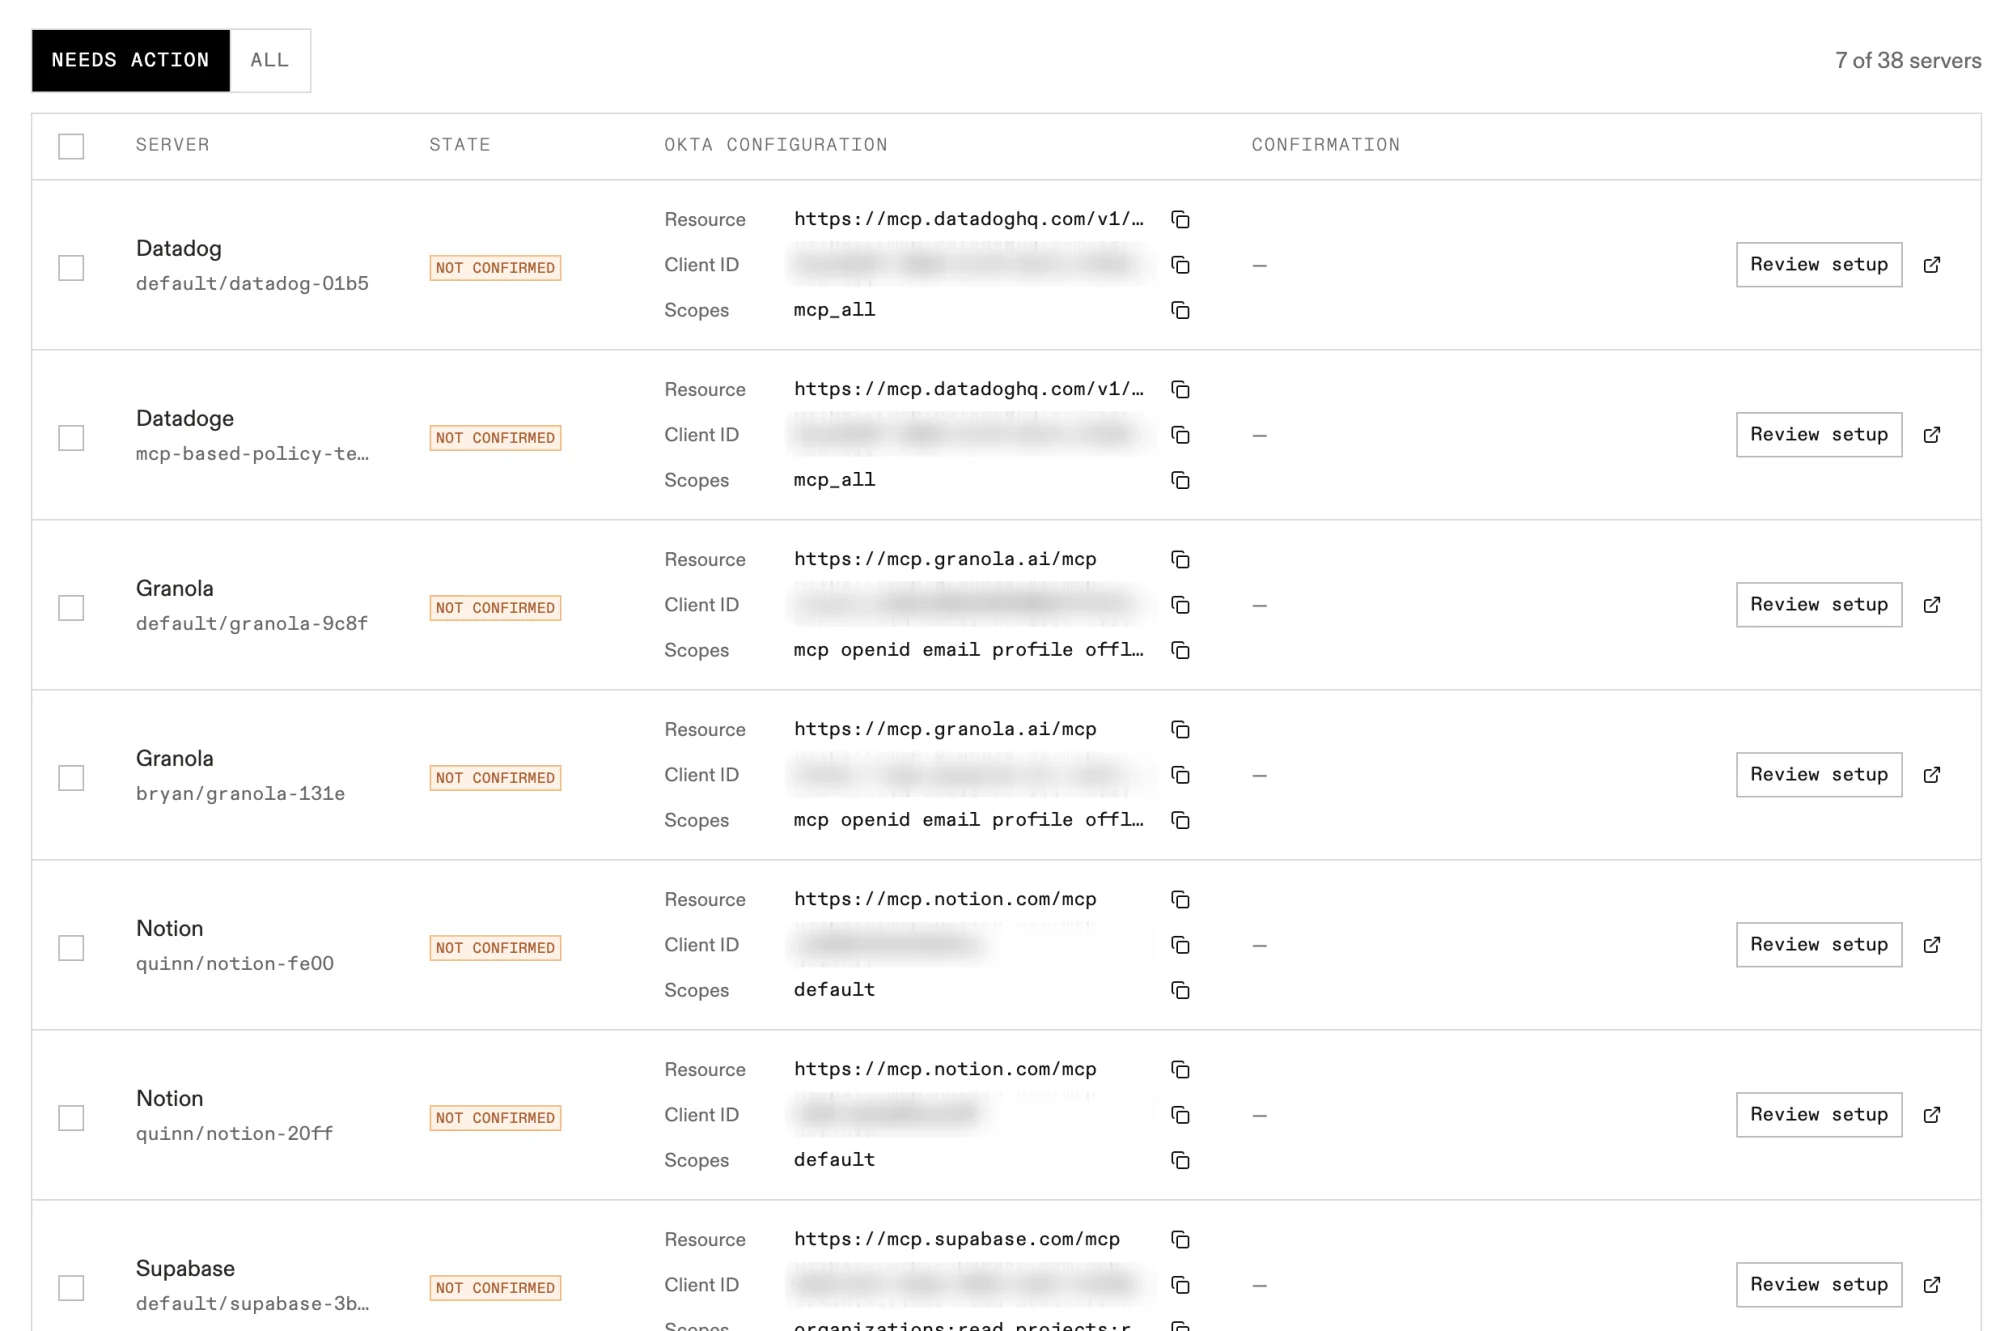
- In the service’s admin console, turn on Enterprise Managed Authorization and trust your Okta issuer, such as
https://example.okta.com. Linear, for example, needs SAML through Okta and MCP enterprise managed authentication turned on. The platform can’t do this step for you. - In Okta, open the service’s resource app, go to Machine Assignments > Callers > Cross-app access (XAA) > Edit, and set it to Enabled. Enter the Issuer from the dashboard as the Issuer URL and add the scopes. Audience/tenant ID can stay empty.
- In Okta, on the Speakeasy Agent, reuse an existing connection for that app or choose Add resource connection > Application > App configured for AI Agent access and pick the app, listed with an XAA suffix such as Linear - XAA. Enter the Resource, Client ID, and Scopes from the dashboard.
- In the dashboard, select Review setup on the server, check the Issuer URL matches Okta, and select Confirm setup. Servers that share an Okta app and Issuer URL can be confirmed together.
A confirmation records what an admin reviewed. It doesn’t create anything in Okta or prove access works. A server shows as Verified once a real token exchange succeeds, or Not working with the reason when one fails.
4. Turn it on for the server
Section titled “4. Turn it on for the server”- Open the MCP server, go to Settings > Sessions, and set User session issuer to an organization-level sign-in issuer that trusts Okta sign-in.
- In Settings > Enterprise Managed Authorization, check the chain from sign-in to the service’s client. The client must be confidential, with its own secret or key.
- Select Turn on. The status reads On, waiting for a first connection until someone uses the server, then Working.
By default, every identity provider is enabled for every service. To restrict one service, open it under Identity providers > Connected services and select Edit. Keep Okta enabled for any service whose servers sign in through Okta.
What people see
Section titled “What people see”The consent screen still appears on every sign-in. Services the platform reaches through Okta show as Connected through your organization, with no redirect to the service and no disconnect control. Services without support keep their ordinary Connect cards.
When Okta access is missing or has lapsed, the card asks for a fresh enterprise sign-in. A policy denial in Okta never falls back to an interactive connect flow.
Renewal, revocation, and deprovisioning
Section titled “Renewal, revocation, and deprovisioning”- Renewal. When the stored service token has expired, the platform uses the refresh token to get a new ID token, requests a new ID-JAG, and redeems it. Without a refresh token, the person signs in again once the ID token expires.
- Revocation. Deactivating a person in Okta, unassigning them from the linked app, or removing a resource connection makes Okta refuse the next exchange. Tokens already issued stay valid until they expire.
- Platform sessions. The MCP session ends at the server’s session length. Ending a session in the platform does not revoke anything in Okta. See Revoking access.
Troubleshooting
Section titled “Troubleshooting”The Platform MCP’s get_xaa_readiness tool reports readiness for one server. See Readiness and troubleshooting.
| Message | Fix |
|---|---|
| Okta did not grant all required permissions (scopes). | Grant okta.apps.read on the API service app, then Re-verify |
| Okta has not retrieved the public signing key. | Point the custom app’s public key at the key URL from the checklist |
| Okta rejected the client ID or client secret. | Use the API service app’s client ID, not the AI agent’s or an SSO app’s |
| This server does not report support for the identity assertion grant | The service doesn’t support Enterprise Managed Auth. People keep using the connect flow |
| Okta refused the requested scopes. | Allow the scopes on the agent’s resource connection |
| Okta rejected the AI agent app’s client authentication. | Paste the agent public key in the agent’s Credentials and select Activate |
| Okta issued the assertion, but this server’s authorization server refused it. | Turn on Enterprise Managed Authorization in the service and trust your Okta issuer |
| Enterprise Managed Authorization needs an organization-level sign-in. | Set the server’s user session issuer to an organization-level issuer that trusts Okta sign-in |
| Okta sign-in signs with a key in your Google Cloud KMS, which needs customer-managed encryption keys. | Contact Speakeasy to enable customer-managed encryption keys |