Publish SDKs and MCP Servers
Prerequisites
- The Speakeasy CLI
- Speakeasy generated SDKs or MCP servers
- Access tokens or credentials for target package managers
Supported package managers
Naming packages
Tip
For global package managers like PyPI and Maven, ensure the package name is unique.
Publishing packages
1. Start publishing configuration
speakeasy configure publishingSelect the existing SDK targets to configure publishing. If no SDK targets are available, run speakeasy configure targets first.
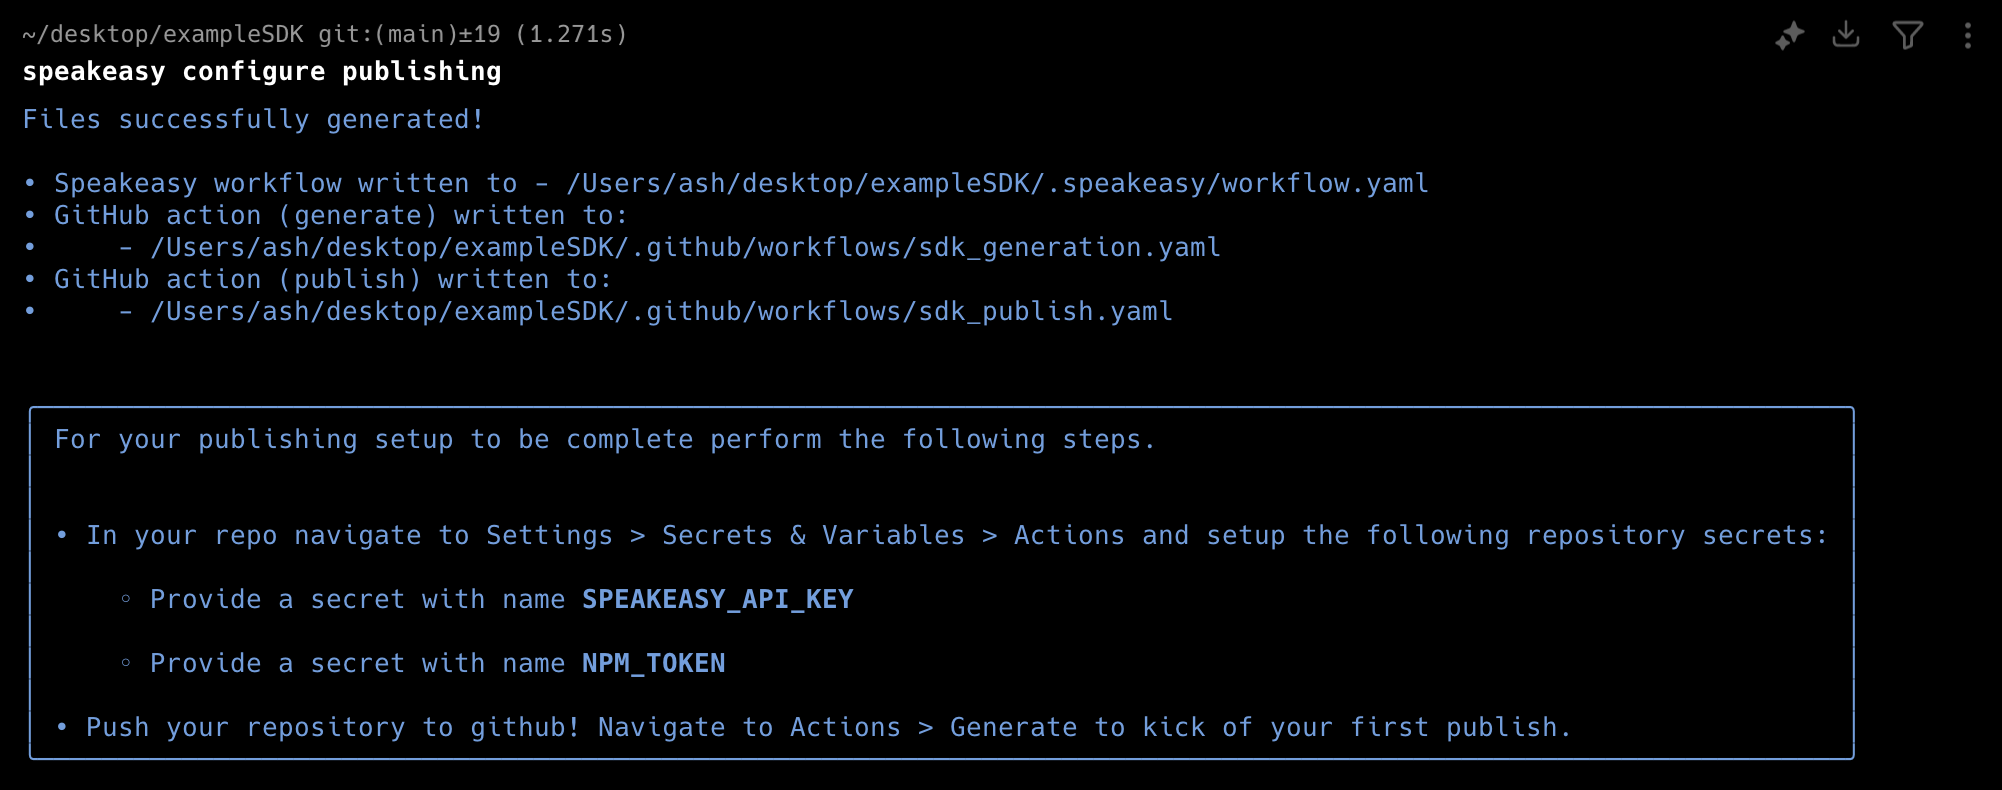
2. Verify configuration files
Once configuration is complete, the following files will be generated or updated:
.speakeasy/workflow.yaml– Speakeasy workflow configuration..github/workflows/sdk_generation.yaml– GitHub Action to generate SDKs. Indirectmode, this workflow also handles publishing to package registries as part of the same run..github/workflows/sdk_publish.yaml– GitHub Action to publish SDKs. This workflow is used inprmode and runs when a generated PR is merged.
For more details on how the mode setting affects publishing, see Workflow modes and publishing.
3. Set up repository secrets
- Navigate to GitHub repository Settings > Secrets & Variables > Actions.
- Click New repository secret.
- Add
SPEAKEASY_API_KEY(if needed) and any other required tokens (e.g.,NPM_TOKEN).
5. Push changes and verify
Commit and push the updated workflow files. Once GitHub receives the generated SDK, manually kick off publishing for the first version.
6. Complete language-specific configuration
Java and C# require additional setup after running speakeasy configure publishing.
Java Maven: Sonatype Central Portal (recommended)
- Create a Sonatype Central Portal account (if needed).
- Generate a Sonatype username and password for authentication . Save these for step 5.
- Create a Sonatype namespace .
- Create a GPG key to sign the artifacts . Save these for step 5.
- Install GnuPG:
brew install gnupg - Generate a key:
gpg --gen-key. Note the key ID (e.g.,CA925CD6C9E8D064FF05B4728190C4130ABA0F98) and short ID (e.g.,0ABA0F98). - Send the key:
gpg --keyserver keys.openpgp.org --send-keys <keyId> - Note: The following key servers can also be used:
keyserver.ubuntu.com,keys.openpgp.org, orpgp.mit.edu - Export the secret key:
gpg --export-secret-keys --armor <shortId> > secret_key.asc - The file
secret_key.ascwill contain the GPG secret key.
- Install GnuPG:
- Store the following secrets Github actions secrets:
OSSRH_USERNAME(the Sonatype username generated in Step 2)OSSRH_PASSWORD(the corresponding password/token generated in Step 2)JAVA_GPG_SECRET_KEY(the exported GPG key)JAVA_GPG_PASSPHRASE(the passphrase for your GPG key)
- In the java section of
gen.yaml, provide the additional configuration required for publishing to Maven:
java:
  #ensure the `groupID` matches the OSSRH org
  groupID: com.example
  #ensure the `artificatID` matches the artifact name:
  artifactID: example-sdk
  githubURL: github.com/org/repo
  companyName: My Company
  companyURL: https://www.mycompany.com
  companyEmail: info@mycompany.com
C# NuGet
- Create a NuGet account.
- Create a NuGet API key:
- Set the Package Owner field to the user or organization that will “own” the SDK artifact.
- Ensure the API key has the relevant Push scope. If the package already exists, the API key may not need “Push new packages and package versions” permissions.
- Populate the Glob Pattern and Available Packages fields in a way that allows publishing the SDK. Use the
packageNamespecified in thegen.yamlfile.
- Store the
NUGET_API_KEYin the GitHub Actions secrets. - In the C# section of
gen.yamladd:csharp: packageName: MyPackageName # Ensure this matches the desired NuGet package ID packageTags: sdk api client # Provide space-separated tags for searching on NuGet enableSourceLink: true # Enables publishing with Source Link for better debugging includeDebugSymbols: true # Includes .pdb files for publishing a symbol package (.snupkg) - In the
infosection of the OpenAPI document, describe what the package is for in thedescriptionproperty. It will be set as the Package description , visible when searching for the package on NuGet.openapi: 3.1.0 info: description: This description will be visible when searching for the package on NuGet. - In the
externalDocssection of the OpenAPI document, provide the website’s homepage in theurlproperty. It will be set as the Project URL , visible in the package’s “About” section.openapi: 3.1.0 externalDocs: url: https://homepage.com/docs description: Public Docs - In the root of the repository:
- Add a
LICENSE[.md|.txt]file (see Licensing for more details). - Add a 128x128 dimension image file called
icon[.jpg|.png]to display on the NuGet package page. - Review the
NUGET.mdfile, which is similar to the mainREADME.mdbut excludes theSDK InstallationandAvailable Operationssections. For more details, see Editing SDK Docs.
- Add a
PHP
- Create a Packagist account and manually create the Packagist package.
- Generate a Main API Token:
- Navigate to Packagist Profile and log in.
- Record the “Main API Token” under account settings.
- Update GitHub Action Secrets with Packagist credentials:
- Navigate to the repository’s Github Secret Settings.
- Update the following secrets:
PACKAGIST_TOKEN: Set this to the Main API Token from step 2.PACKAGIST_USERNAME: Set this to Packagist username.
- Store the following secrets in the GitHub Actions secrets:
PACKAGIST_TOKENPACKAGIST_USERNAME
- Confirm that the publishing job is properly set up with the updated credentials. Note: Package name is read from composer.json
namefield.
TypeScript: Publishing private packages to npm
For TypeScript SDKs, publish private packages to npm by configuring both the package name and publish settings in the gen.yaml file.
Requirements for private npm packages:
- Package name must be scoped (e.g.,
@organization/package-name) - npm access token with appropriate permissions
publishConfig.access: restrictedin package.json
Configuration steps:
- Set a scoped package name in the
gen.yaml:
typescript:
packageName: "@example/openapi"- Add the private publishing configuration:
typescript:
  packageName: "@example/openapi"
  additionalPackageJSON:
    publishConfig:
      access: restricted
This configuration generates a package.json that looks like:
{
  "name": "@example/openapi",
  "version": "0.0.3",
  "author": "Speakeasy",
  "publishConfig": {
    "access": "restricted"
  }
}- Ensure the
NPM_TOKEN(configured in step 3) has the necessary permissions to publish to the organization’s private packages.
Note
For more details on additionalPackageJSON configuration options, see the
TypeScript configuration
reference.
TypeScript: npm granular access tokens
The npm registry requires granular access tokens for publishing packages. Classic tokens are deprecated; use granular tokens instead.
Generating a granular access token:
-
Log in to your npm account
-
Navigate to Access Tokens in your account settings
-
Click Generate New Token and select Granular Access Token
-
Configure the token with the following settings:
- Token name: Choose a descriptive name (e.g.,
speakeasy-sdk-publishing) - Expiration: Default is 7 days, but can be extended up to 1 year for automation workflows
- Packages and scopes: Select Read and write permission for the packages you want to publish
- For organization packages, ensure you have the appropriate organization permissions
- Token name: Choose a descriptive name (e.g.,
-
Copy the generated token and store it securely as the
NPM_TOKENsecret in your GitHub repository
Important
Granular tokens expire after the configured period (default 7 days). For CI/CD workflows, set a longer expiration period (up to 1 year) and establish a process to rotate tokens before they expire to avoid publishing failures.
Python: PyPI trusted publishing
PyPI supports trusted publishing using OpenID Connect (OIDC), which eliminates the need for long-lived API tokens. Instead of storing a PYPI_TOKEN secret, the publishing workflow requests a short-lived token from PyPI at publish time, scoped to the specific workflow run.
Benefits of trusted publishing:
- No secrets to manage or rotate
- Publishing is scoped to a specific GitHub repository and workflow
- Better auditability with every publish tied to a specific commit and workflow run
Configuration steps:
Run the following command to configure trusted publishing:
speakeasy configure publishing --pypi-trusted-publishingThis command updates the workflow files to use the publish-pypi action and adds the required id-token: write permission.
After running the command, configure the trusted publisher on pypi.org :
- Navigate to Manage > Publishing for the package
- Select GitHub Actions as the trusted publisher
- Enter the GitHub owner and repository name for the SDK
- Set the workflow name to the publishing workflow file (typically
sdk_publish.yaml) - Leave the environment field blank
For more details, see the PyPI trusted publishers documentation .
Tip
After verifying that trusted publishing works, remove the PYPI_TOKEN secret
from the repository settings to reduce the attack surface.
Migrating from a monorepo to a dedicated repository
When moving a Speakeasy-generated SDK from within a monorepo to its own dedicated repository, follow these steps to ensure a smooth transition.
Setting up the new repository
- Create a new repository (can be public or private)
- Copy the SDK configuration files to the root of the new repository:
.speakeasy/gen.yaml.speakeasy/workflow.yamloverlay.yaml(if using)
- Update package configuration files to reflect the new repository location:
- For TypeScript: Update
package.json - For Python: Update
setup.pyorpyproject.toml - For Go: Update
go.mod - For other languages: Update the respective package metadata files
- For TypeScript: Update
GitHub Actions configuration
Copy the GitHub Actions workflows to the new repository under .github/workflows/. Important considerations:
- Remove any
working_directorysettings that referenced the old monorepo structure - Ensure the following secrets are configured in the new repository:
GITHUB_TOKEN- Package manager tokens (e.g.,
NPM_TOKEN,PYPI_TOKEN) SPEAKEASY_API_KEY
Benefits of a dedicated repository
- Cleaner build process without workspace dependencies
- Easier configuration of linting and other tools
- Simplified version control and release management
- Direct GitHub issues integration for better user support
- Independent versioning and release cycles
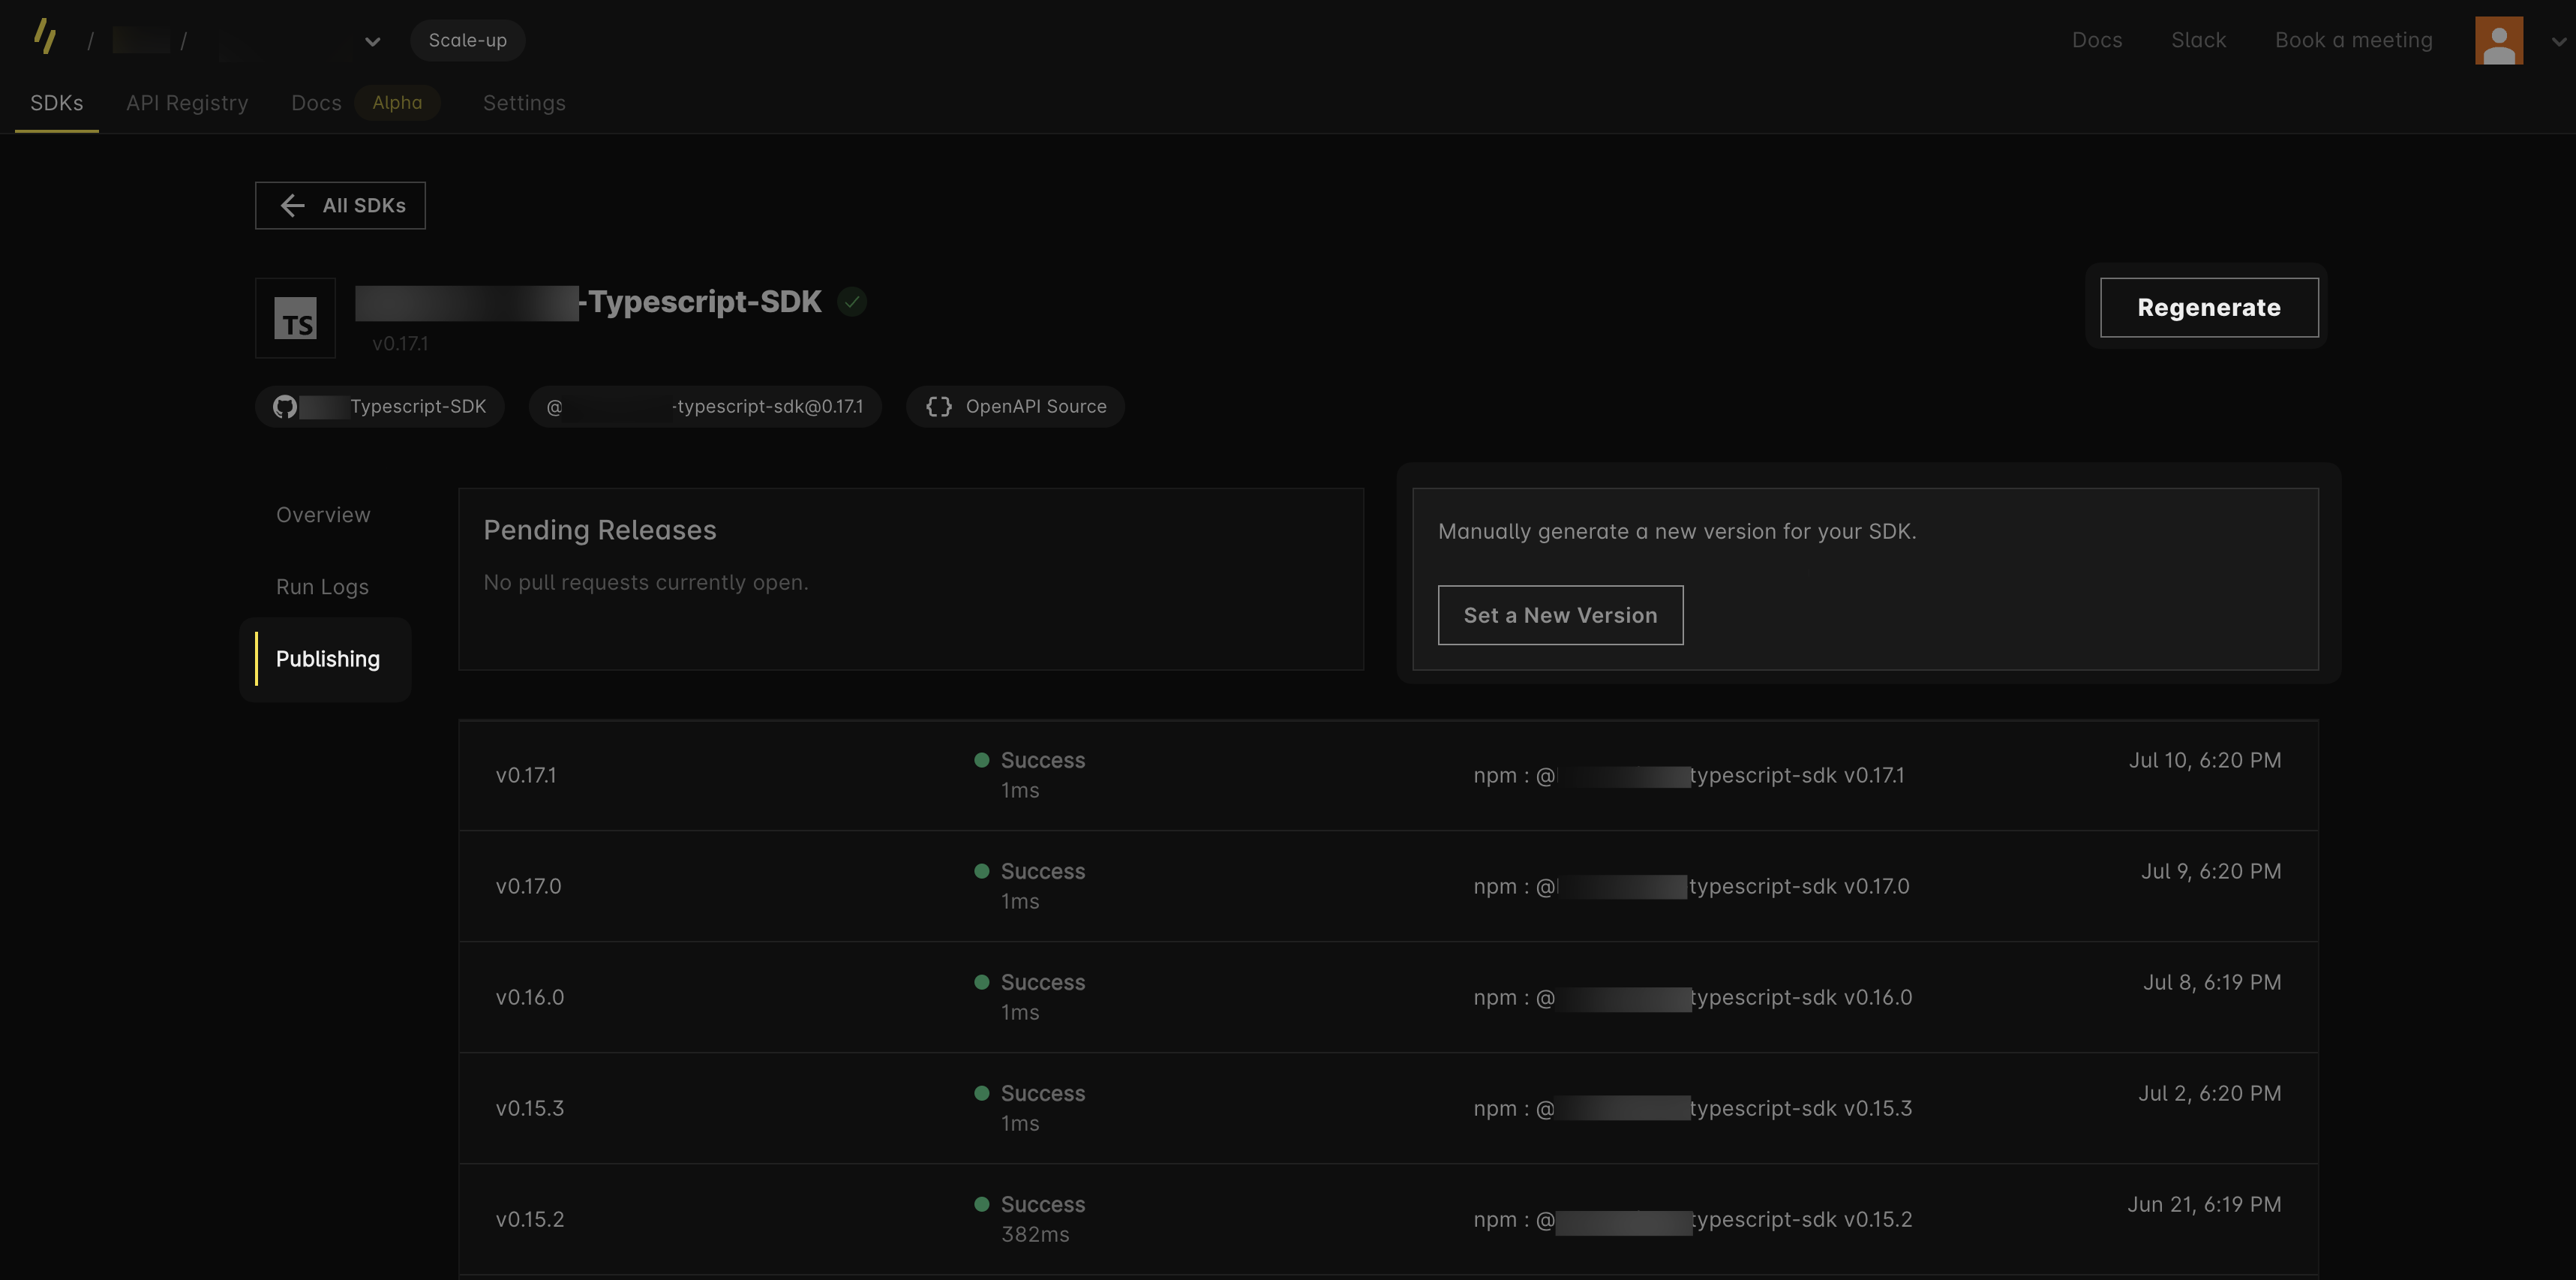
Publishing in the Speakeasy dashboard
The SDK publishing tab in the Speakeasy dashboard provides an overview of the publishing history and offers various utilities for setting up and maintaining SDK publishing.
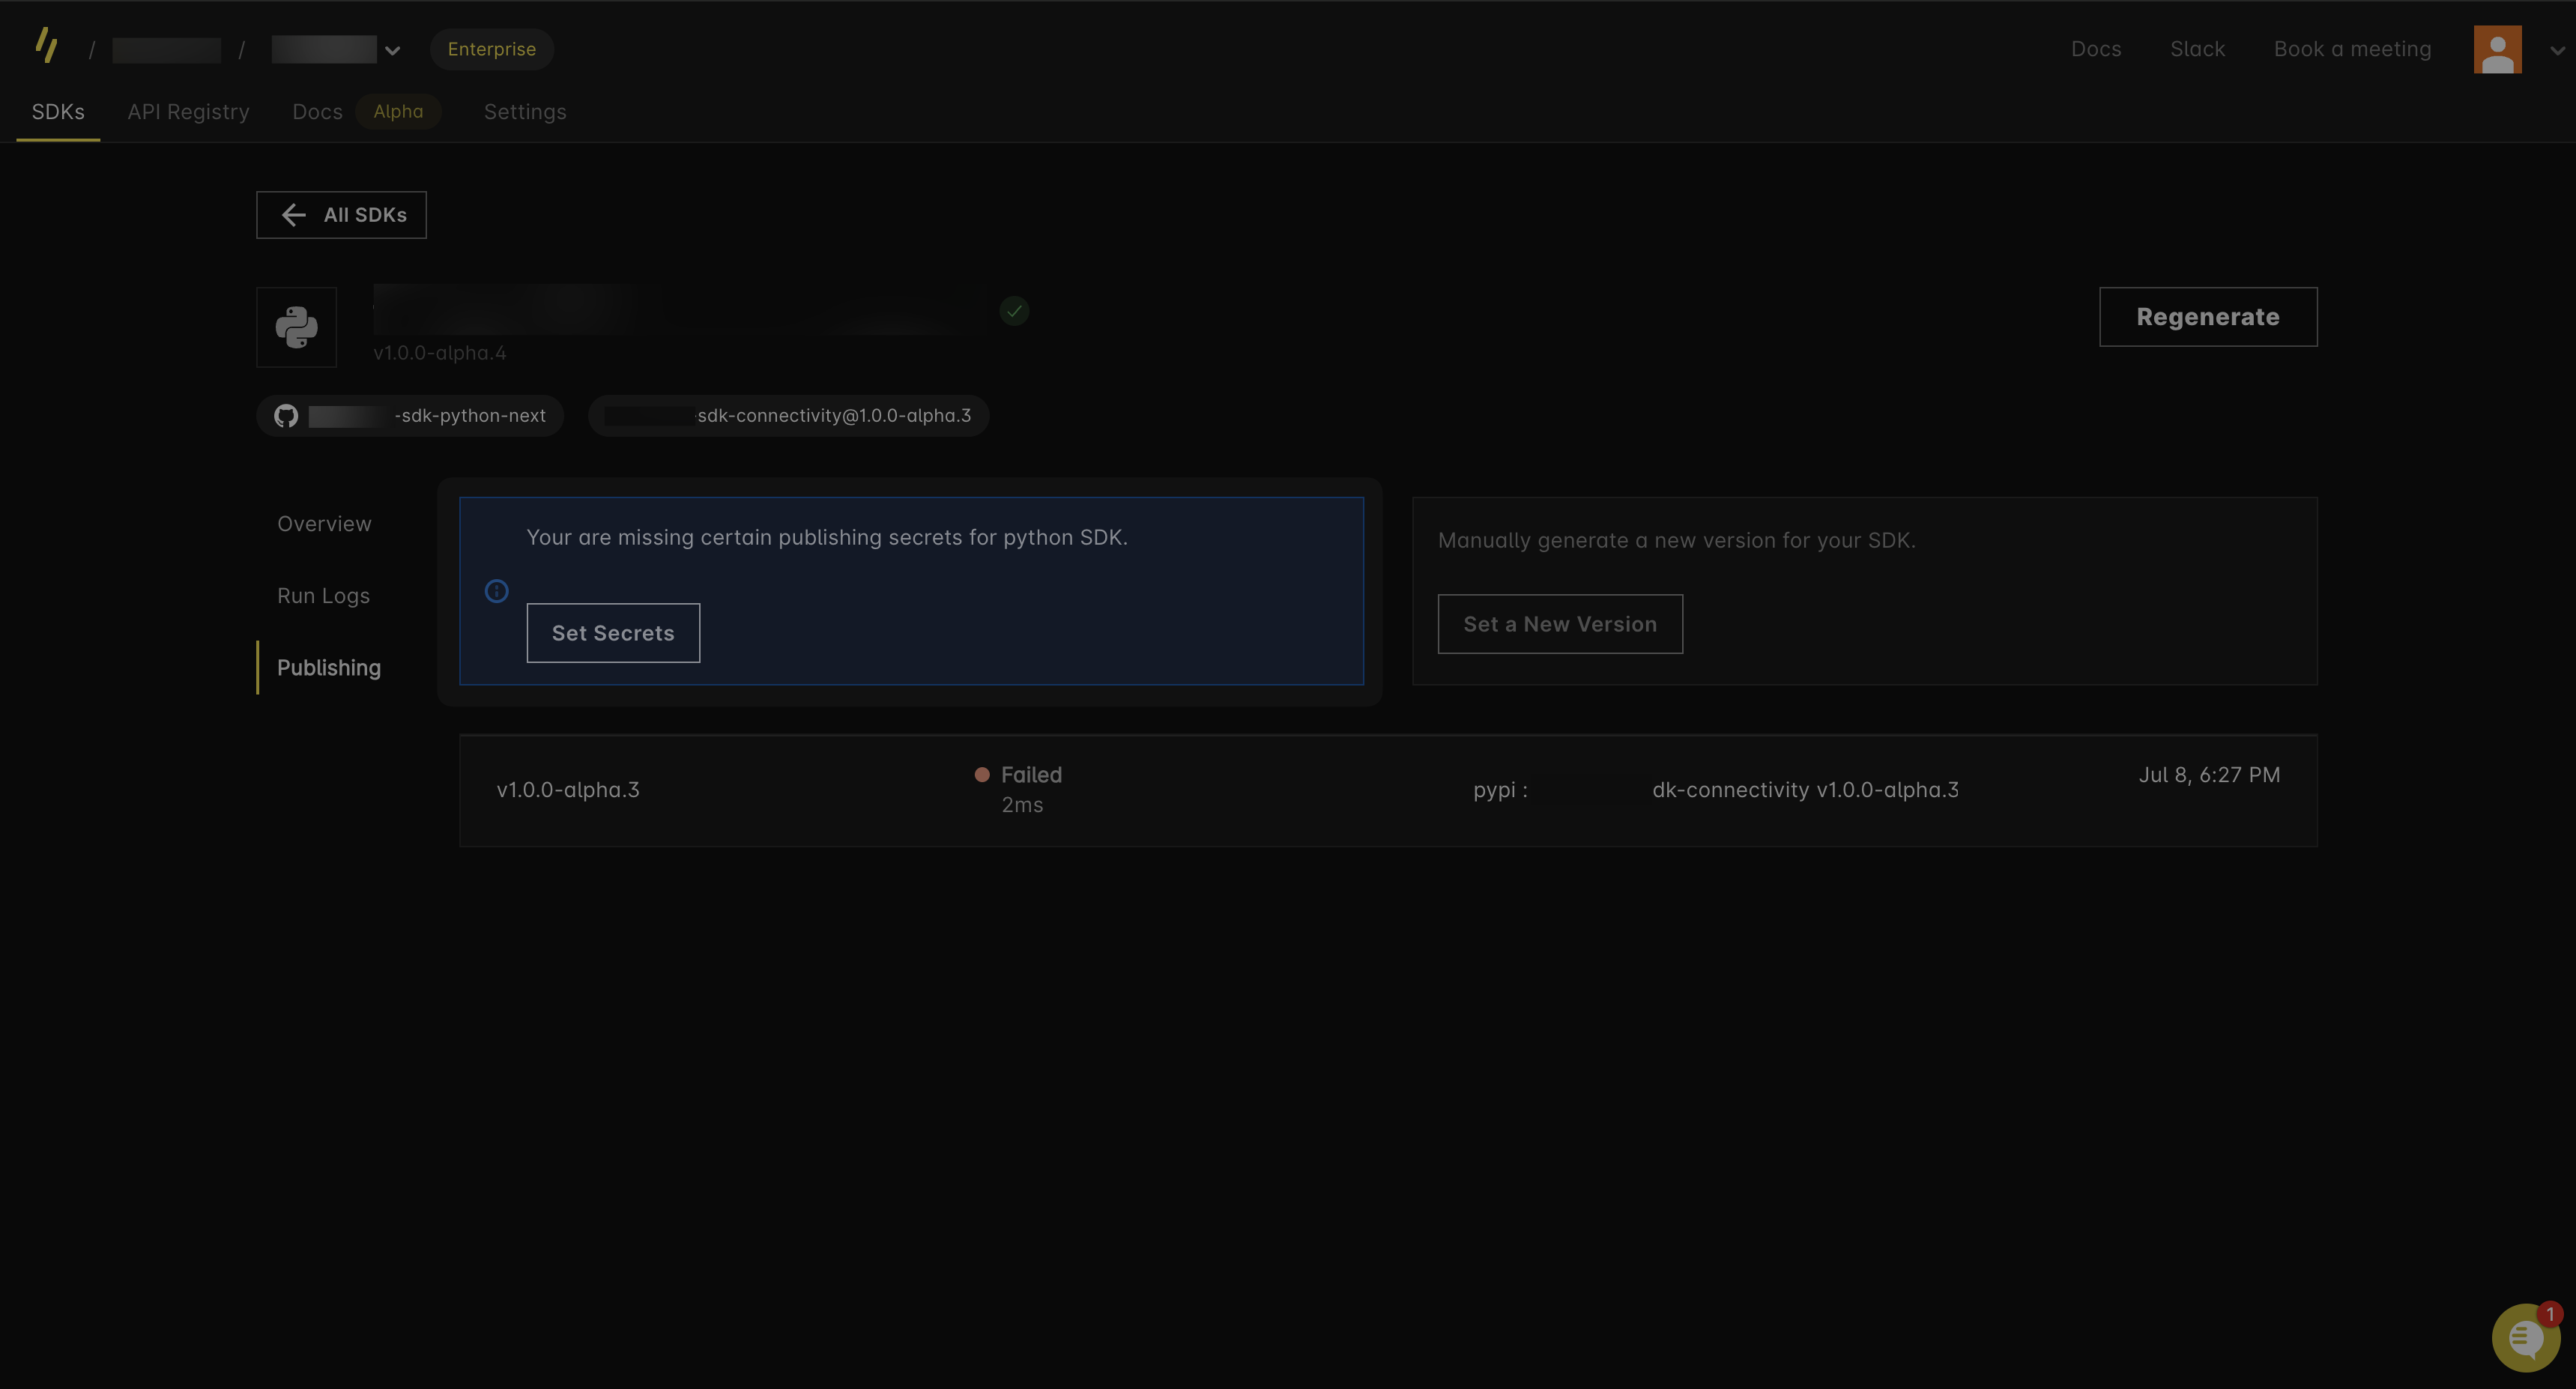
If package manager secrets were not set during the initial SDK repo setup, the publishing dashboard provides an interface to attach these secrets to the repository.
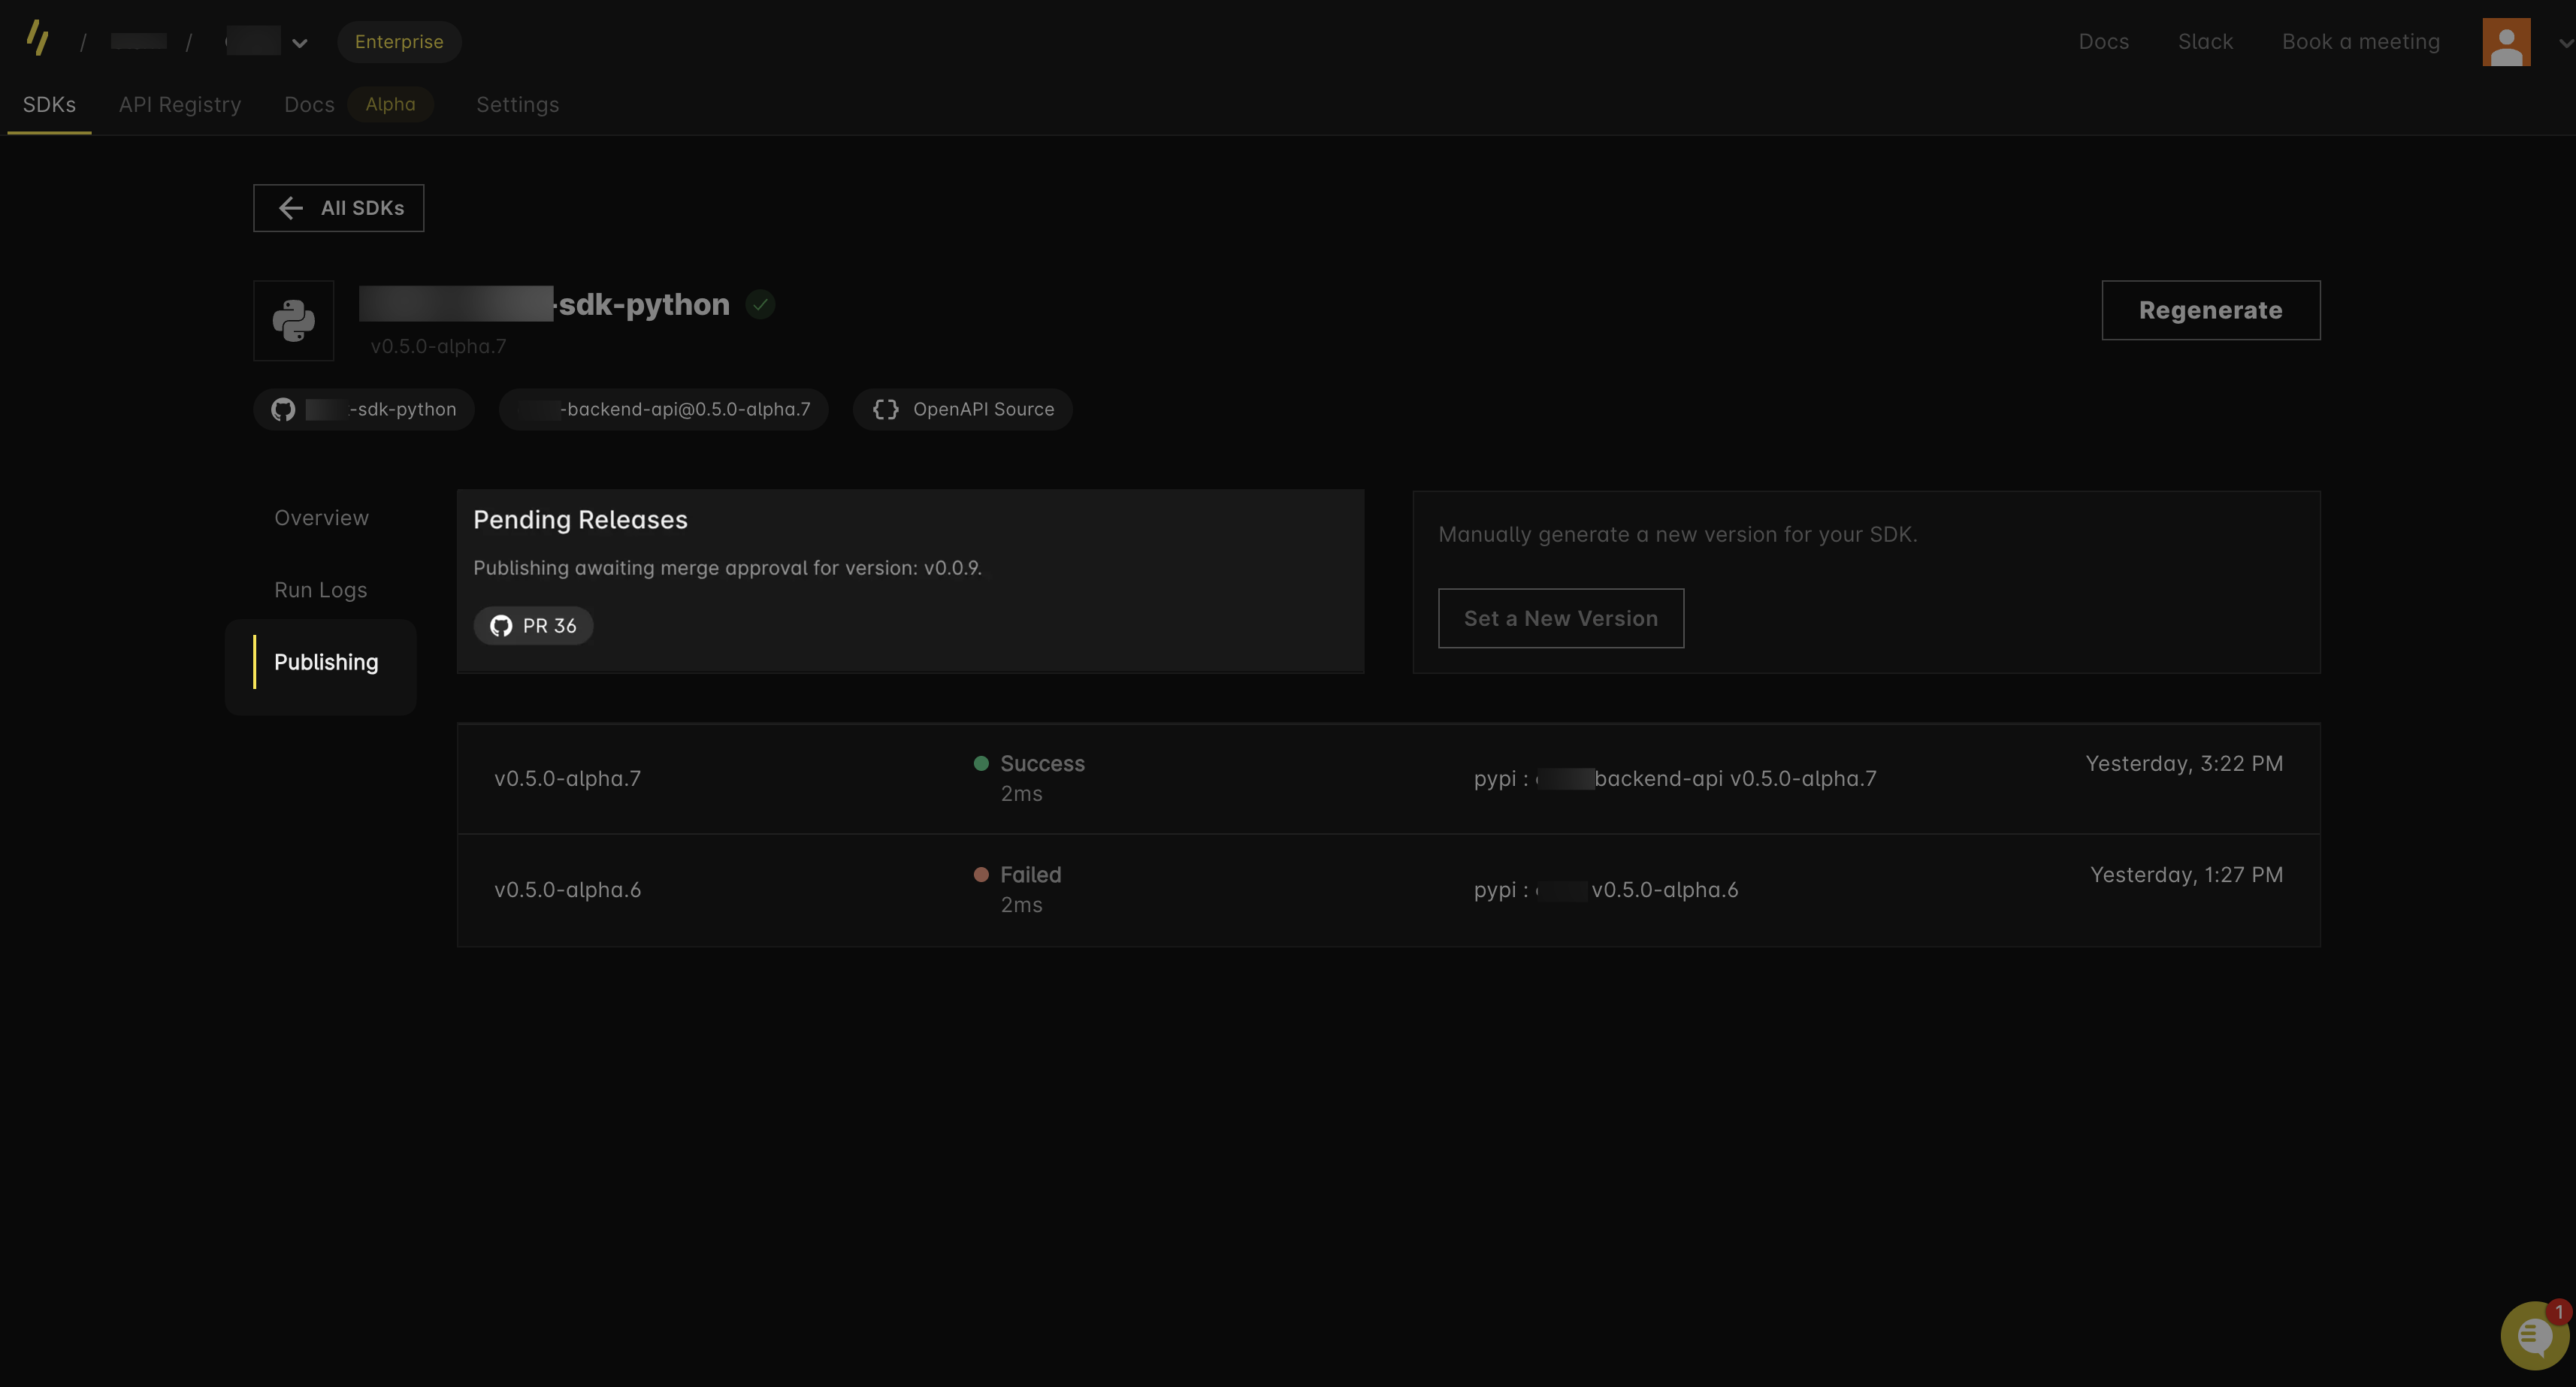
For GitHub actions set up with mode:pr, the publishing dashboard highlights open PRs in the SDK repo that are pending release. This view displays the exact SDK version that will be published upon merging the PR.
Customizing GitHub release notes
When publishing SDKs, Speakeasy automatically generates release notes for GitHub releases based on generator changes. To customize these release notes or add release notes when no generator changes are detected, edit the releaseNotes property in the gen.lock file.
The releaseNotes property is used for generating GitHub release notes.
Editing release notes
To customize release notes, add or edit the releaseNotes field in your .speakeasy/gen.lock file:
# .speakeasy/gen.lock
lockVersion: 2.0.0
id: abc123
management:
  # ... other fields
features:
  # ... feature flags
releaseNotes: |
  ## What's new
  - Added support for new authentication methods
  - Improved error handling for rate limits
  - Fixed pagination issues in list endpoints
Tip
It’s safe to edit the releaseNotes property before merging an auto-generated
PR. The SDK generation workflow validates for changes before running, so your
edits won’t be overwritten during regeneration.
Last updated on